

intERP does consider e.g. customers, prospects etc. as "Third Parties", so no one that is placed within your company.
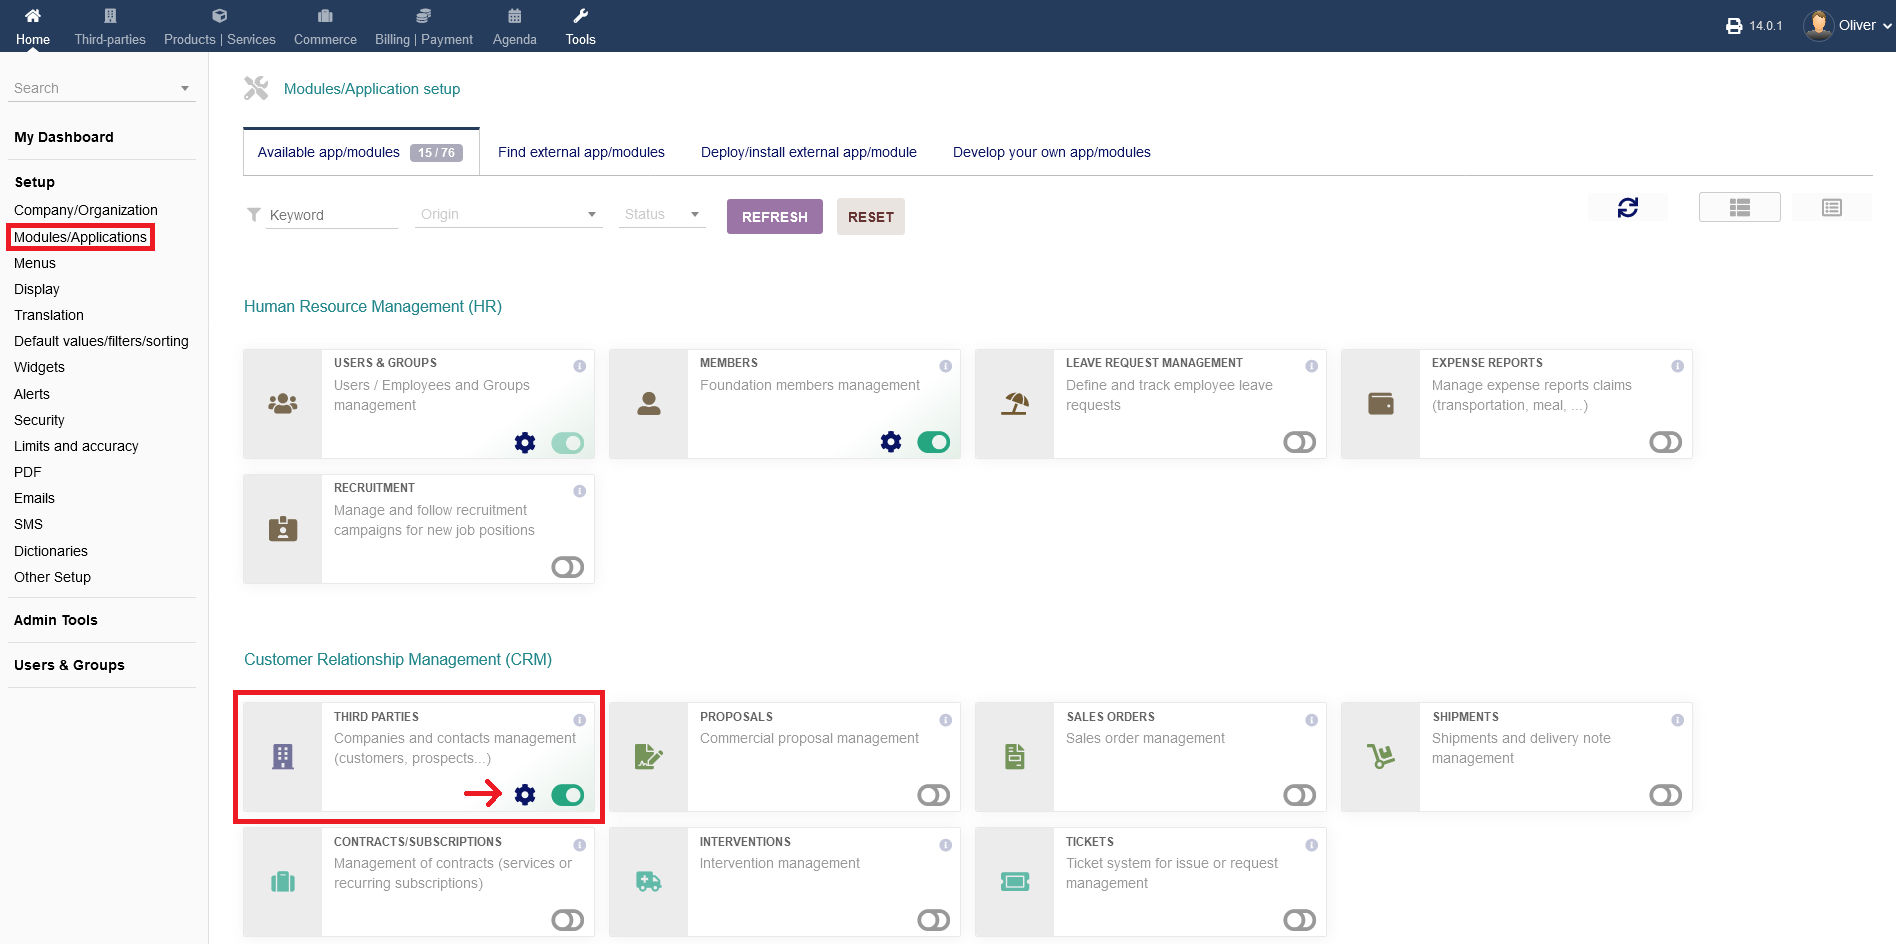
To change any settings regarding the module "Third Parties", go to "Setup -> Modules/Applications -> Customer Relationship Management (CRM) -> Third Parties" and click on the "gear" icon.
You can activate/disable that module by clicking on the button on the right hand side of the gear icon. Green indicates, that the module is active.
Using the module (e.g. setting up/managing new third parties), go to the top left corner of the dark blue menu bar and click on "Third-parties". Any documentation on how to use the third parties module can be found under the "Master Data" documentation.
1.1 Miscellaneous settings
Under "Miscellaneous settings" you can set different "third party" options.
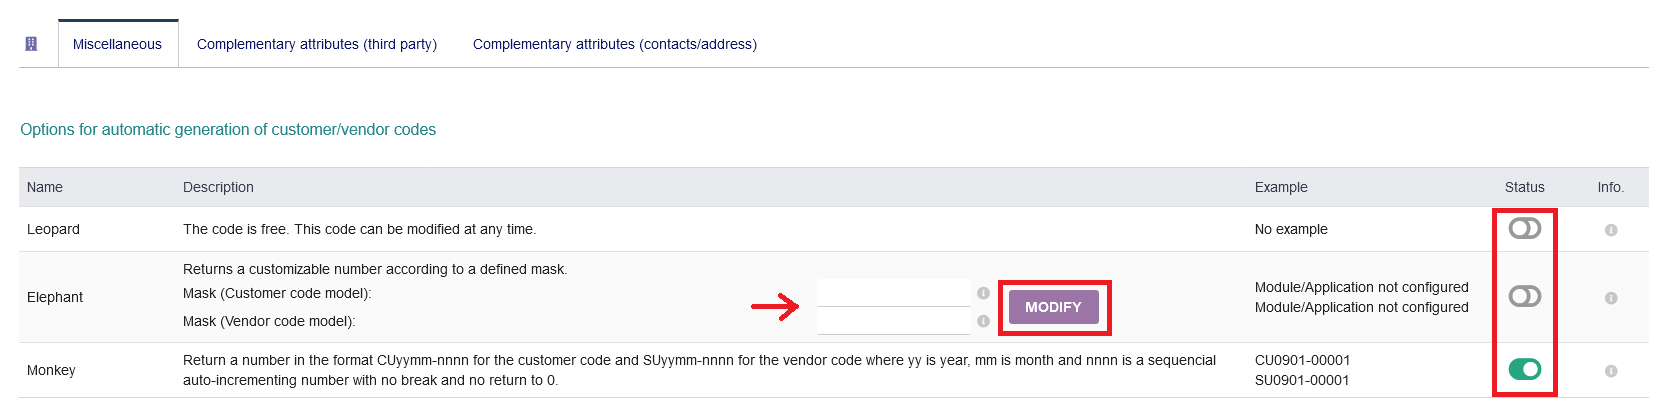
1. You have options for automatic code generation for customers/vendors. intERP gives you the choice of three different methods, how the code will be generated. Note, that the three options are alternative options.
a) Under "Leopard", you can have a freely automatic generated code without pre-defined custom rules to the code generation. You can manually modify the code at any time.
b) Under "Elephant", you can set pre-defined rules/numbers for customer code generation and vendors/suppliers code generation. Fill out the respected fields and click "MODIFY". Examples are found by hovering the cursor over the "i" icon next to the "MODIFY" button.
c) Under "Monkey", you can have the code generation set, using the date format (YY = year, MM = month) and a sequencial number in the end (NN). CU stands for customer and SU for supplier/vendor. This option doesnt need any manual rules.
To enable an option, click the radio button under the heading "Status". You get further information by hovering the cursor over the "i" icon on the right hand side of the toggle switch.
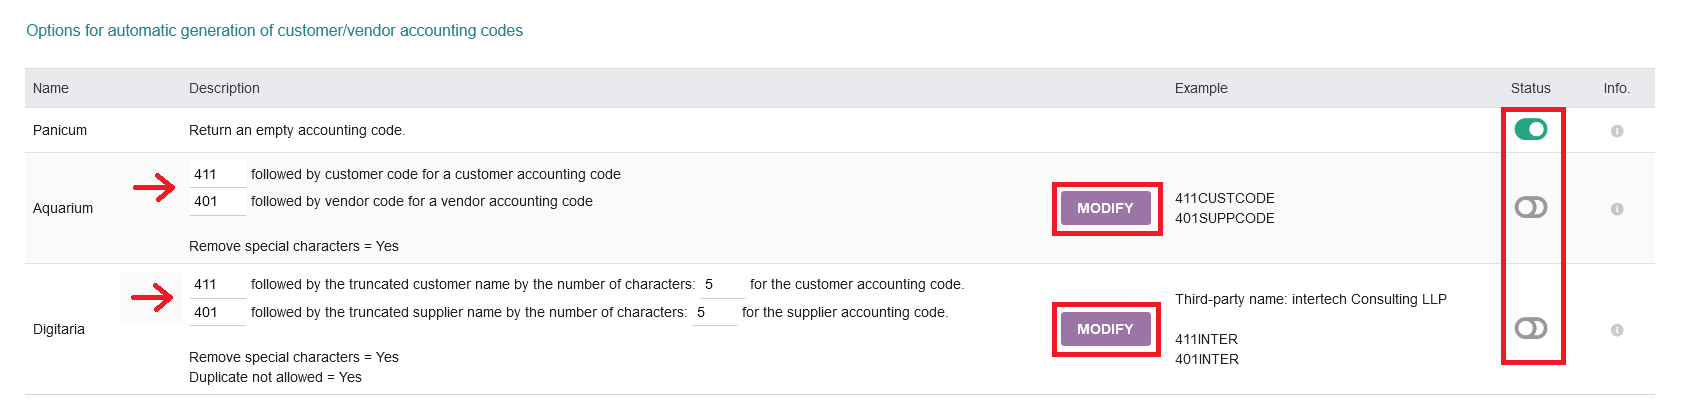
2. Furthermore, there are options for automatic generation of customer/vendor accounting codes. intERP gives you the choice of three different methods, how the code will be generated. Note, that the three options are alternative options.
a) Under "Panicum", you can set intERP to give you no accounting code at all. This is helpful, if you want to have a black space for manually filling in a code by hand later on.
b) Under "Aquarium", you can set pre-defined rules/numbers for the code generation. Fill out the respected fields and click "MODIFY". Examples are found next to the "MODIFY" button. Duplicate codes are allowed with that option. Special characters are removed.
c) Under "Digitaria", you can have a custom code, by choosing a pre-defined rule/number, followed by the truncated supplier name and the number of characters of the name, which you can set manually. Fill out the respected fields and click "MODIFY". Examples are found next to the "MODIFY" button. Duplicate codes are not allowed with that option. Special characters are removed.
To enable an option, click the radio button under the heading "Status". You get further information by hovering the cursor over the "i" icon on the right hand side of the toggle switch.
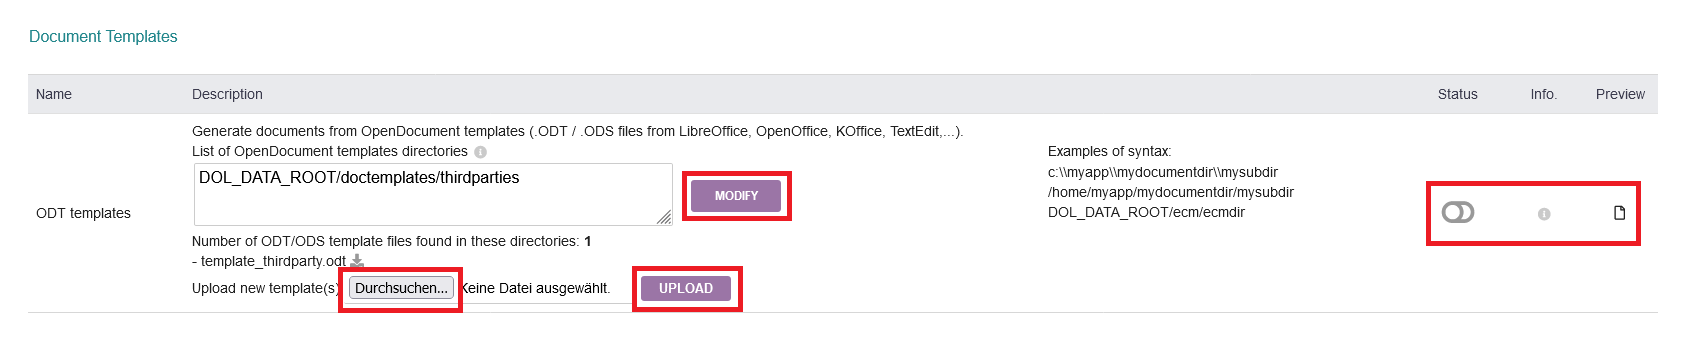
3. Also, you can have custom document templates. It will use OpenDocument files such as .ODT / .ODS files from LibreOffice, OpenOffice, KOffice, TextEdit etc.
You can set a list of OpenDocument templates directories and click "MODIFY" when you are done.
Additionally, you can upload new templates from your computer. Click "UPLOAD" in the end.
Under the heading "Status" you can enable that option and click the "paper" icon to have a preview.
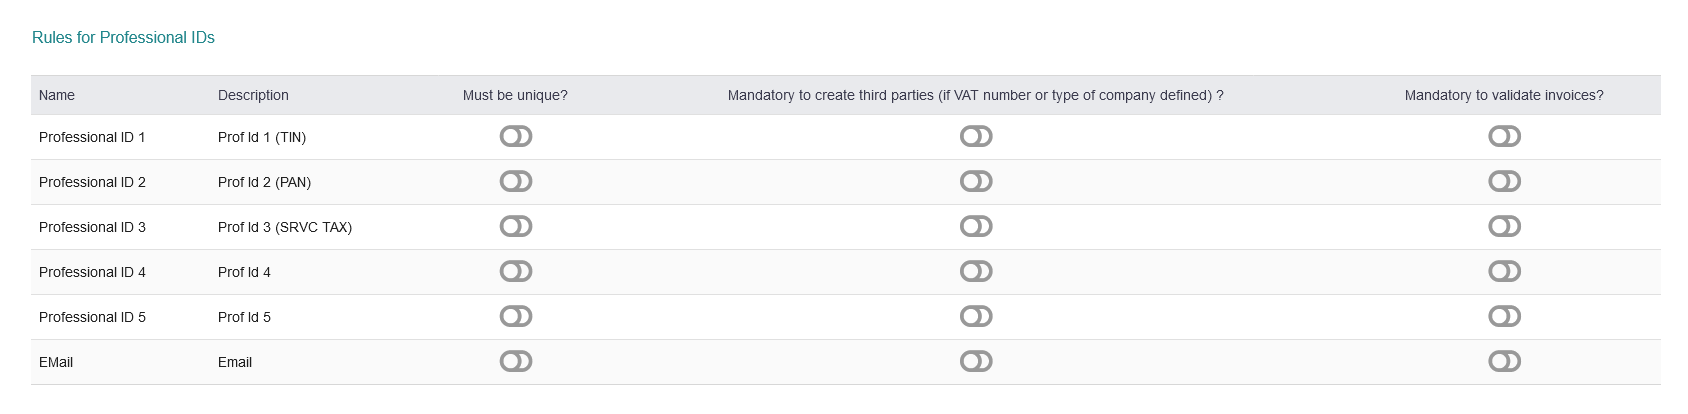
4. You can set rules for Professional IDs. Options are, that they "must be unique", to be "mandatory to create third parties" and to be "mandatory to validate invoices". To enable/disable, click each toggle switch.
5. Lastly, there are other options as non categorized parameters. The following options are available
a) Wait until a key is pressed before loading content of Third Parties combo list. This may increase performance if you have a large number of third parties, but it is less convenient.Set a desired value and click "MODIFY".
b) Wait until a key is pressed before loading content of Contact combo list. This may increase performance if you have a large number of contacts, but it is less convenient. Set a desired value and click "MODIFY".
c) Display Customer/Vendor ref. info list (select list or combobox) and most of hyperlink. Third Parties will appear with a name format of "CC12345 - SC45678 - The Big Company corp." instead of "The Big Company corp". To activate/disable this option, click the toggle switch on the right hand side.
d) Display Customer/Vendor adress info list (select list or combobox). Third Parties will appear with a name format of "The Big Company corp. - 21 jump street 123456 Big town - USA" instead of "The Big Company corp". To activate/disable this option, click the toggle switch on the right hand side.
e) Display Contact email (or phones if not defined) and town info list (select list or combobox). Contacts will appear with a name format of "Dupond Durand - dupond.durand@email.com - Paris" or "Dupond Durand - 06 07 59 65 66 - Paris" instead of "Dupond Durand". To activate/disable this option, click the toggle switch on the right hand side.
f) Disable the "Prospect + Customer" third party type (so third party must be "Prospect" or "Customer", but can't be both). To activate/disable this option, click the toggle switch on the right hand side.
g) Default thirdparty type for "New customer" creation form. Choose an option "Prospect/Customer" or "Customer" and click "MODIFY".

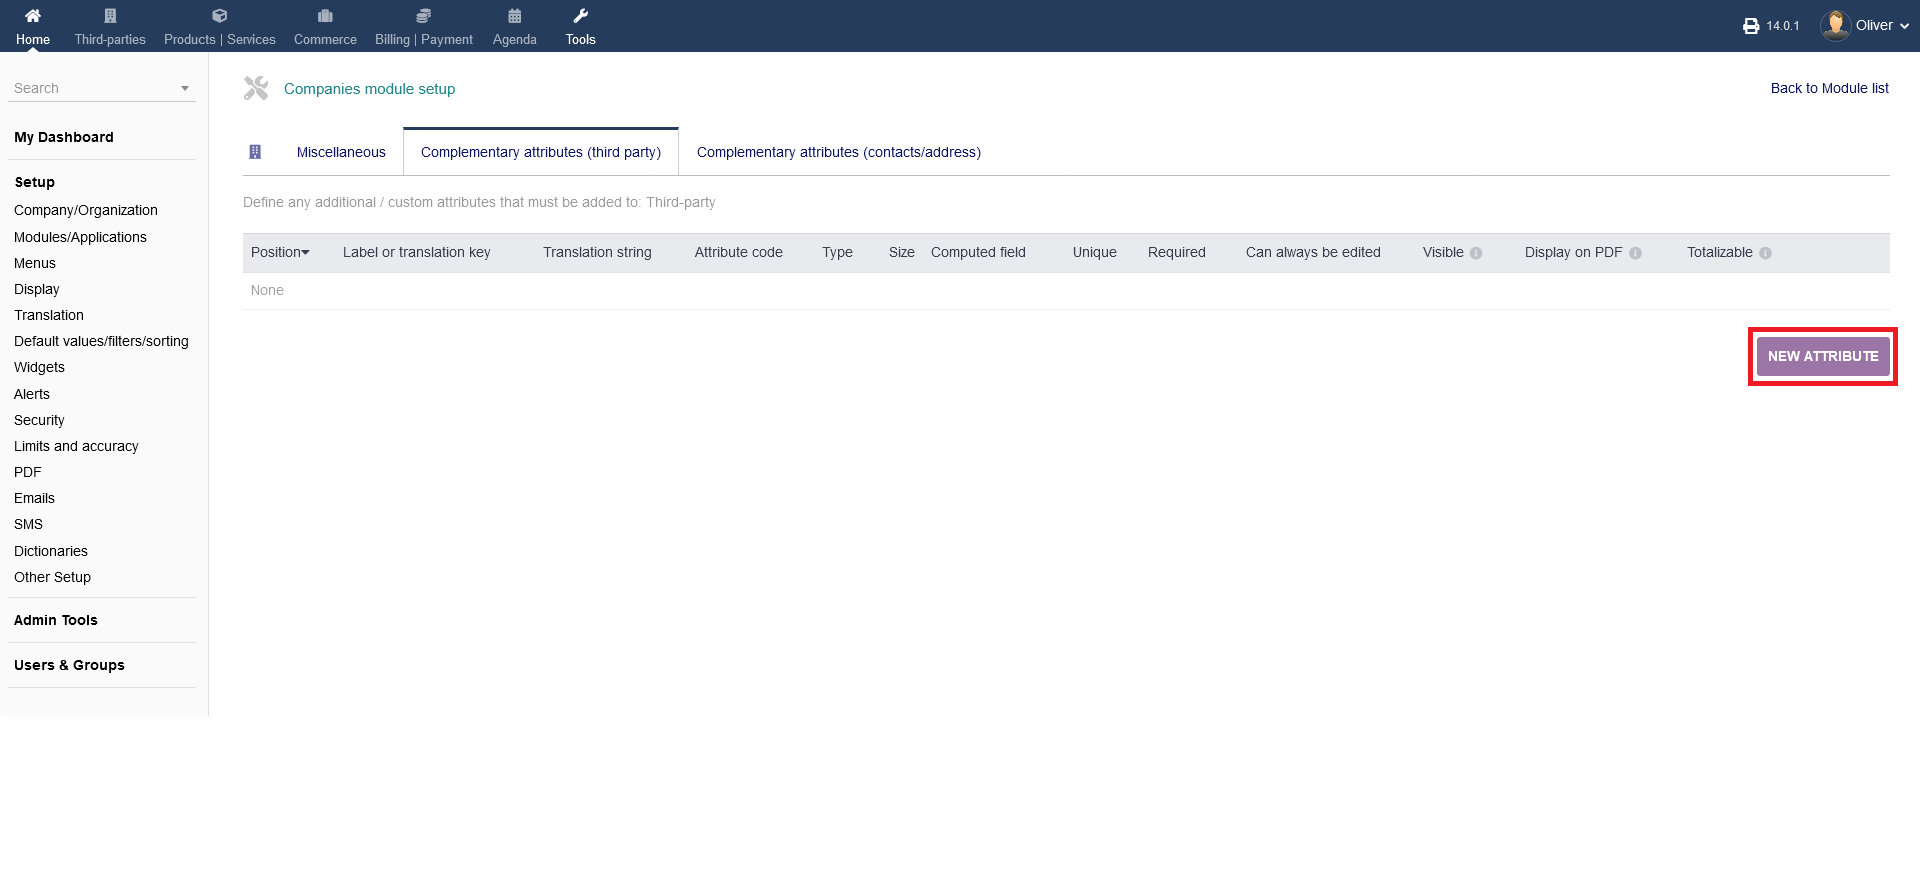
1.2 Complementary attributes (third party)
Here, you can define any additional/custom attributes that must be added to "Third-party". To add a new attribute, click on "NEW ATTRIBUTE".
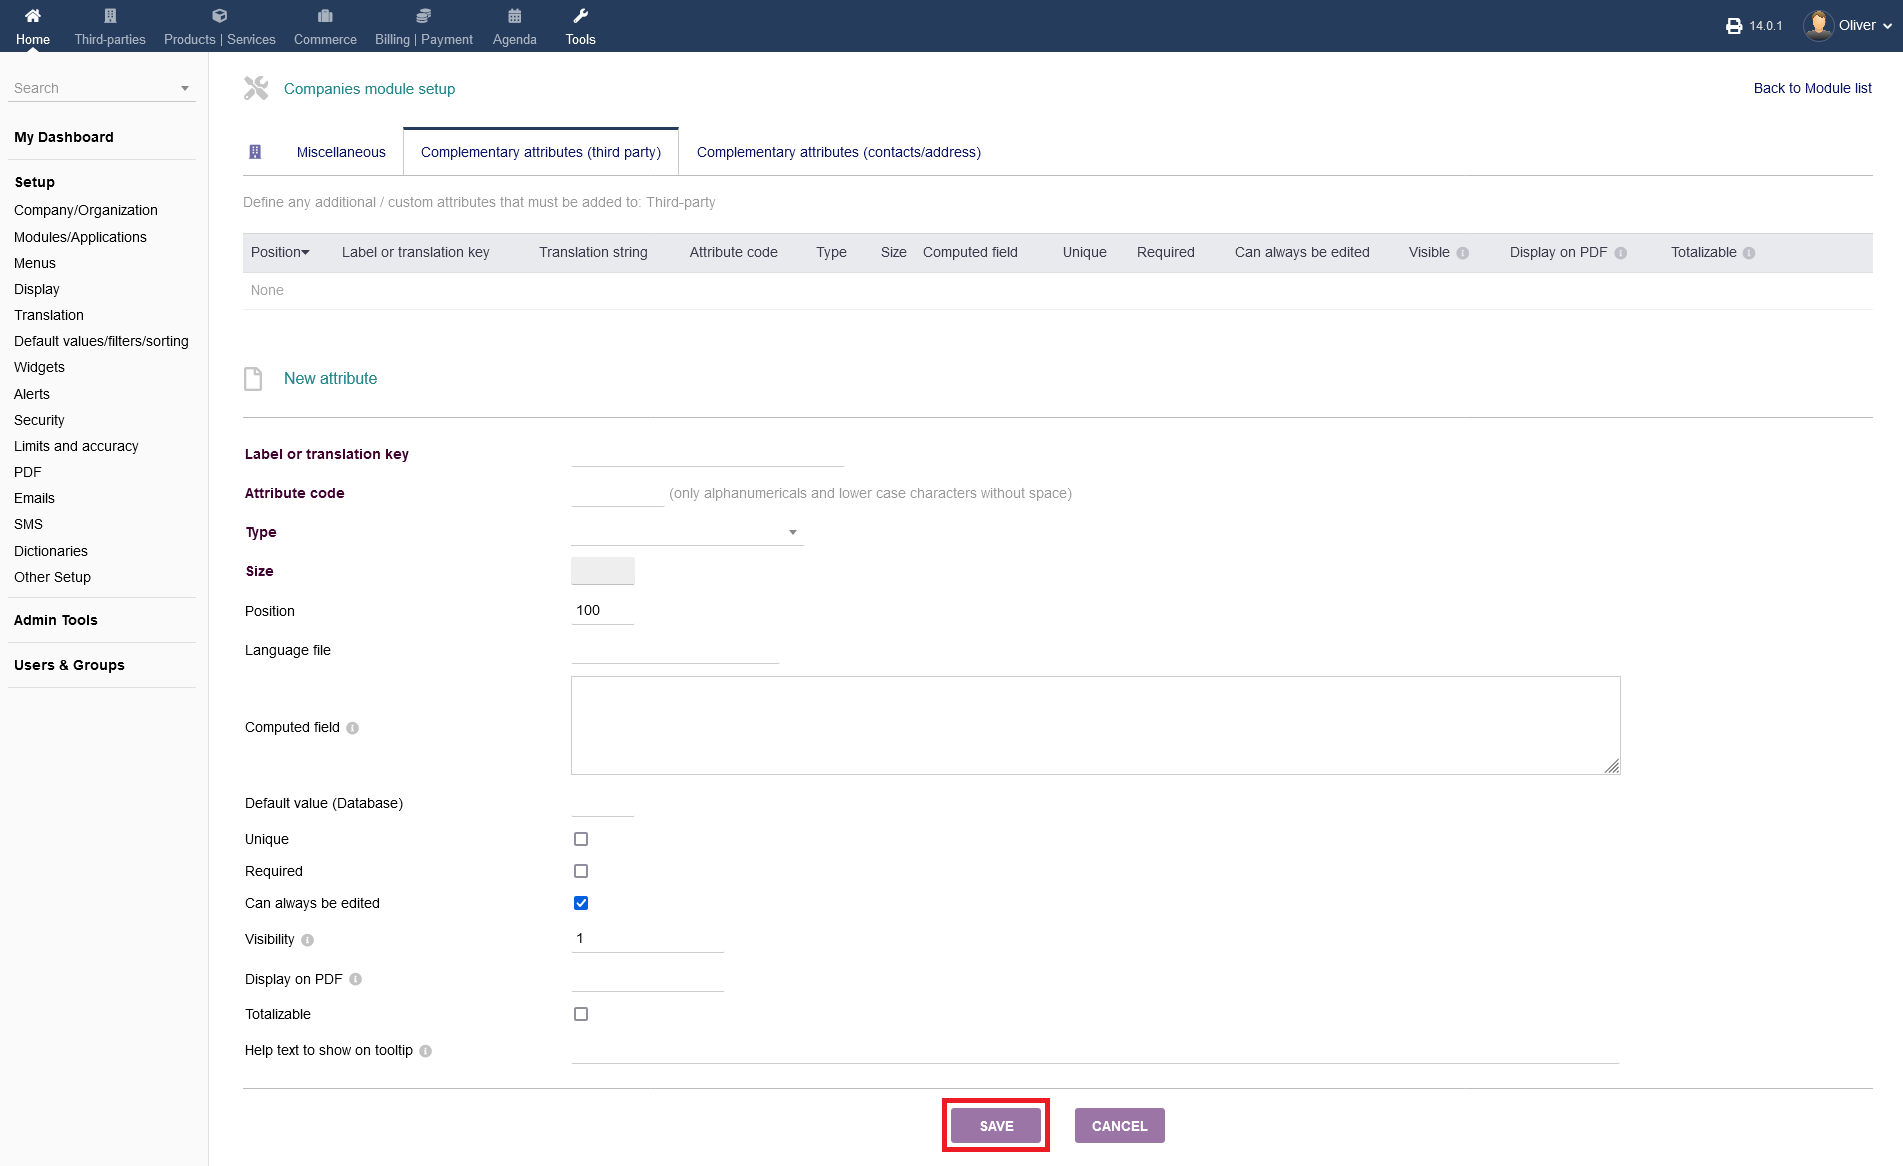
 Fill out all necessary fields. Under "Computed field", you can enter a formula using other properties of object or any PHP coding to get a dynamic computed value. You can use any PHP compatible formulas and following global object: $db, $conf, $langs, $mysoc, $user, $object. When you are done, click "SAVE".
1.3 Complementary attributes (contacts/address)
Here, you can define any additional/custom attributes that must be added to "Contacts/Addresses". The procedure follows the same steps as shown under 1.2. Please refer to the screenshots there.