Vendor invoicing :
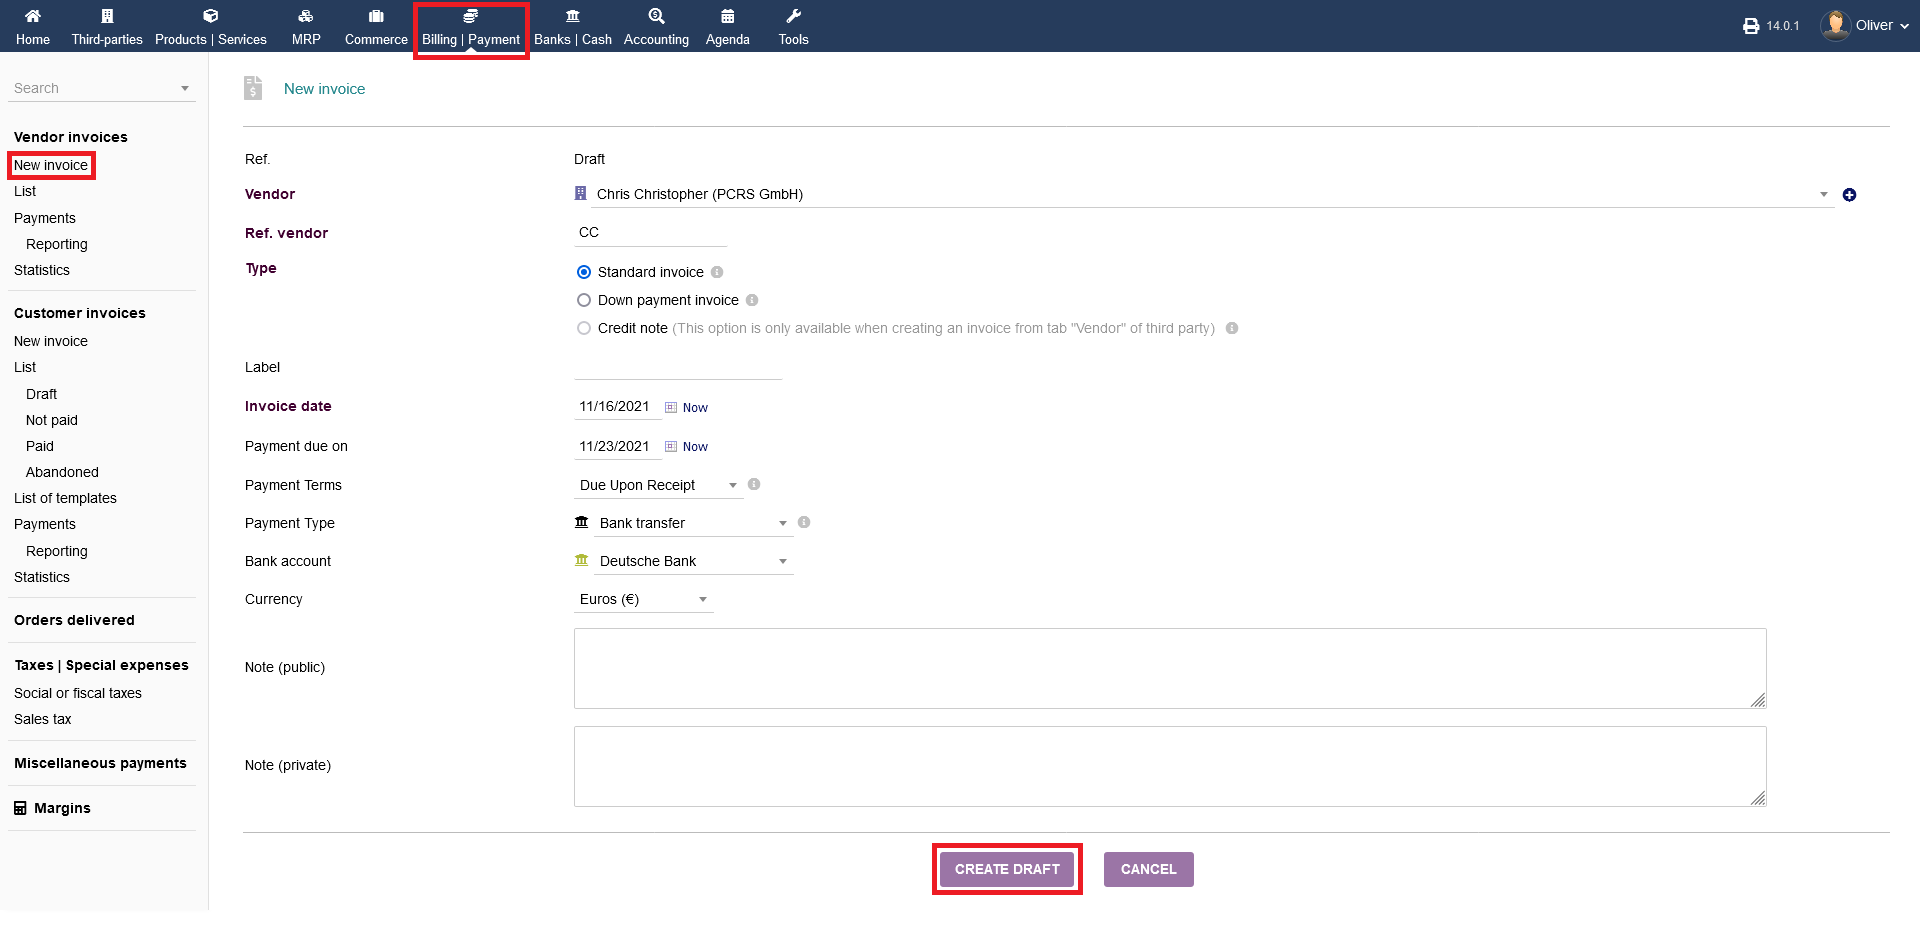
To create a vendor invoice, click on "Billing/Payments -> Vendor invoices -> New invoice". The form should be somewhat familiar at that point. Fill out the form accordingly and click "CREATE DRAFT".
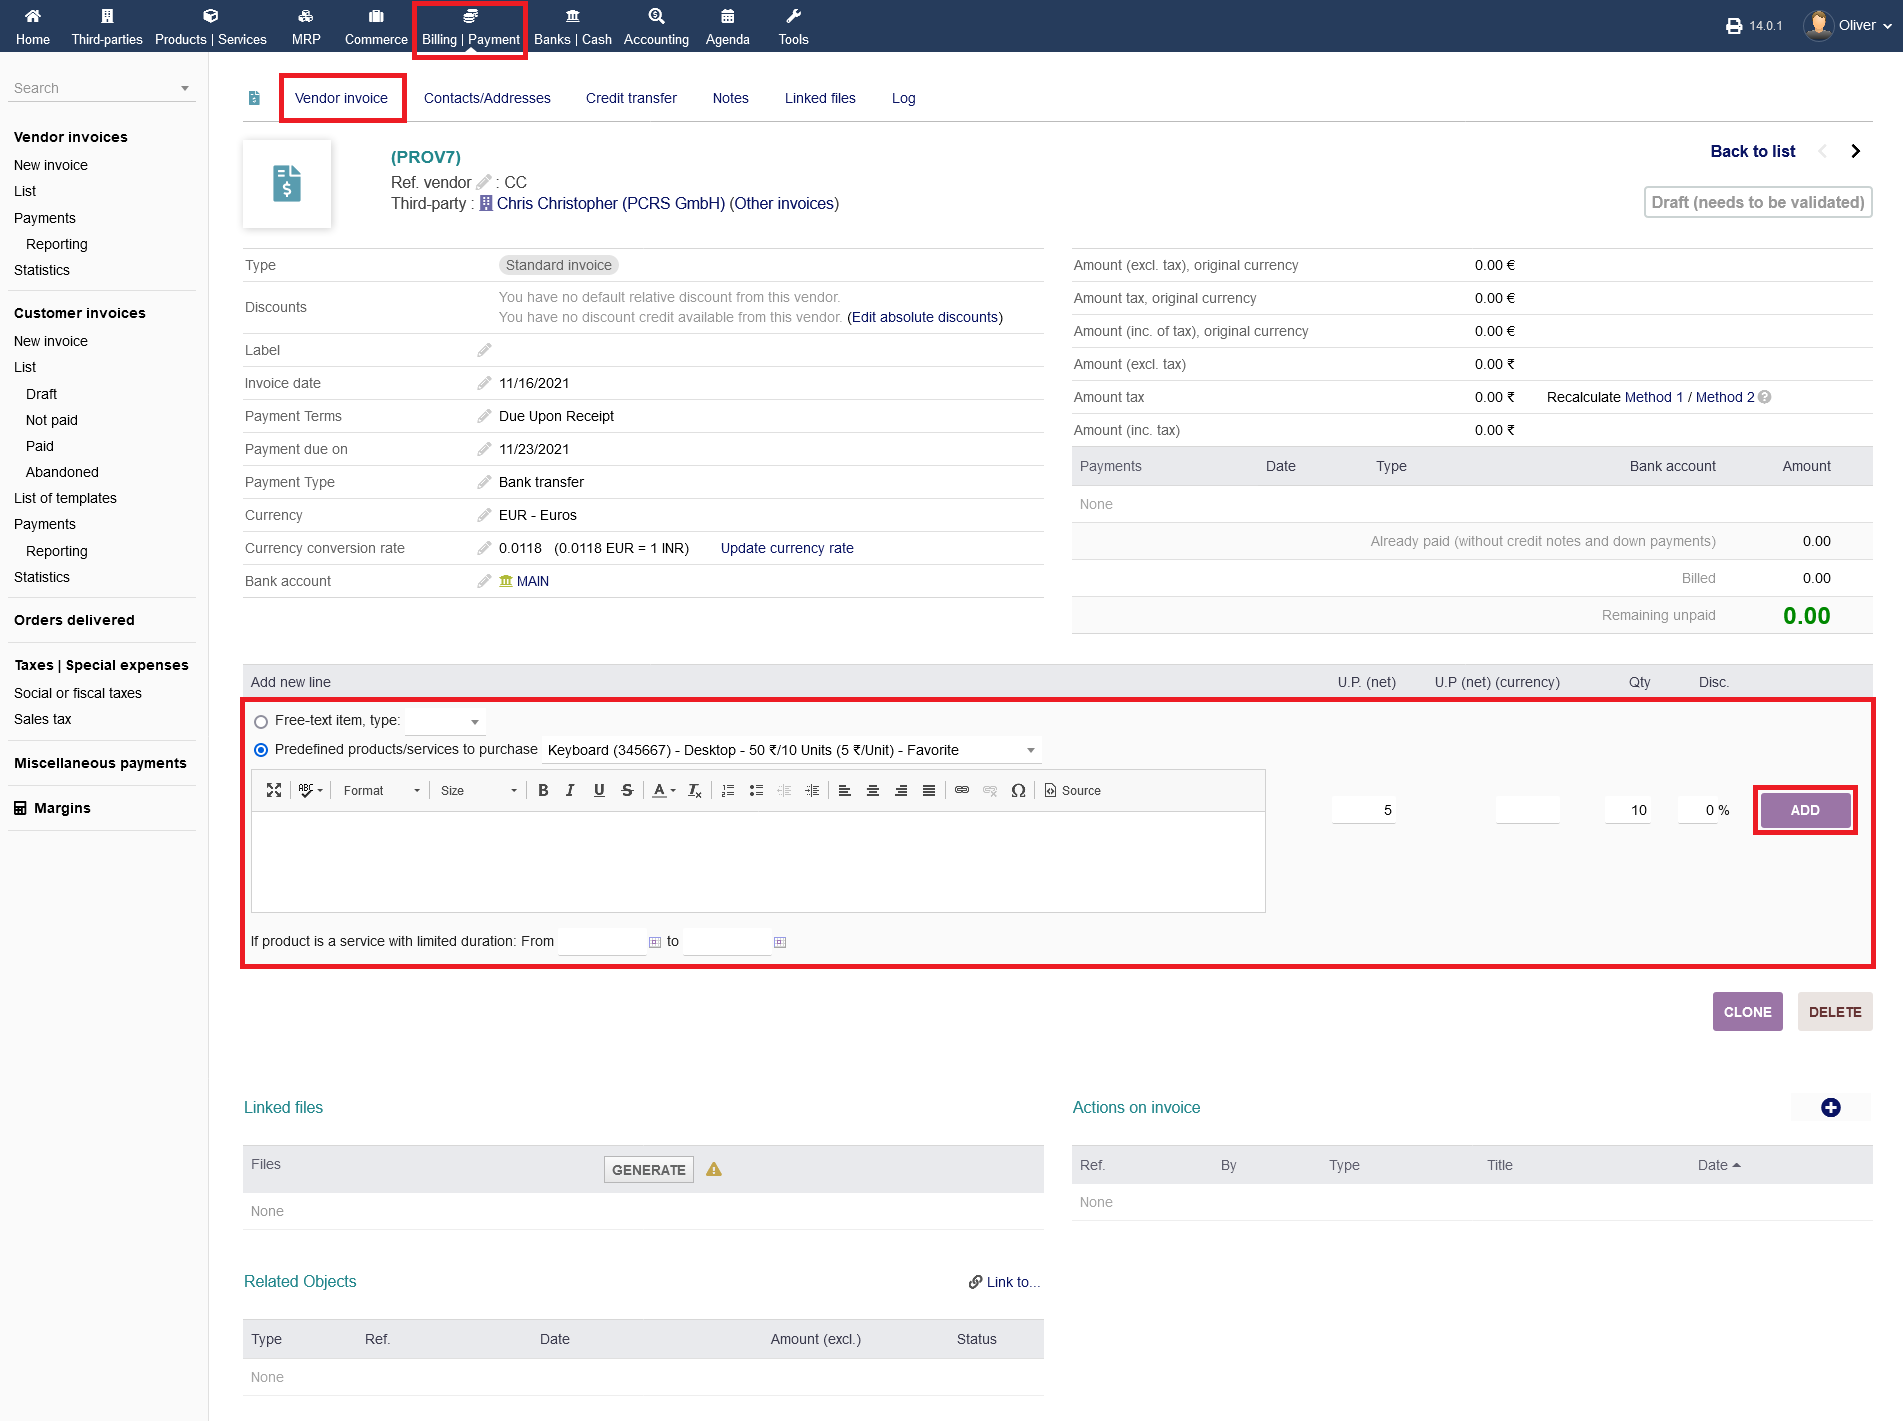
Select a service or a product from or make a free text entry and click "ADD" in the end.
VALIDATE :
The created draft with the chosen item(s) need validation. For that, click on "VALIDATE" to confirm the draft.

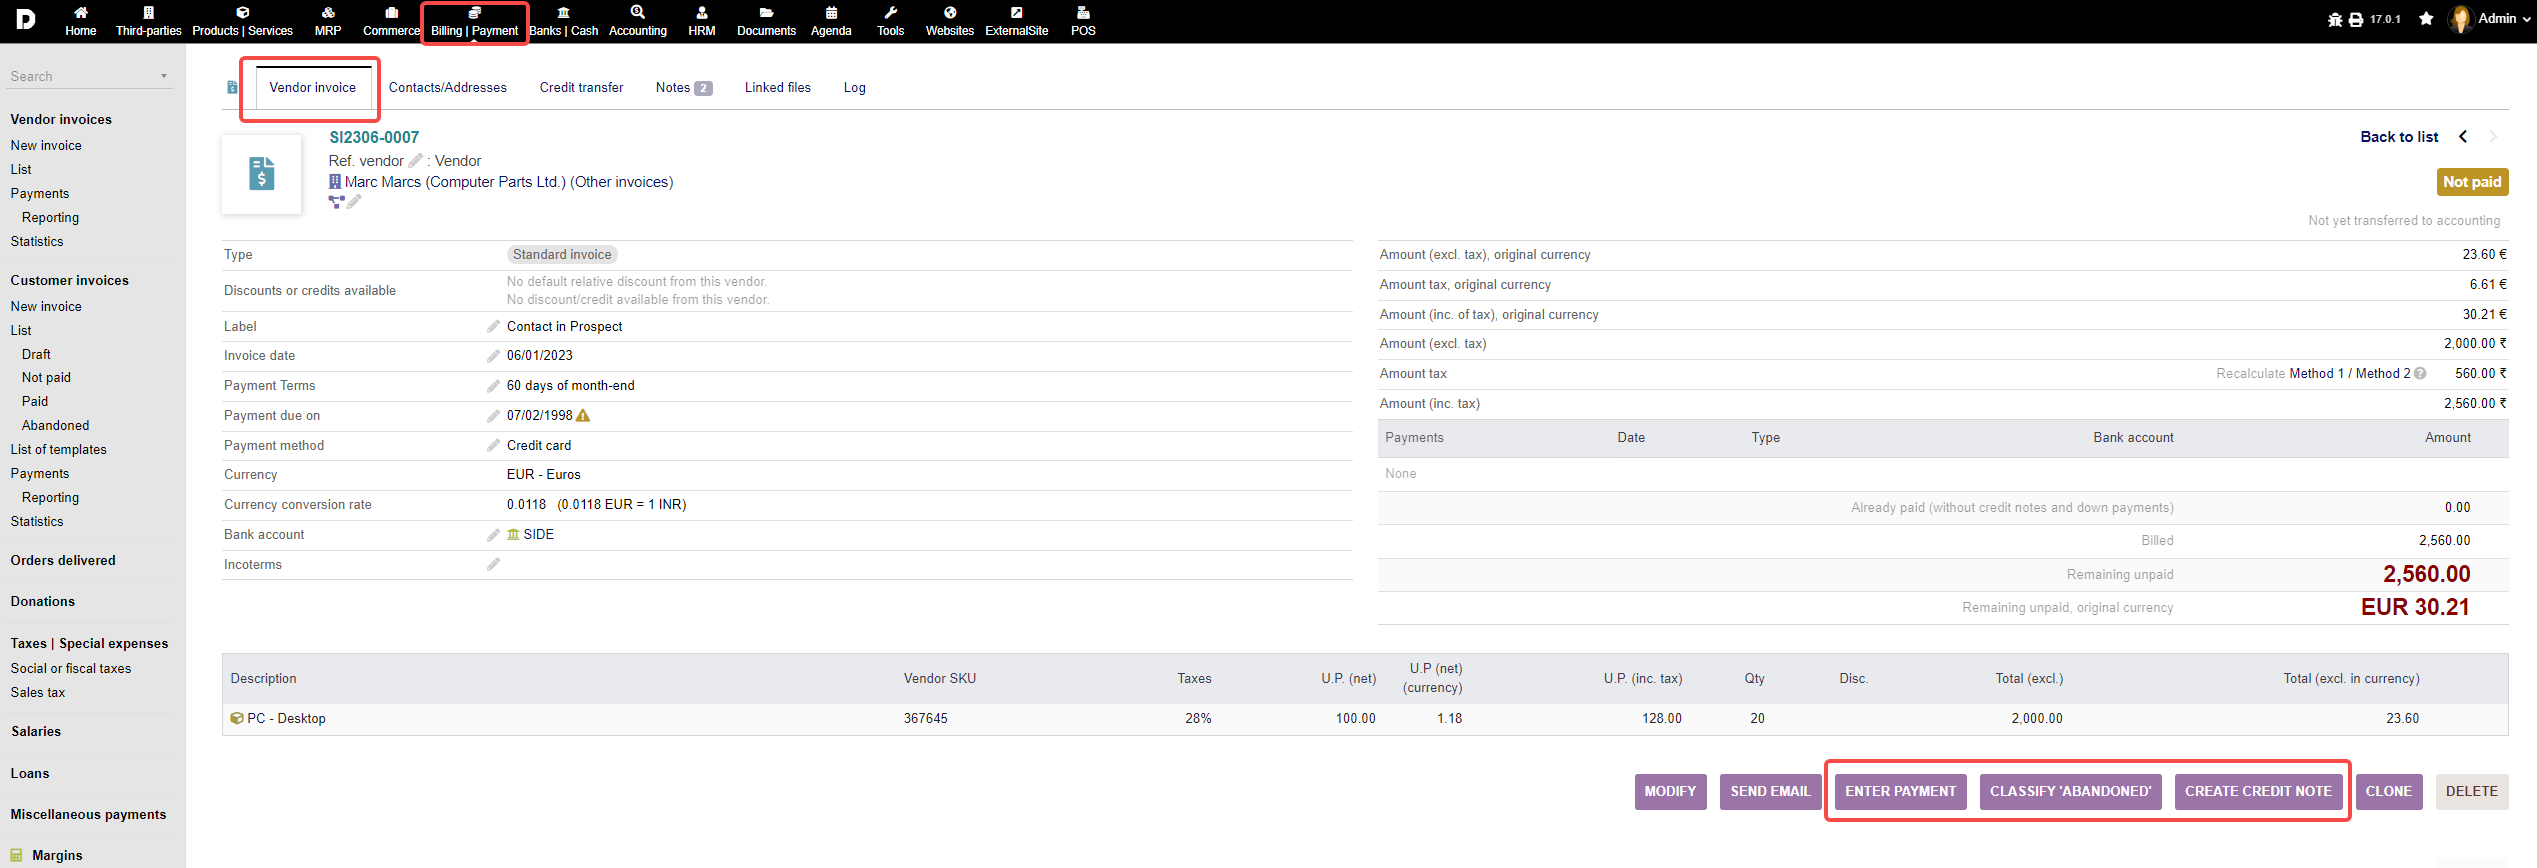
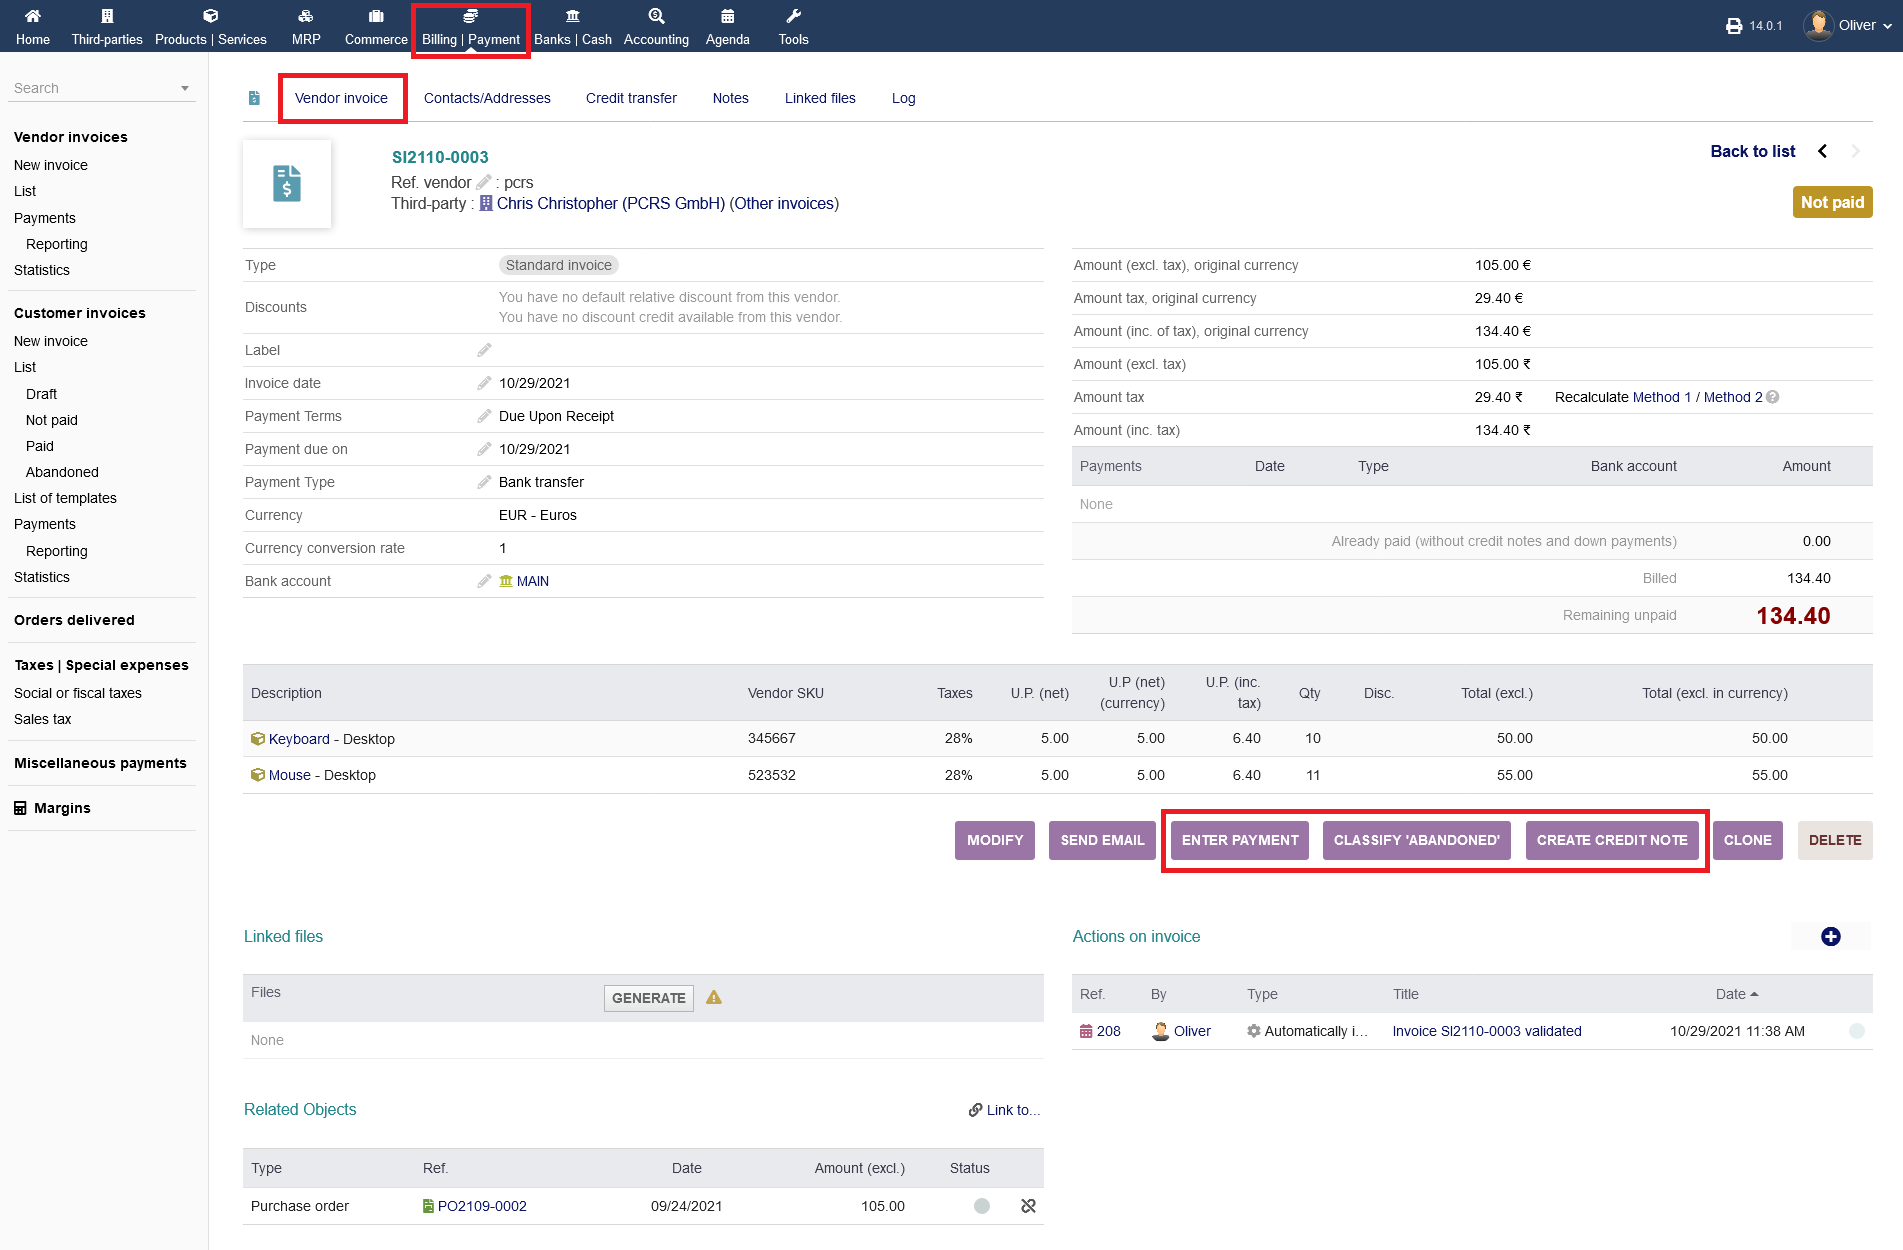
Now, after the invoice is validated, the status changes to "Not paid", so it is now up to you to contact the vendor. For that you can use the in-build email functionality by clicking on "SEND EMAIL".
To continue with the actual billing process, you have the following options by clicking on the respective buttons: "ENTER PAYMENT" (for registering a done payment), "CLASSIFY ABANDONED" (to set the invoicing/billing process as failed), "CREATE CREDIT NOTE".
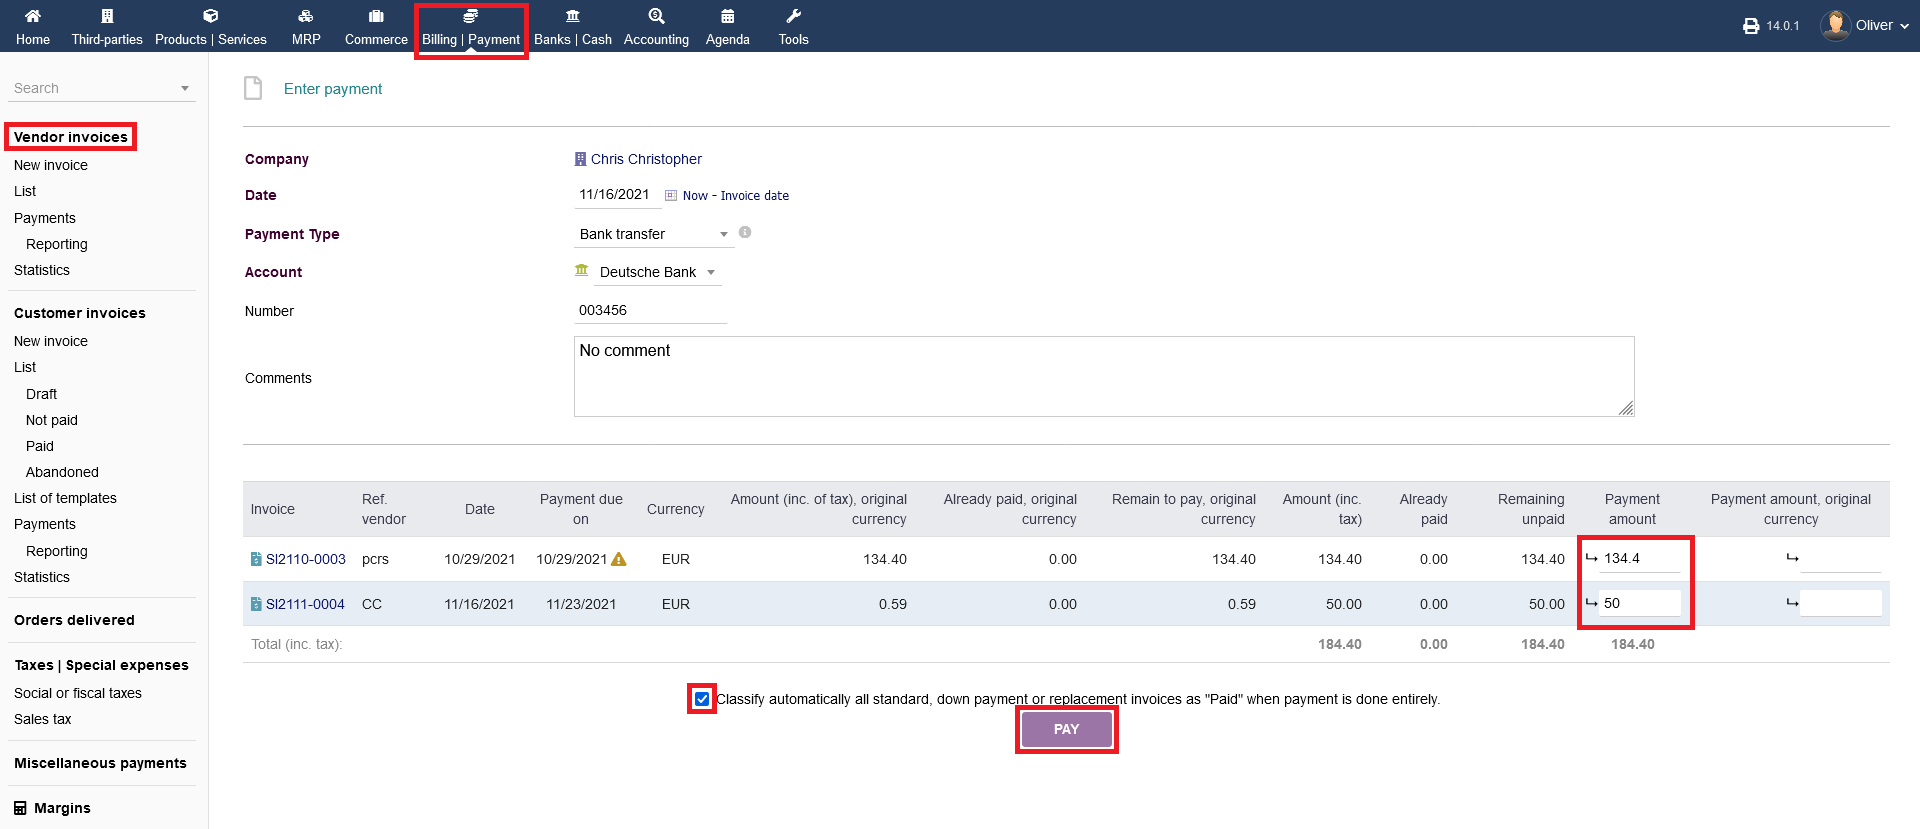
Entering a payment :
Clicking on the button "ENTER PAYMENT" (see screenshot before), redirects you to the respective form where you can enter the payments. Fill out the necessary details (e.g. payment type and your company bank account where you received the payment). Under the section "Payment amount", you have to enter the amounts that you actually received. If you use a different currency with your bank account, you can enter the amount in the original currency separately (see section "Payment amount, original currency"). Note, that you can check the radio box for the automatically setting all payments as "paid" when the payment is done completely. Click "PAY" to finalize the payment entry.
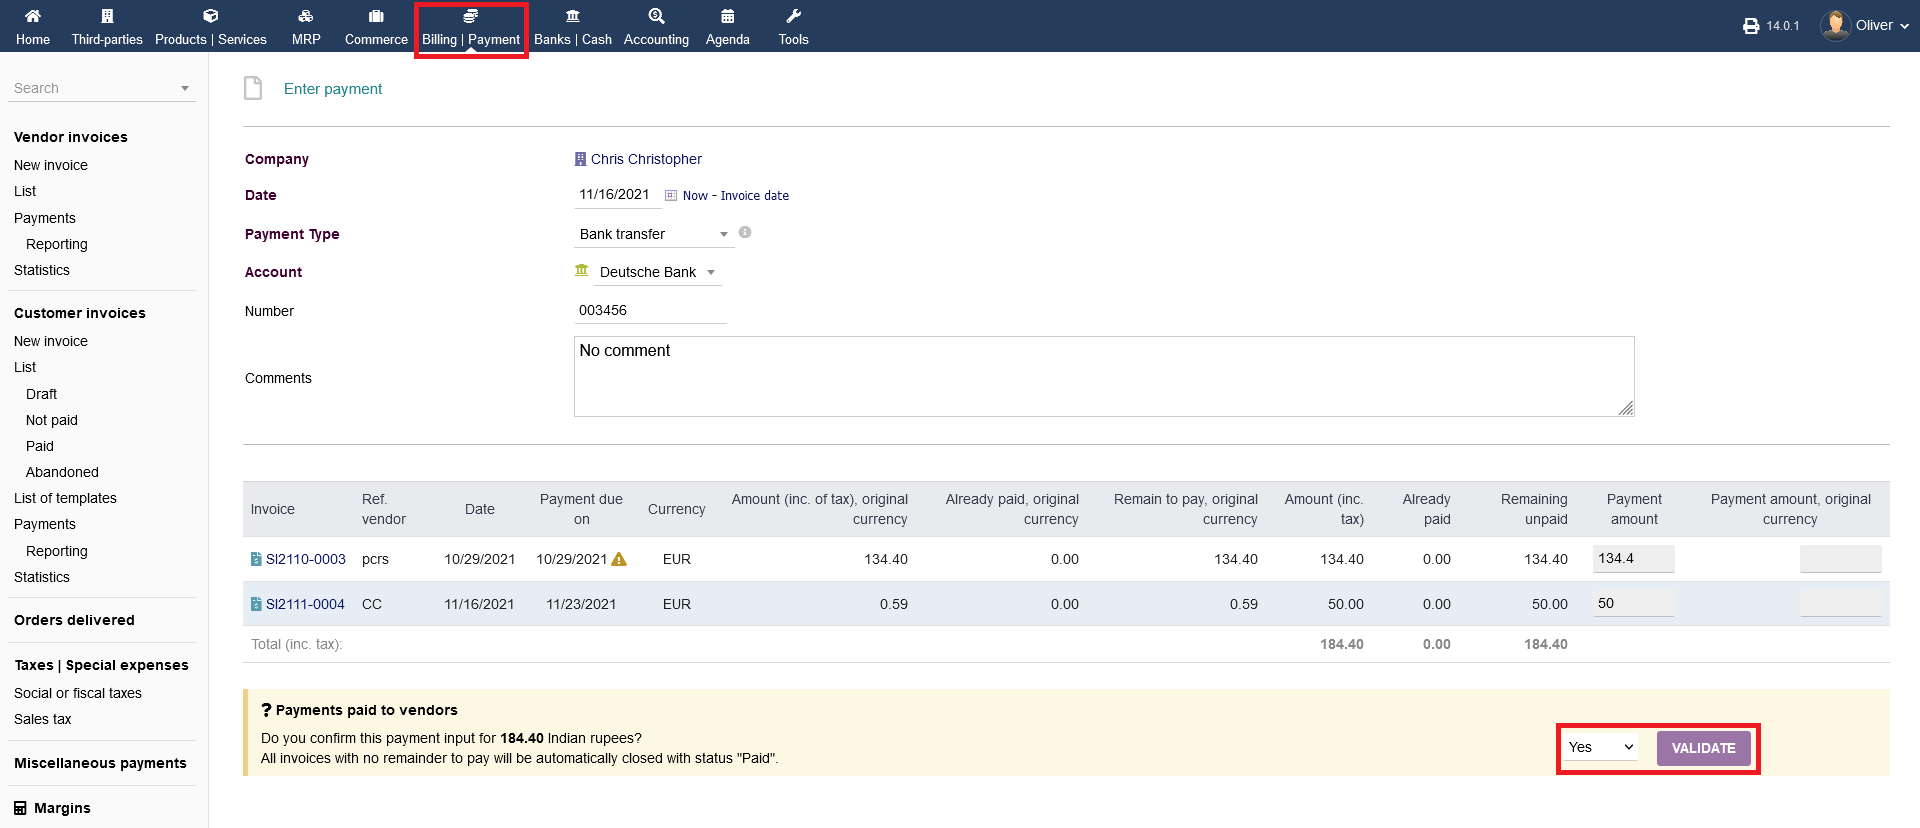
Be aware, that you have to do an extra step of validation, that you really want to set the process as paid. Choose "Yes" from the drop down menu and click on "VALIDATE". In the end, the status should show as "Paid", in the following screen.
Failed billing/invoicing process :
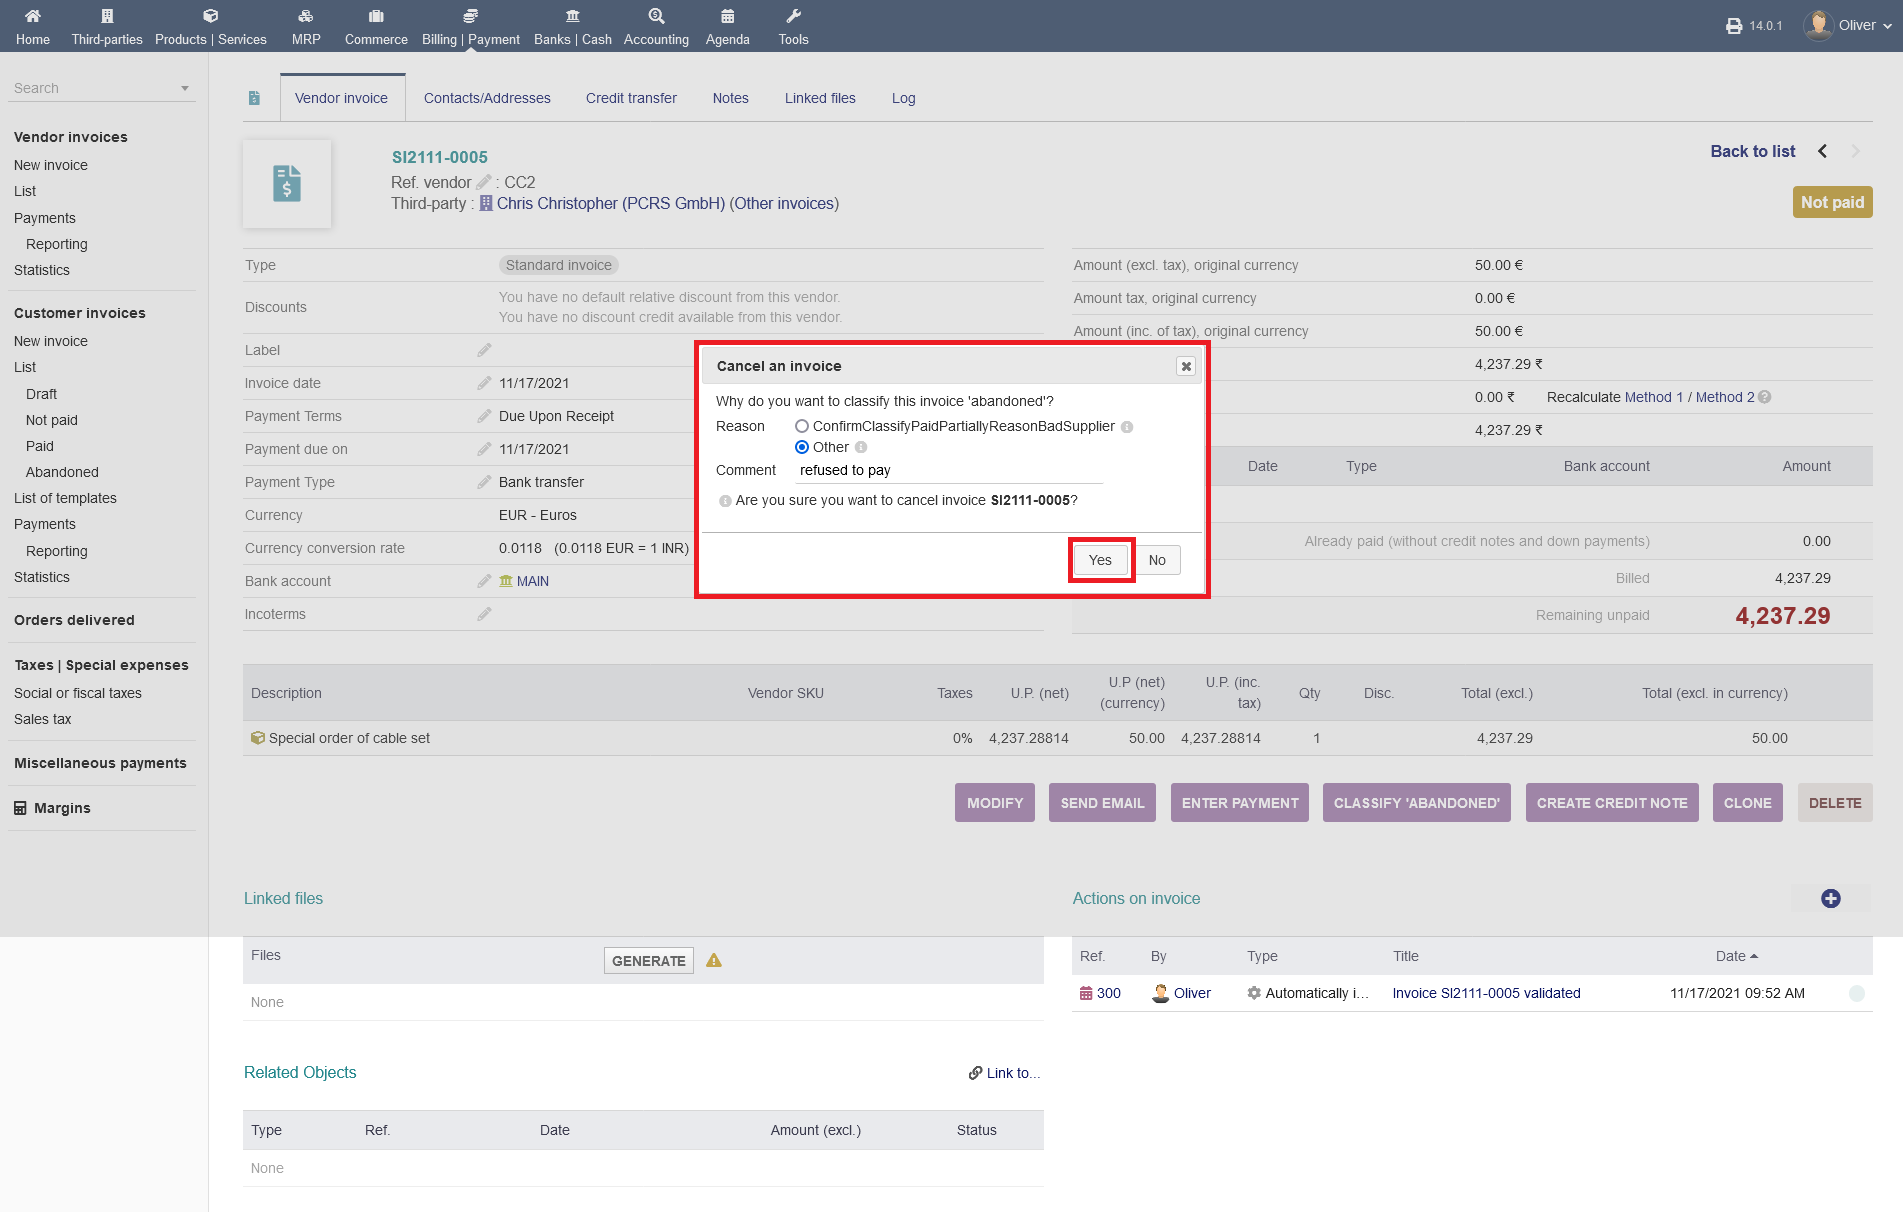
If the payment is refused, click on "CLASSIFY ABANDONED" . You can choose either, that payment was partially done and commenting, that it is the case of bad supplier or you can choose a free text entry (as shown). Click "Yes" to confirm. In the vendor invoice overview, the status should change from "Not paid" to "Closed (unpaid)".
Credit notes :
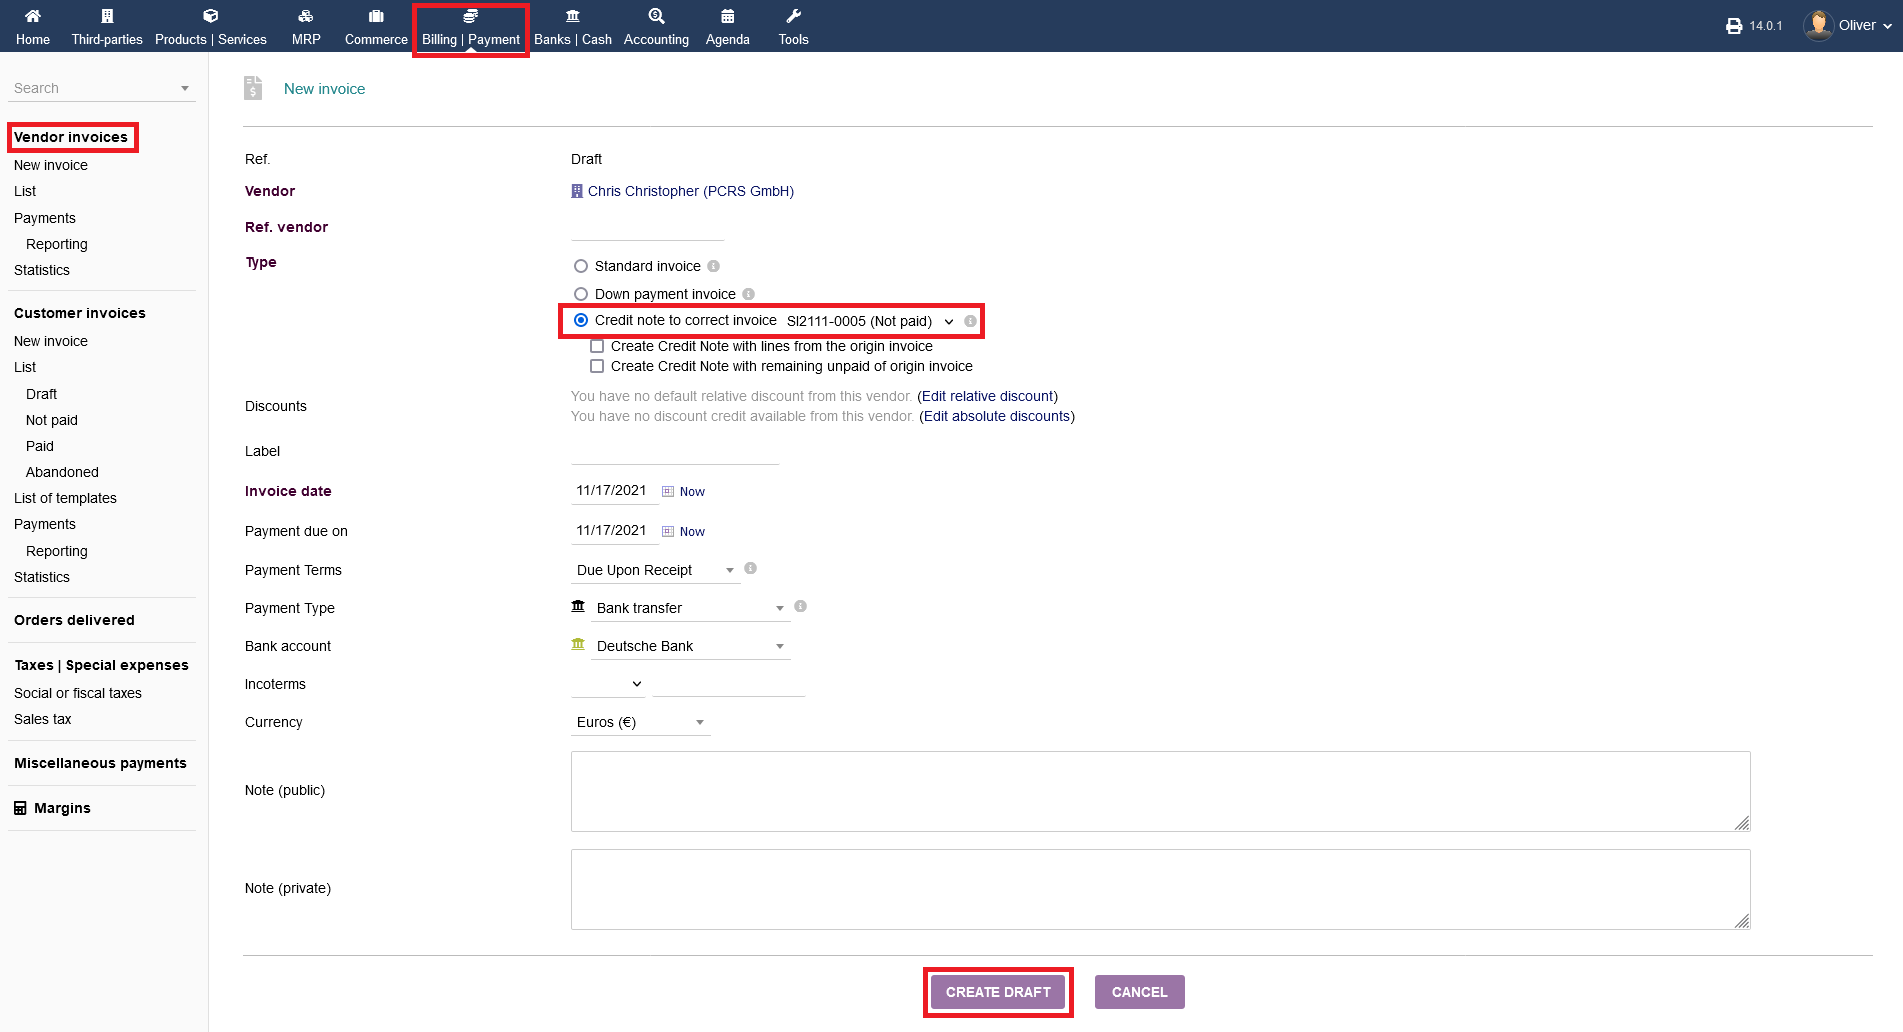
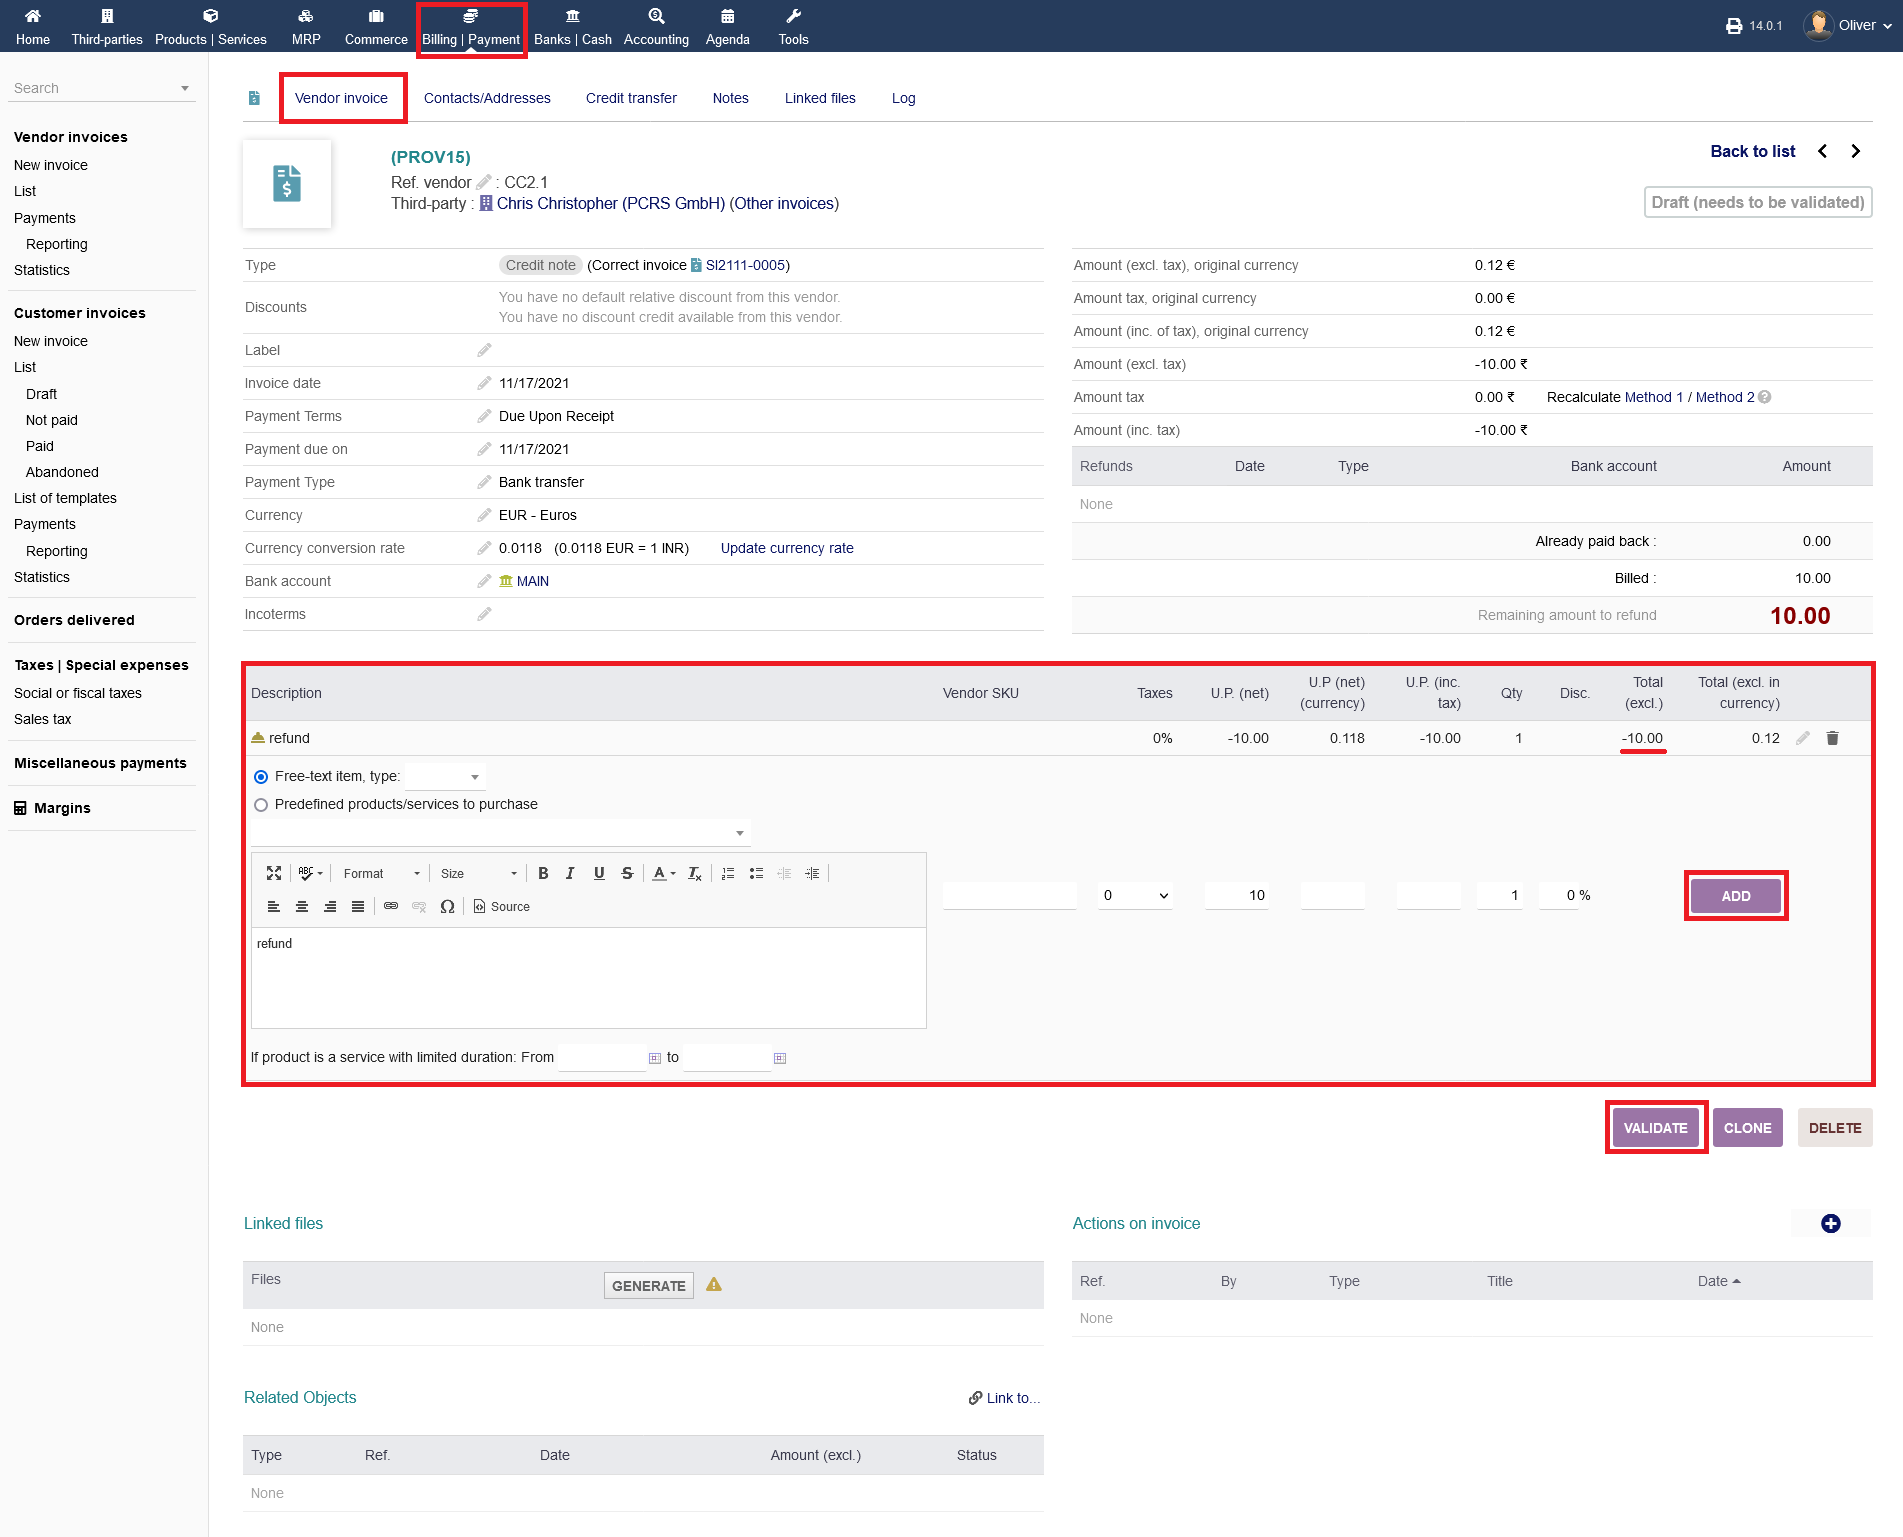
You also can create credit notes to refund a certain amount of the payment. Click on "CREATE CREDIT NOTE" . In the following form, make sure that you are choosing "Credit note to correct invoice" and select the right payment process from the drop down menu next to it. Fill out the usual information and click "CREATE DRAFT" in the end. Note, that any credit not will be handled as a separate invoice.
In the following screen, choose a product, a service or give a free text entry on what you want to perform the refund. Click "ADD" to add the entry to the listing. When you are done, click "VALIDATE" to confirm the credit note process. Note, that your entered amount is now showing as a negative amount in the listings, since you are paying back.
After validating the credit note draft, you get essentially two new options "ENTER REFUND" and "MARK AS CREDIT AVAILABLE". Clicking on "MARK AS CREDIT AVAILABLE" saves the credit amount along with all discounts regarding this specific vendor and can be used in future or in the current invoicing process, to grant further discounts. The status is changing accordingly. Note, there wont be another form to fill out for this option! Click on "ENTER REFUND" to enter a refund payment.
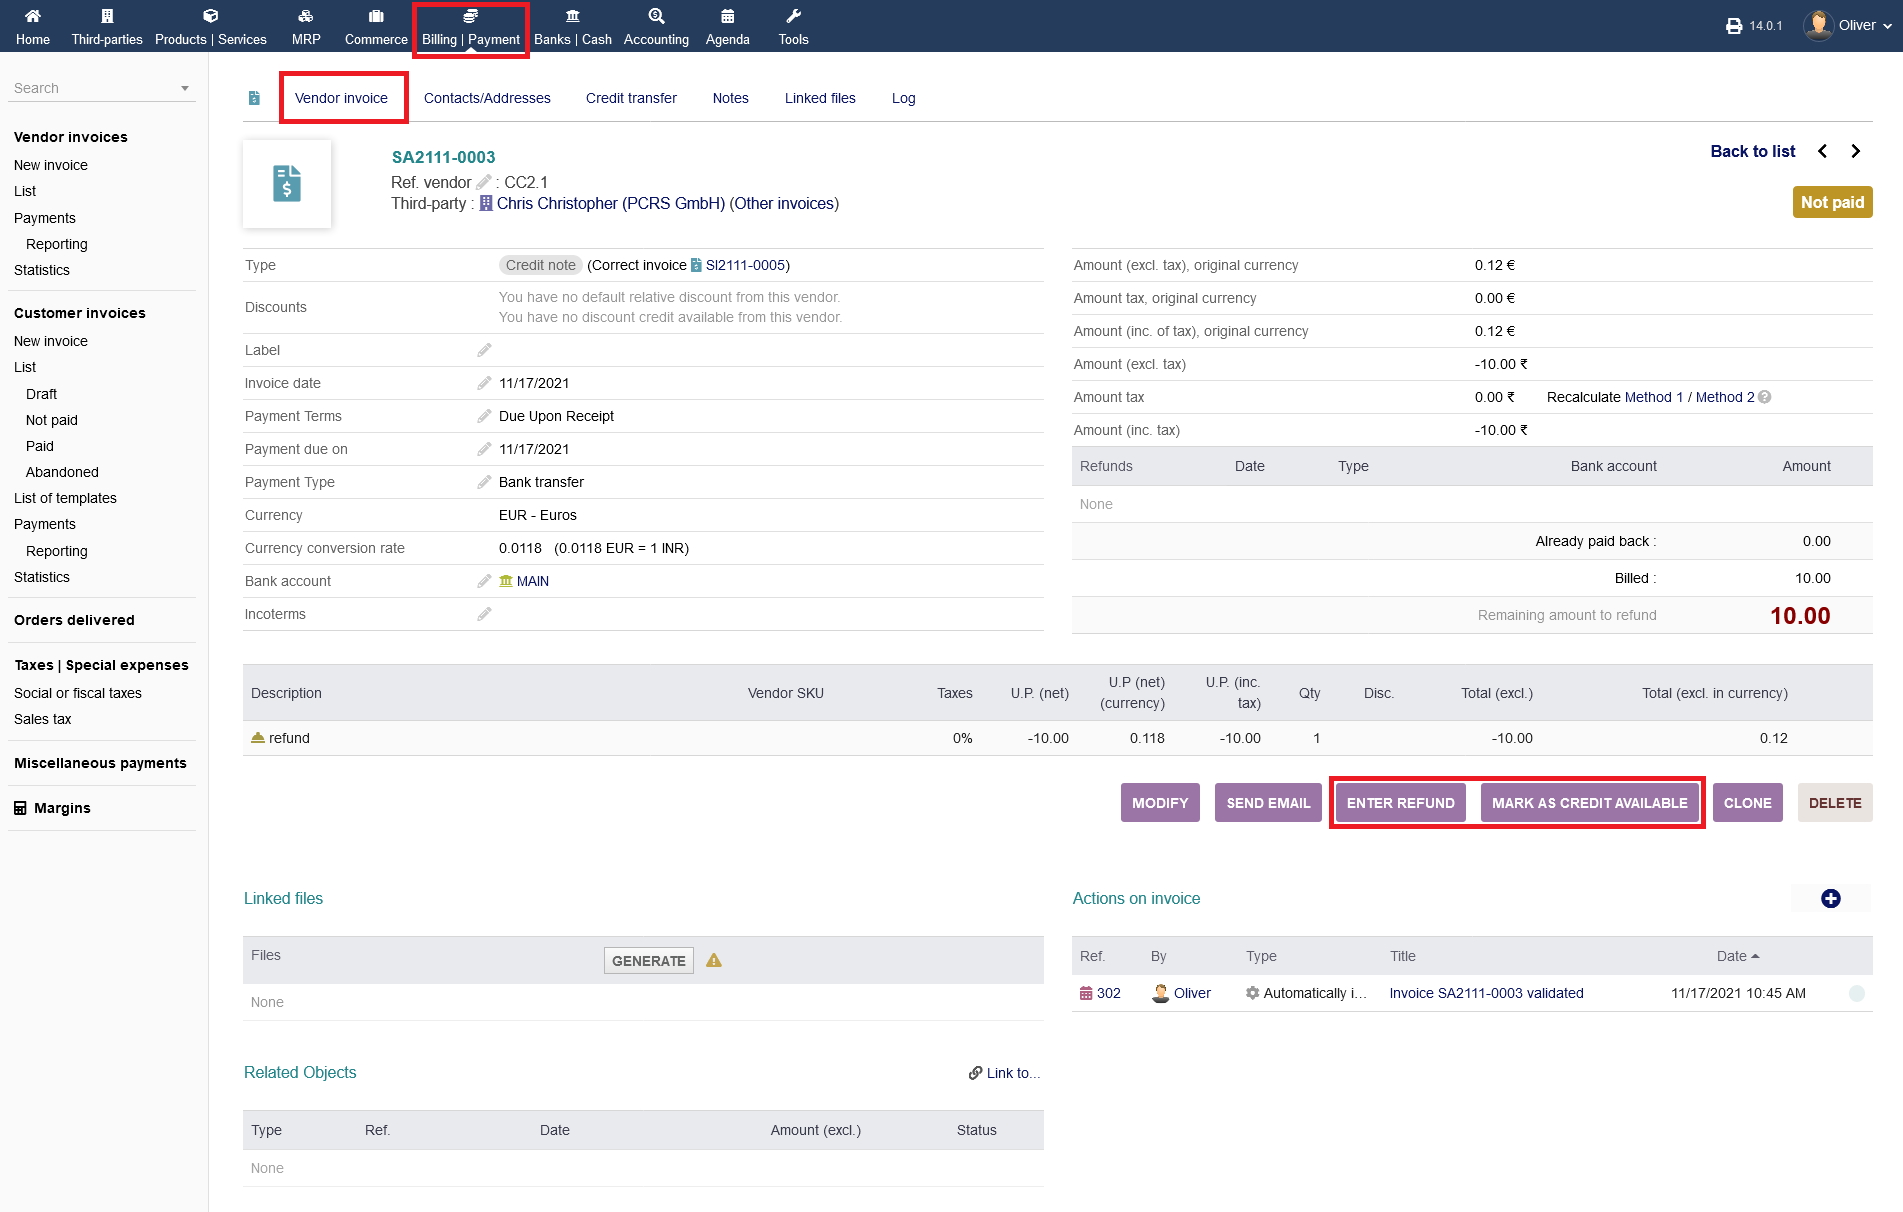
Fill out the form accordingly. This form is the same as mentioned in the above topic "Entering a payment". Click "PAY" when you are done.

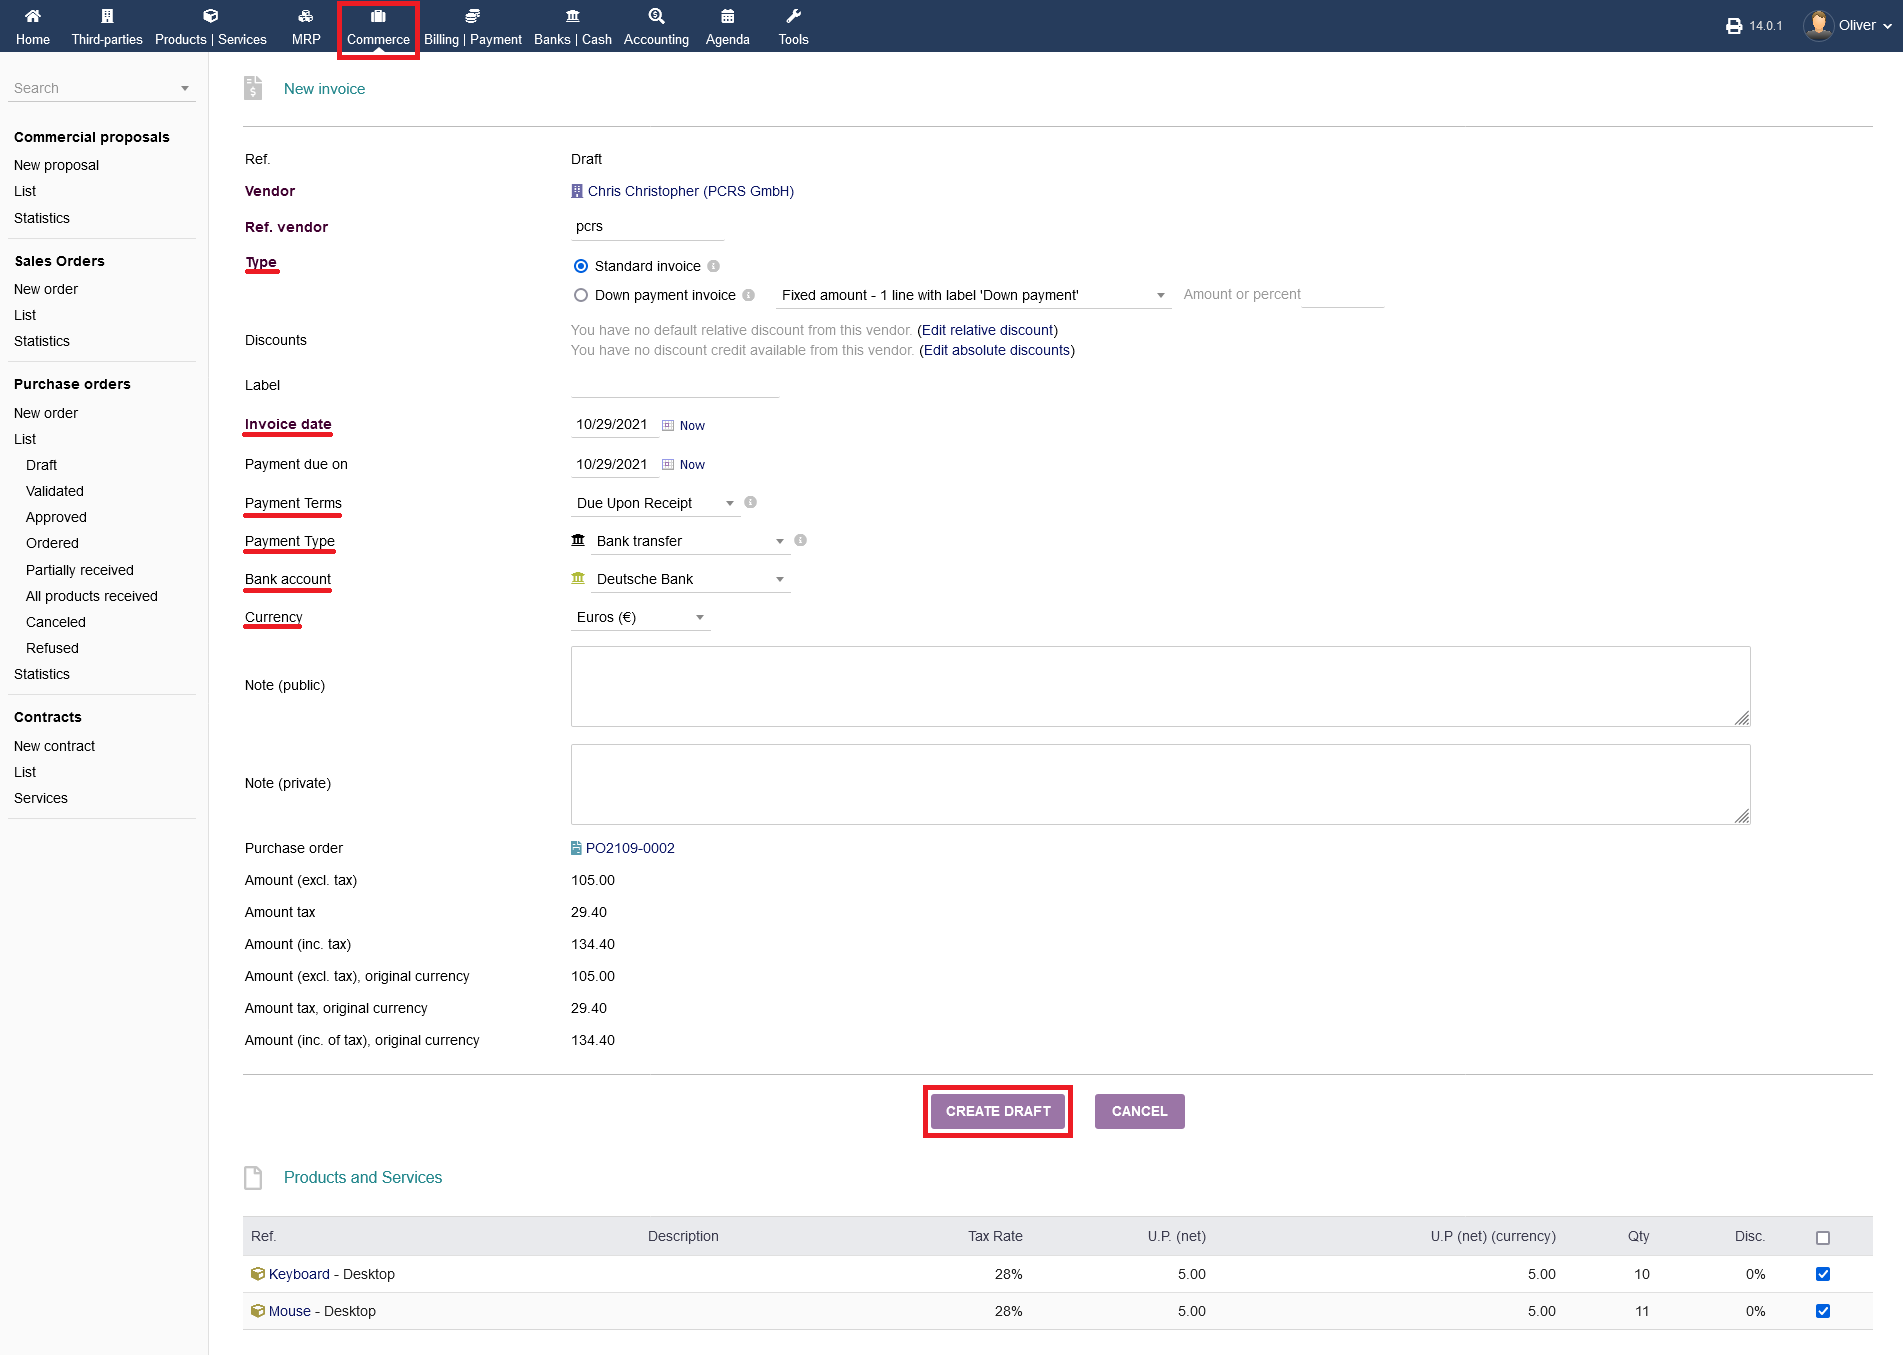
Vendor invoicing from purchasing orders :
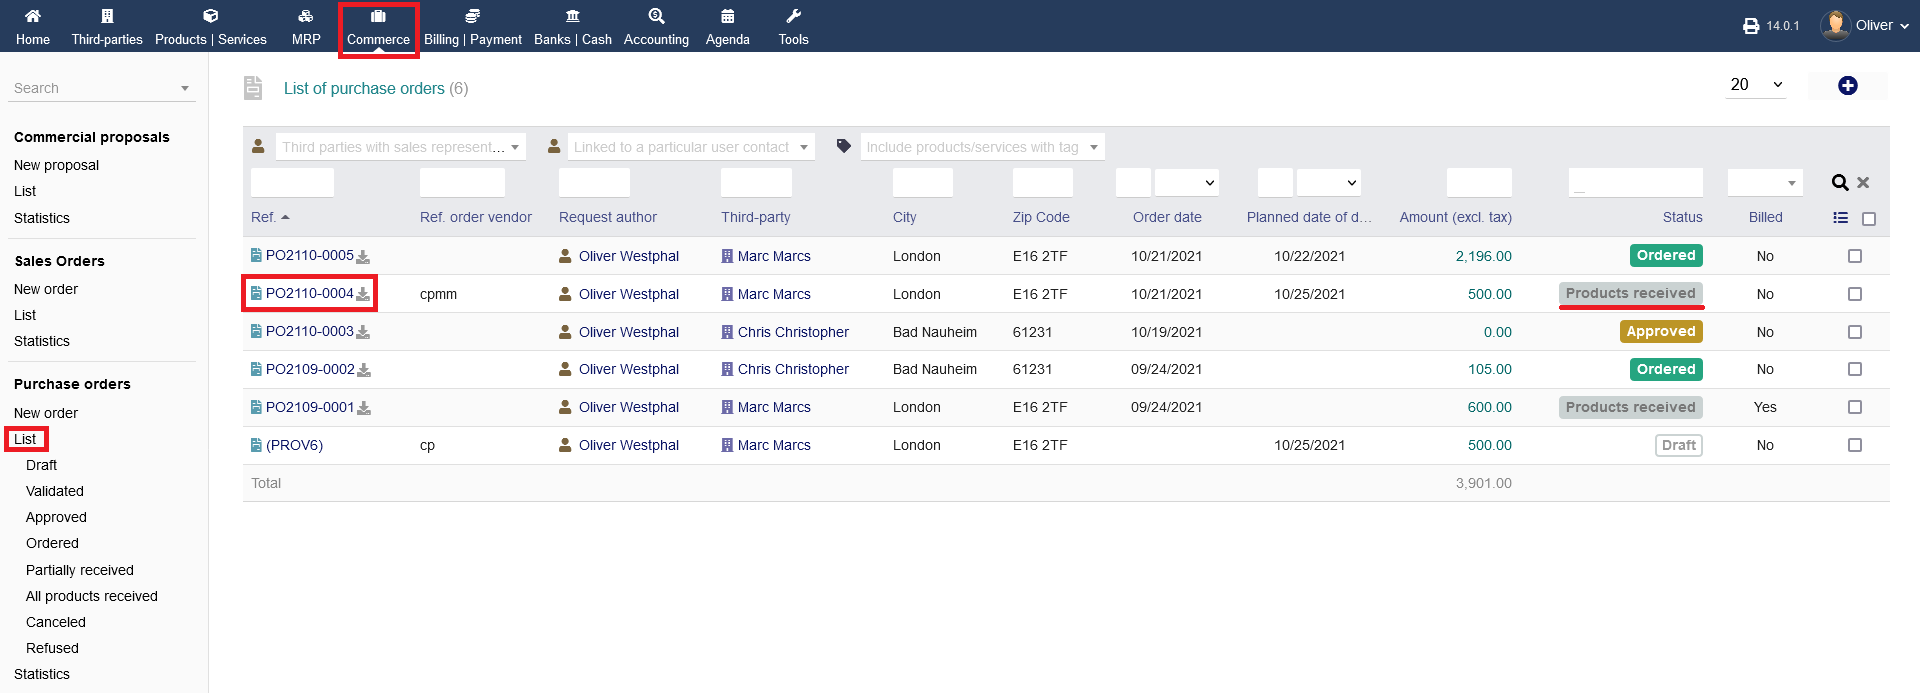
For vendor invoicing, you need to go to the closed/finished product purchasing process via "Commerce -> Purchase orders -> List" and click on the exact purchase order where you want to do the billing process. The status of that purchasing order should say "Products received".
Next, click on "CREATE INVOICE". As you can see, you cannot classify the purchasing process as billed, since you need to invoice the vendor first.
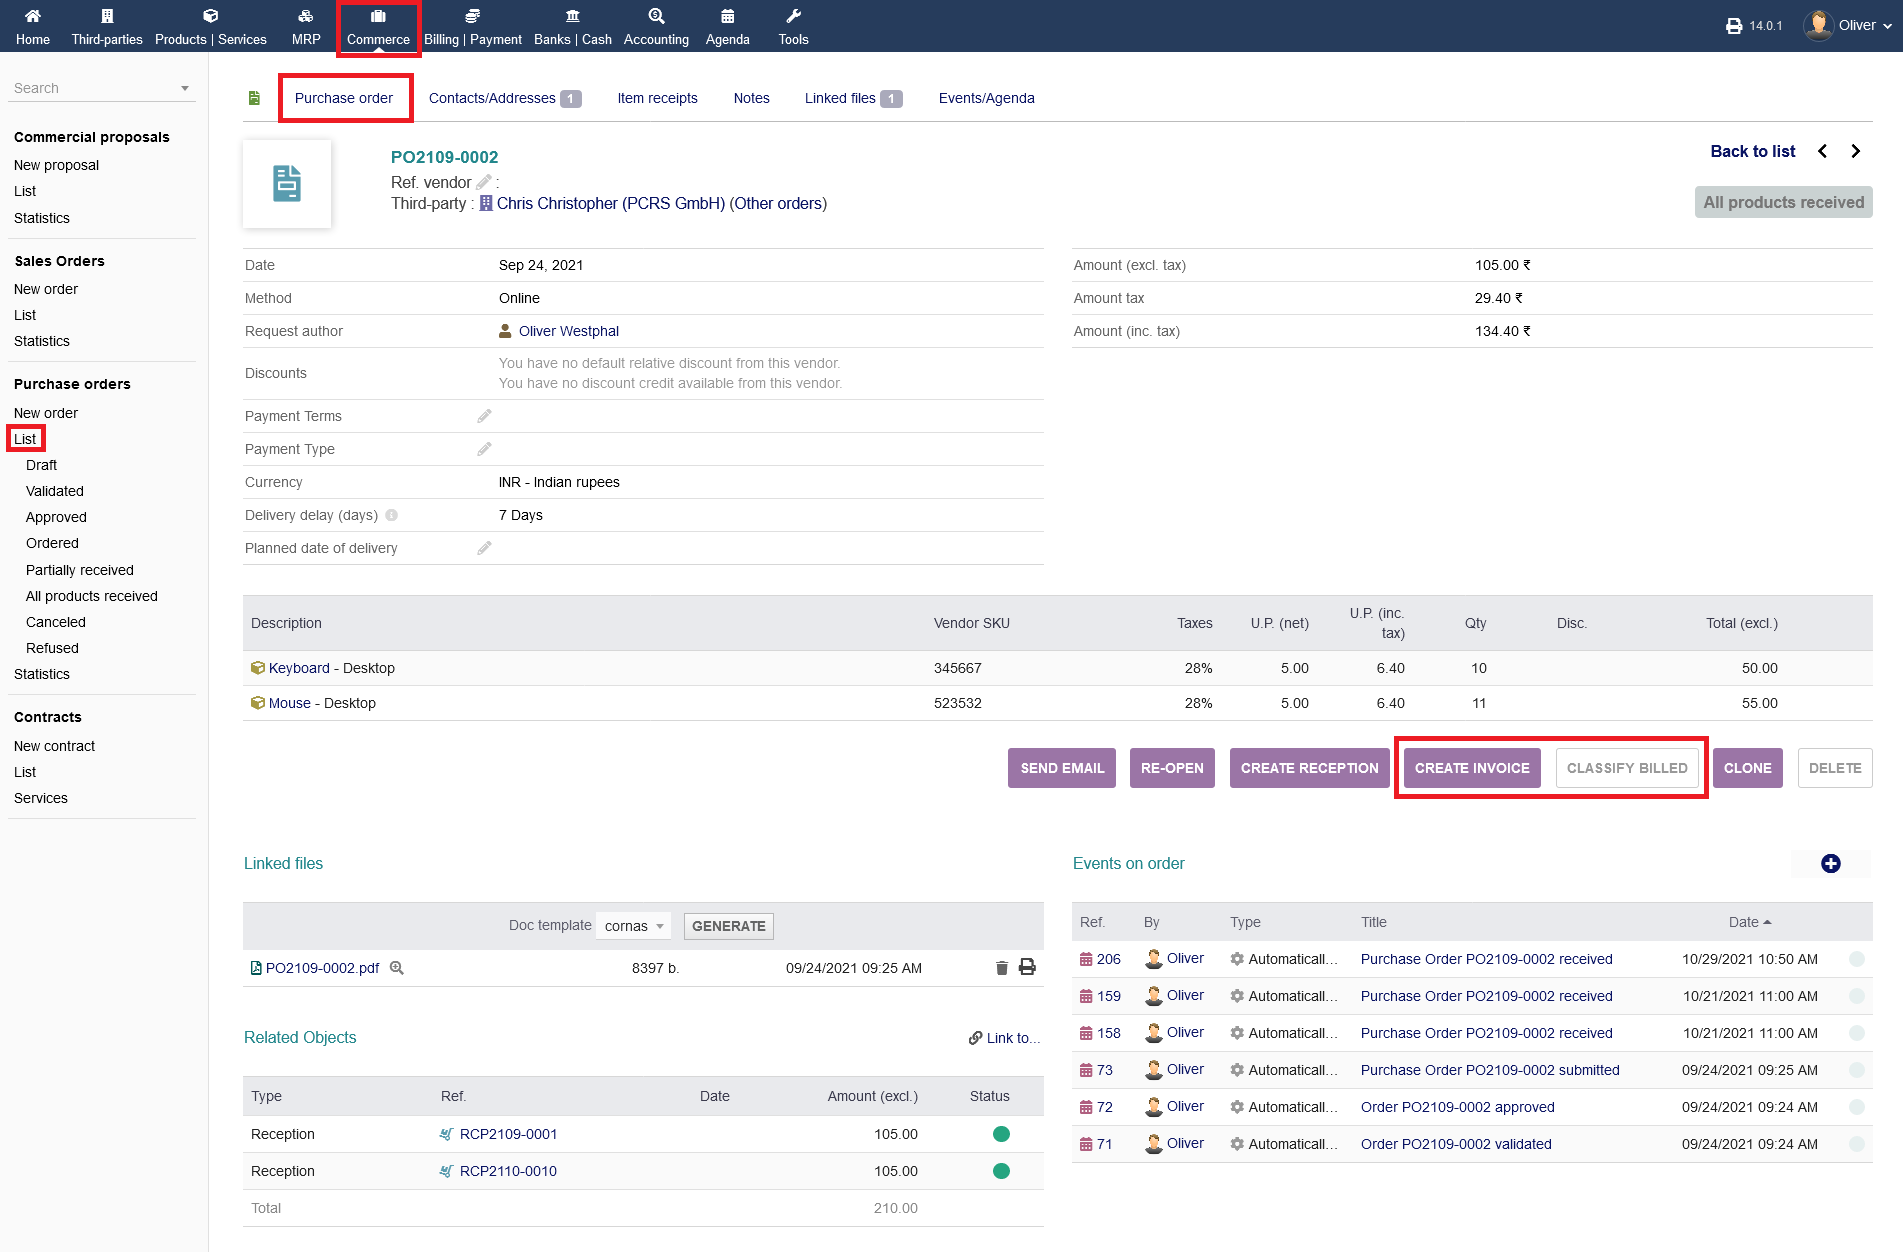
Fill out the invoicing form, especially the invoice "Type", the "Invoice date" as well as the "Payment Type", "Payment Terms" and the "Bank Account" with "Currency" where you whish to make the payment from. Click "CREATE DRAFT" in the end, to create a drafted invoice. Note, that you can see all products you ordered, regarding that billing process, on the bottom of the screen.
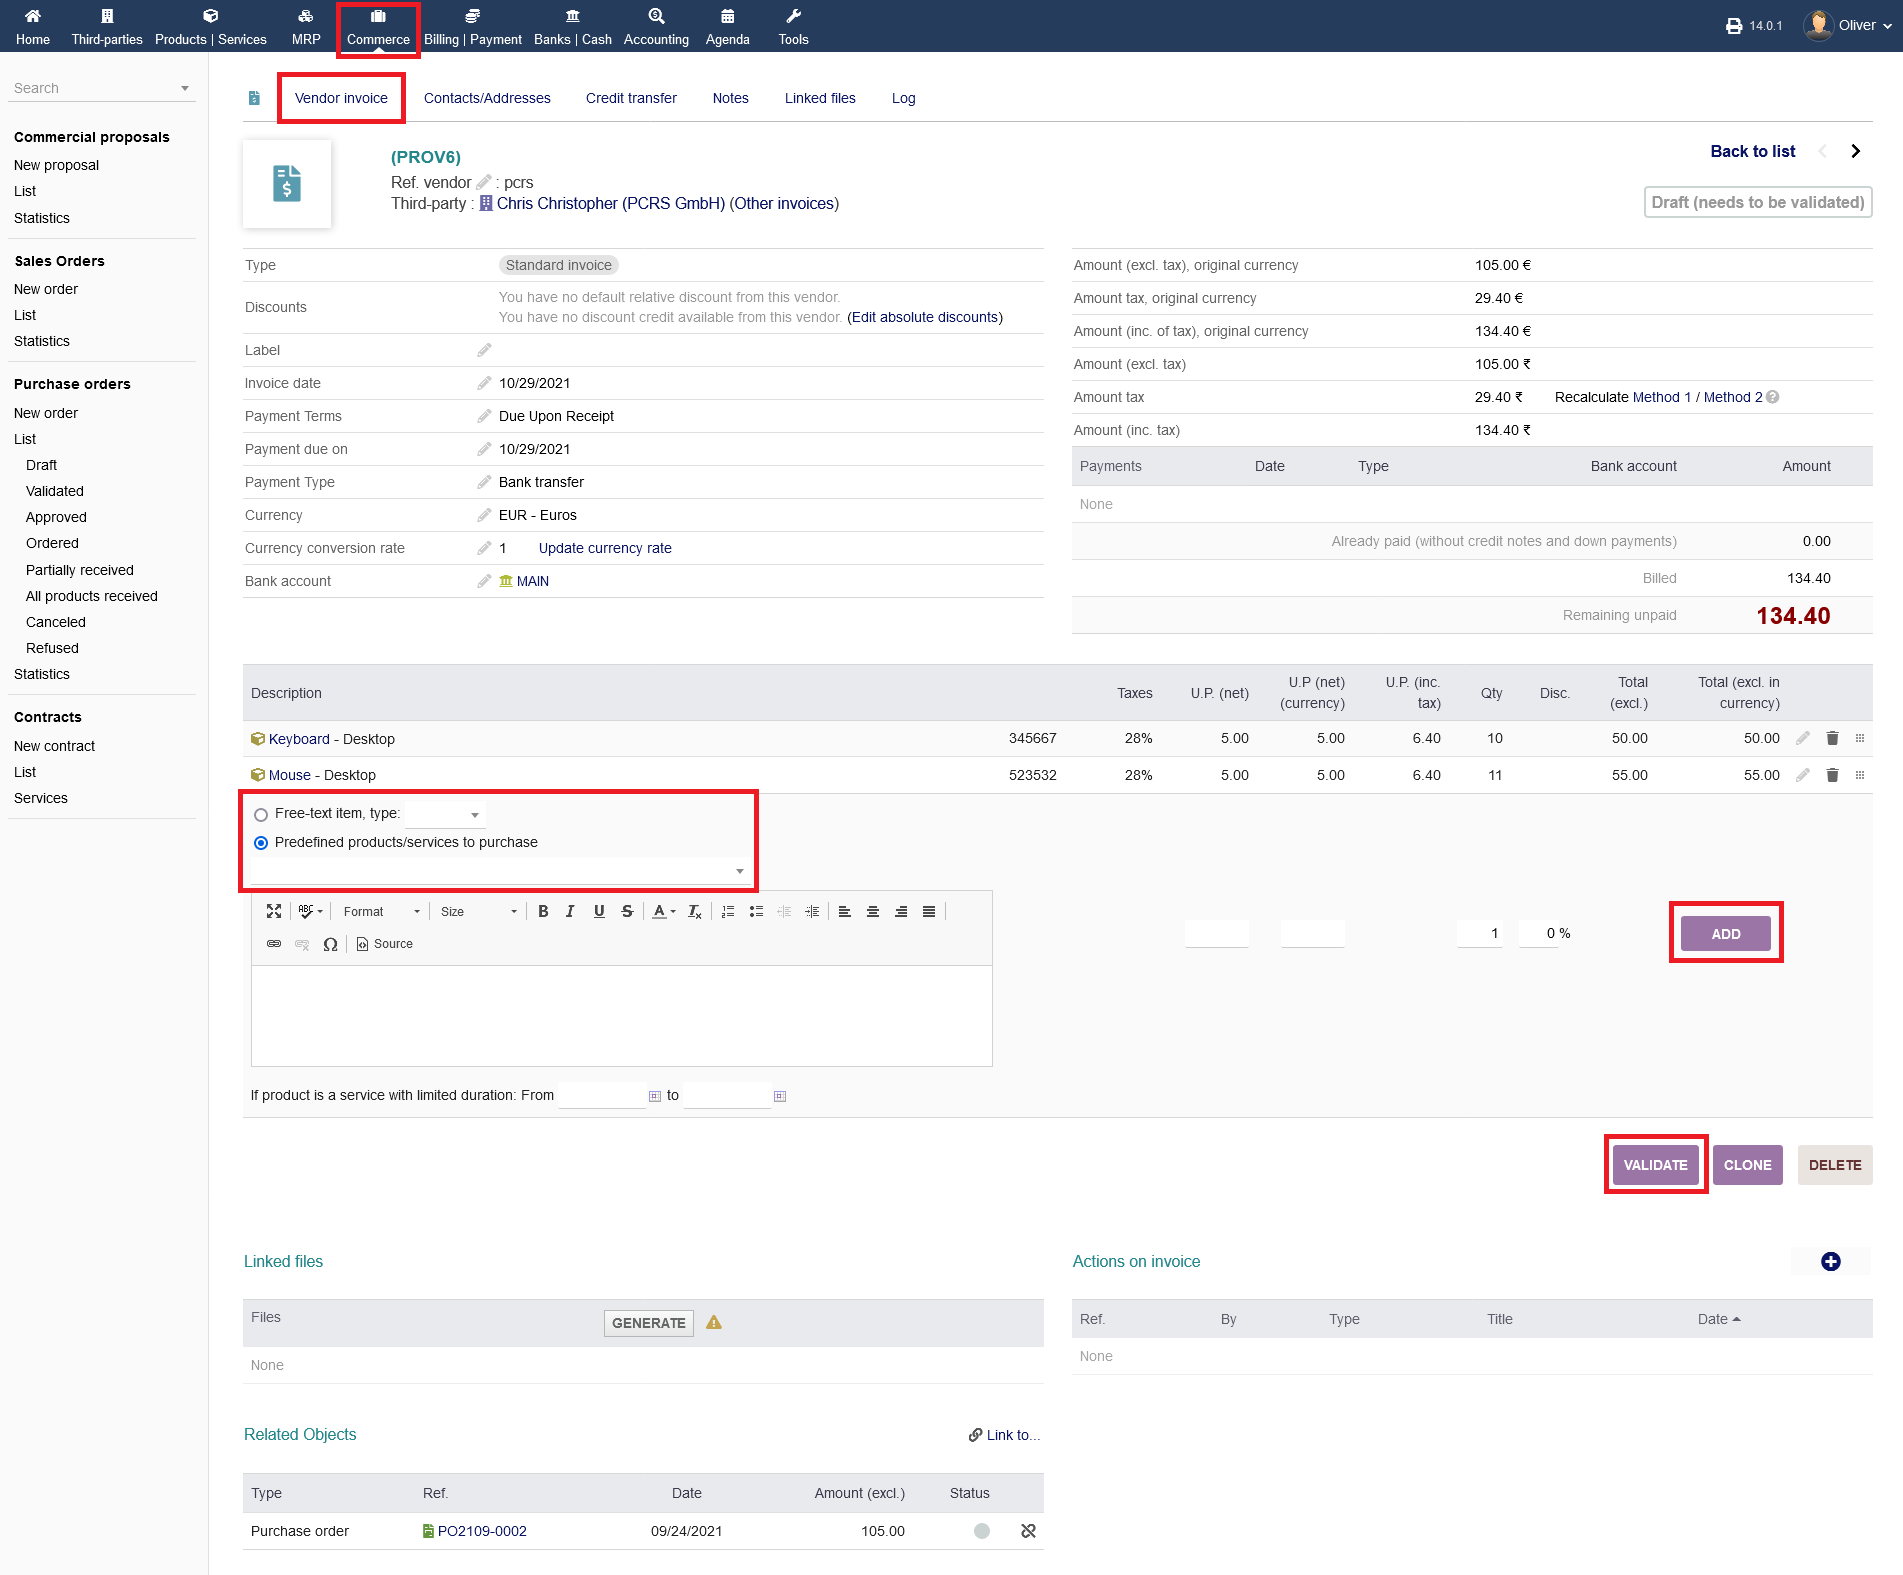
Validating :
In the next screen, you see the invoice card overview, where you can check all details of your invoicing process. If items are missing, you can add them either as a free text entry or from the pre-defined products list which are listed in the drop down menu. Click "ADD" to add an item. If everything seems right, you can finalize the invoice by clicking on "VALIDATE".
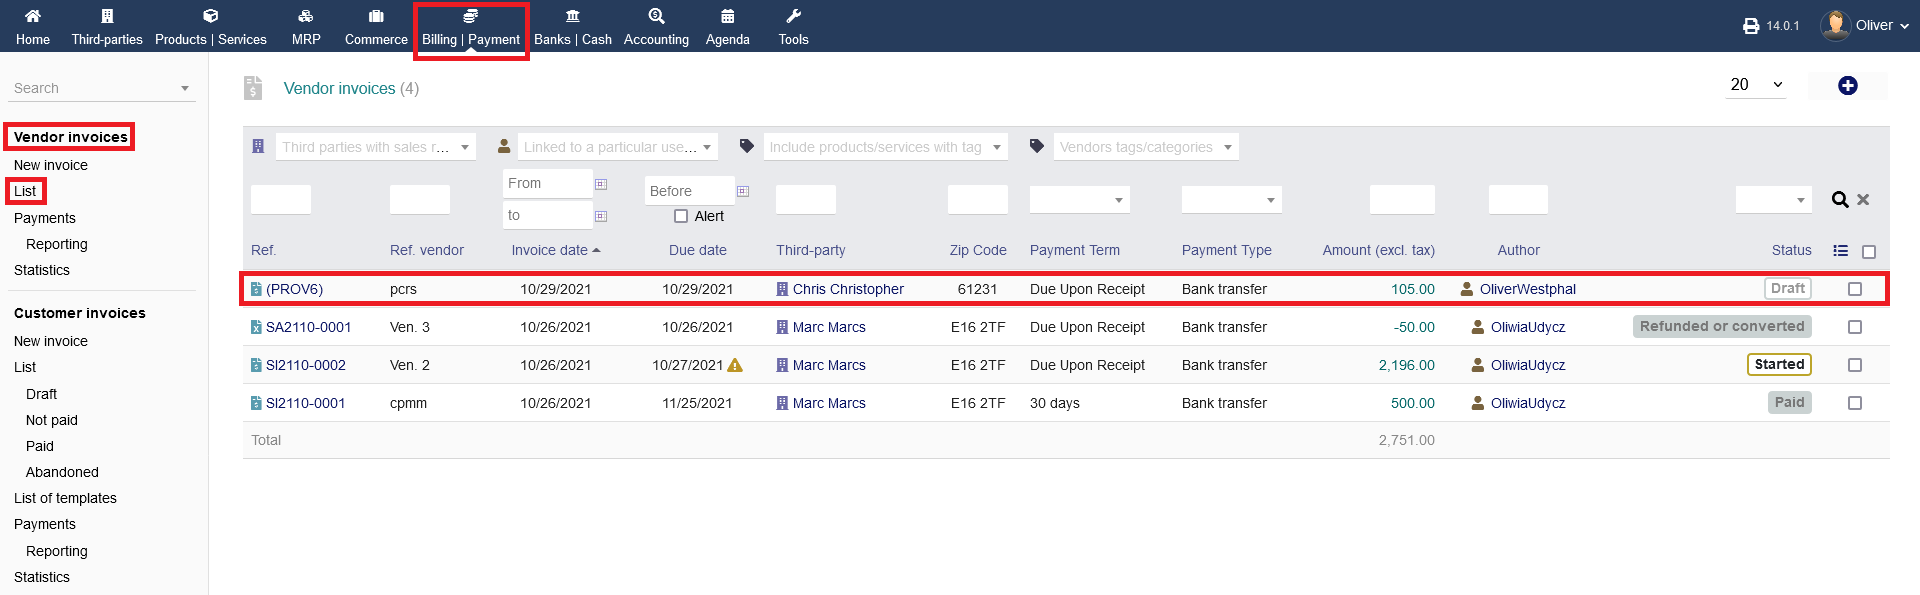
If you don't validate the invoice right away or someone else needs to validate the invoice draft, you can find the drafted process under "Billing/Payment -> Vendor invoices" or "Billing/Payment -> Vendor invoices -> List". Click on the respective invoice ref. to open the invoice card overview. From here, you can validate the invoice as mentioned above.
After validating the invoice, the status will be shown as "Not paid". You will have multiple options, regarding the further progress of your billing process. You can "ENTER PAYMENT" if the payment was made, "CLASSIFY ABANDONED" if payment wont be made and "CREATE CREDIT NOTE" to make a receipt for the payment.
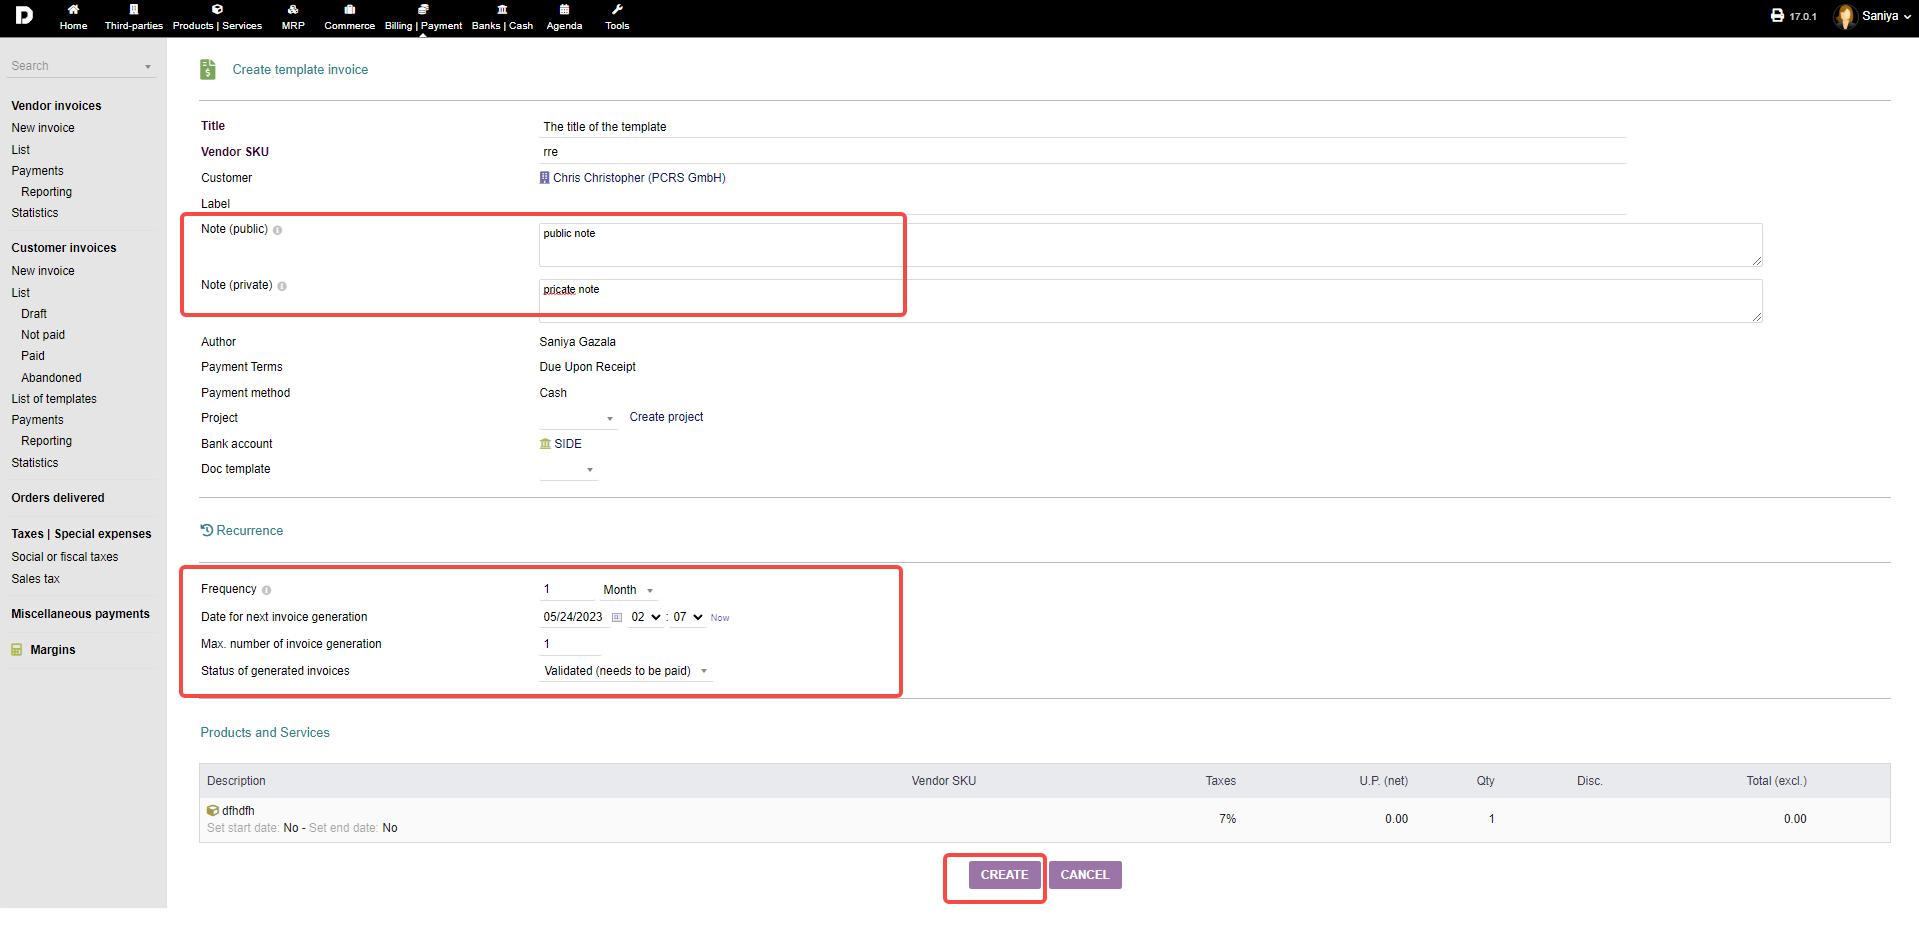
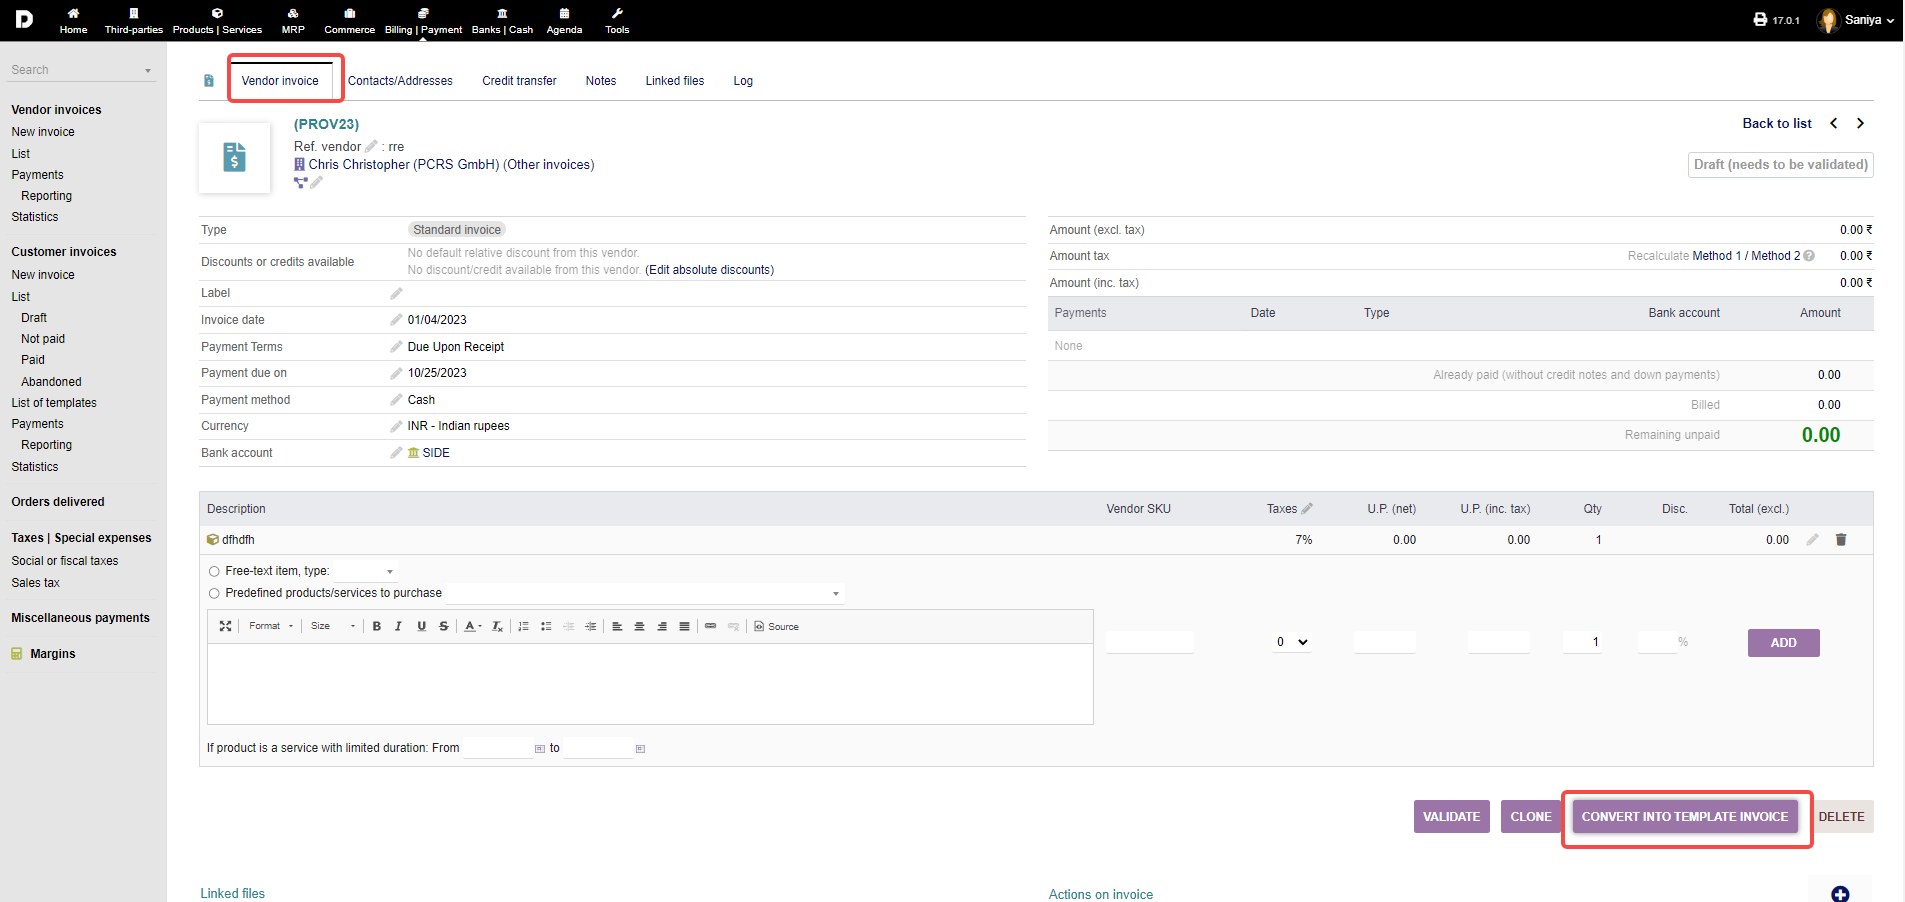
Create template : Creating an invoice template can be easy and helpful , With the help of created template you can create the following invoices instead of creating it from start or new . To do so click on "Billing/Payments->Vendor invoices->List" click on the Draft invoice , once the invoice is open , On the "Vendor invoice" tab you need to add a product then you can see "CONVERT INTO TEMPLATE INVOICE" .
Once you click on "CONVERT INTO TEMPLATE INVOICE" . a new page appears enter the required details such as "Title" , add the notes whether "Public or Private" , If you want to create this template for recurring then at the button you can set up the "Recurring" details and click on "Create". your template will be created.