Creating sales order :
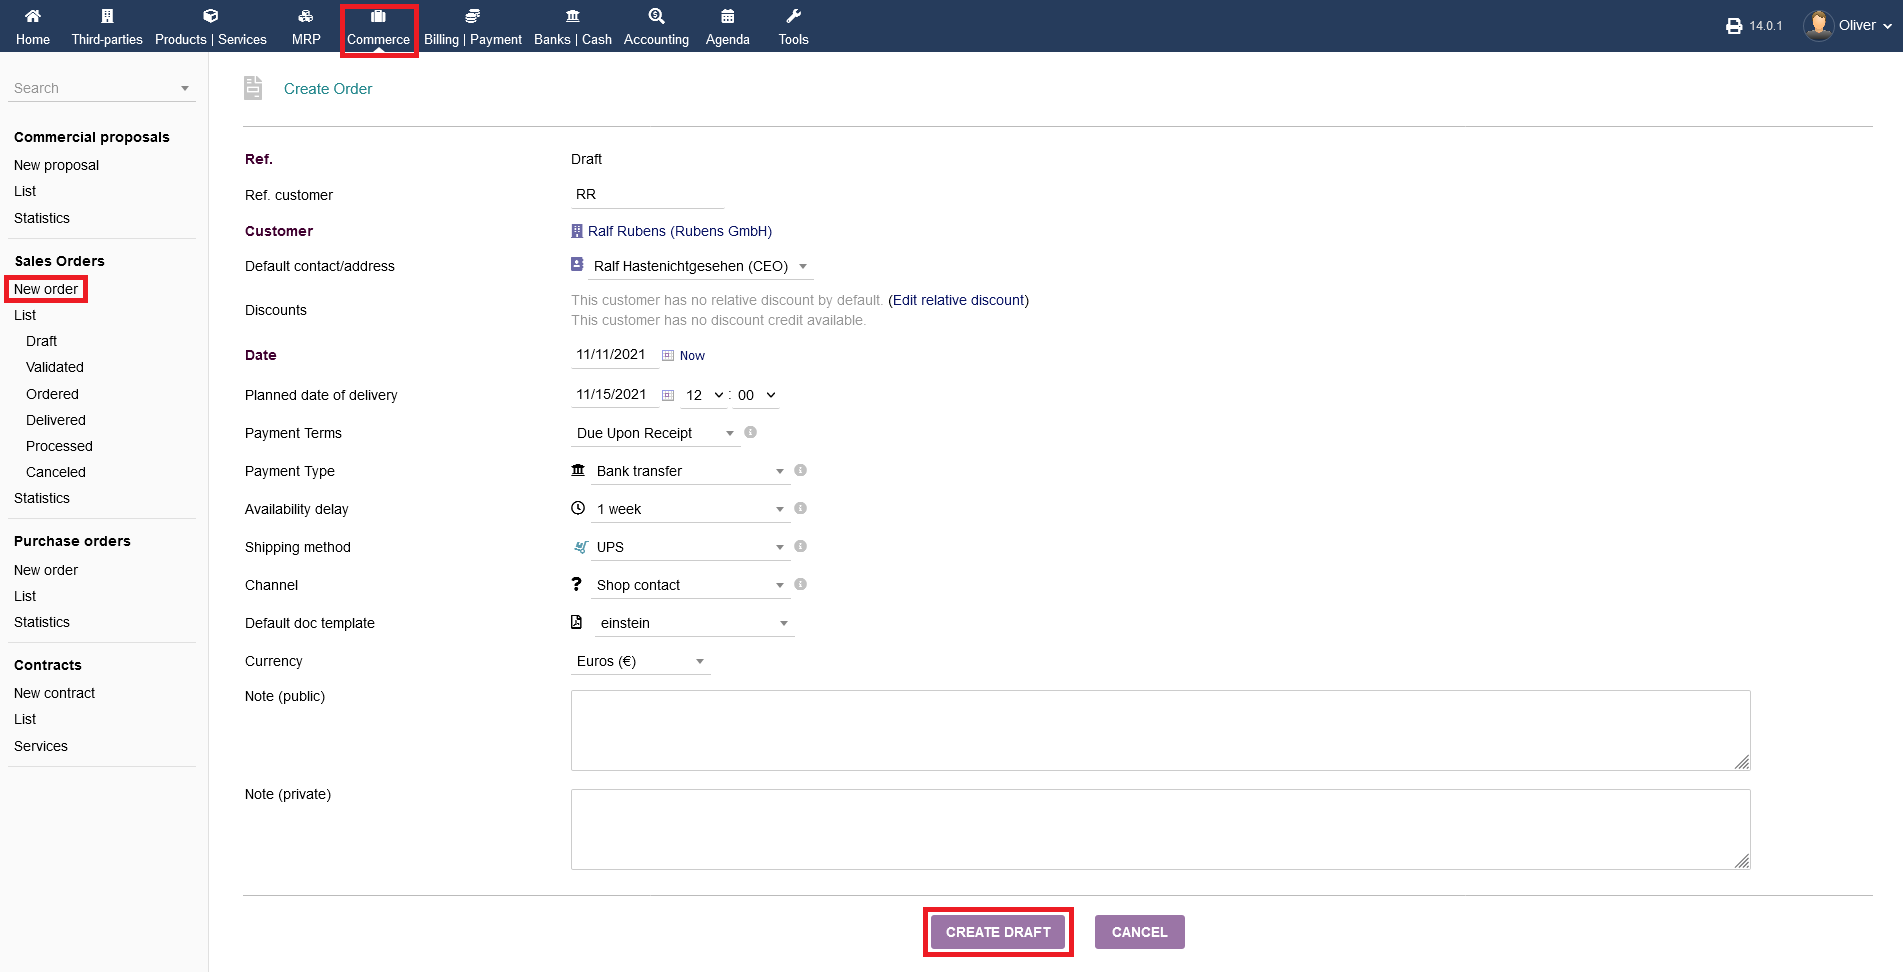
To create a proposal click on "Commerce -> Sales orders -> New order". Fill out all necessary details, especially the third party and the contact, as well as payment details, shipping details, currency etc. Click on "CREATE DRAFT" to create the initial draft.
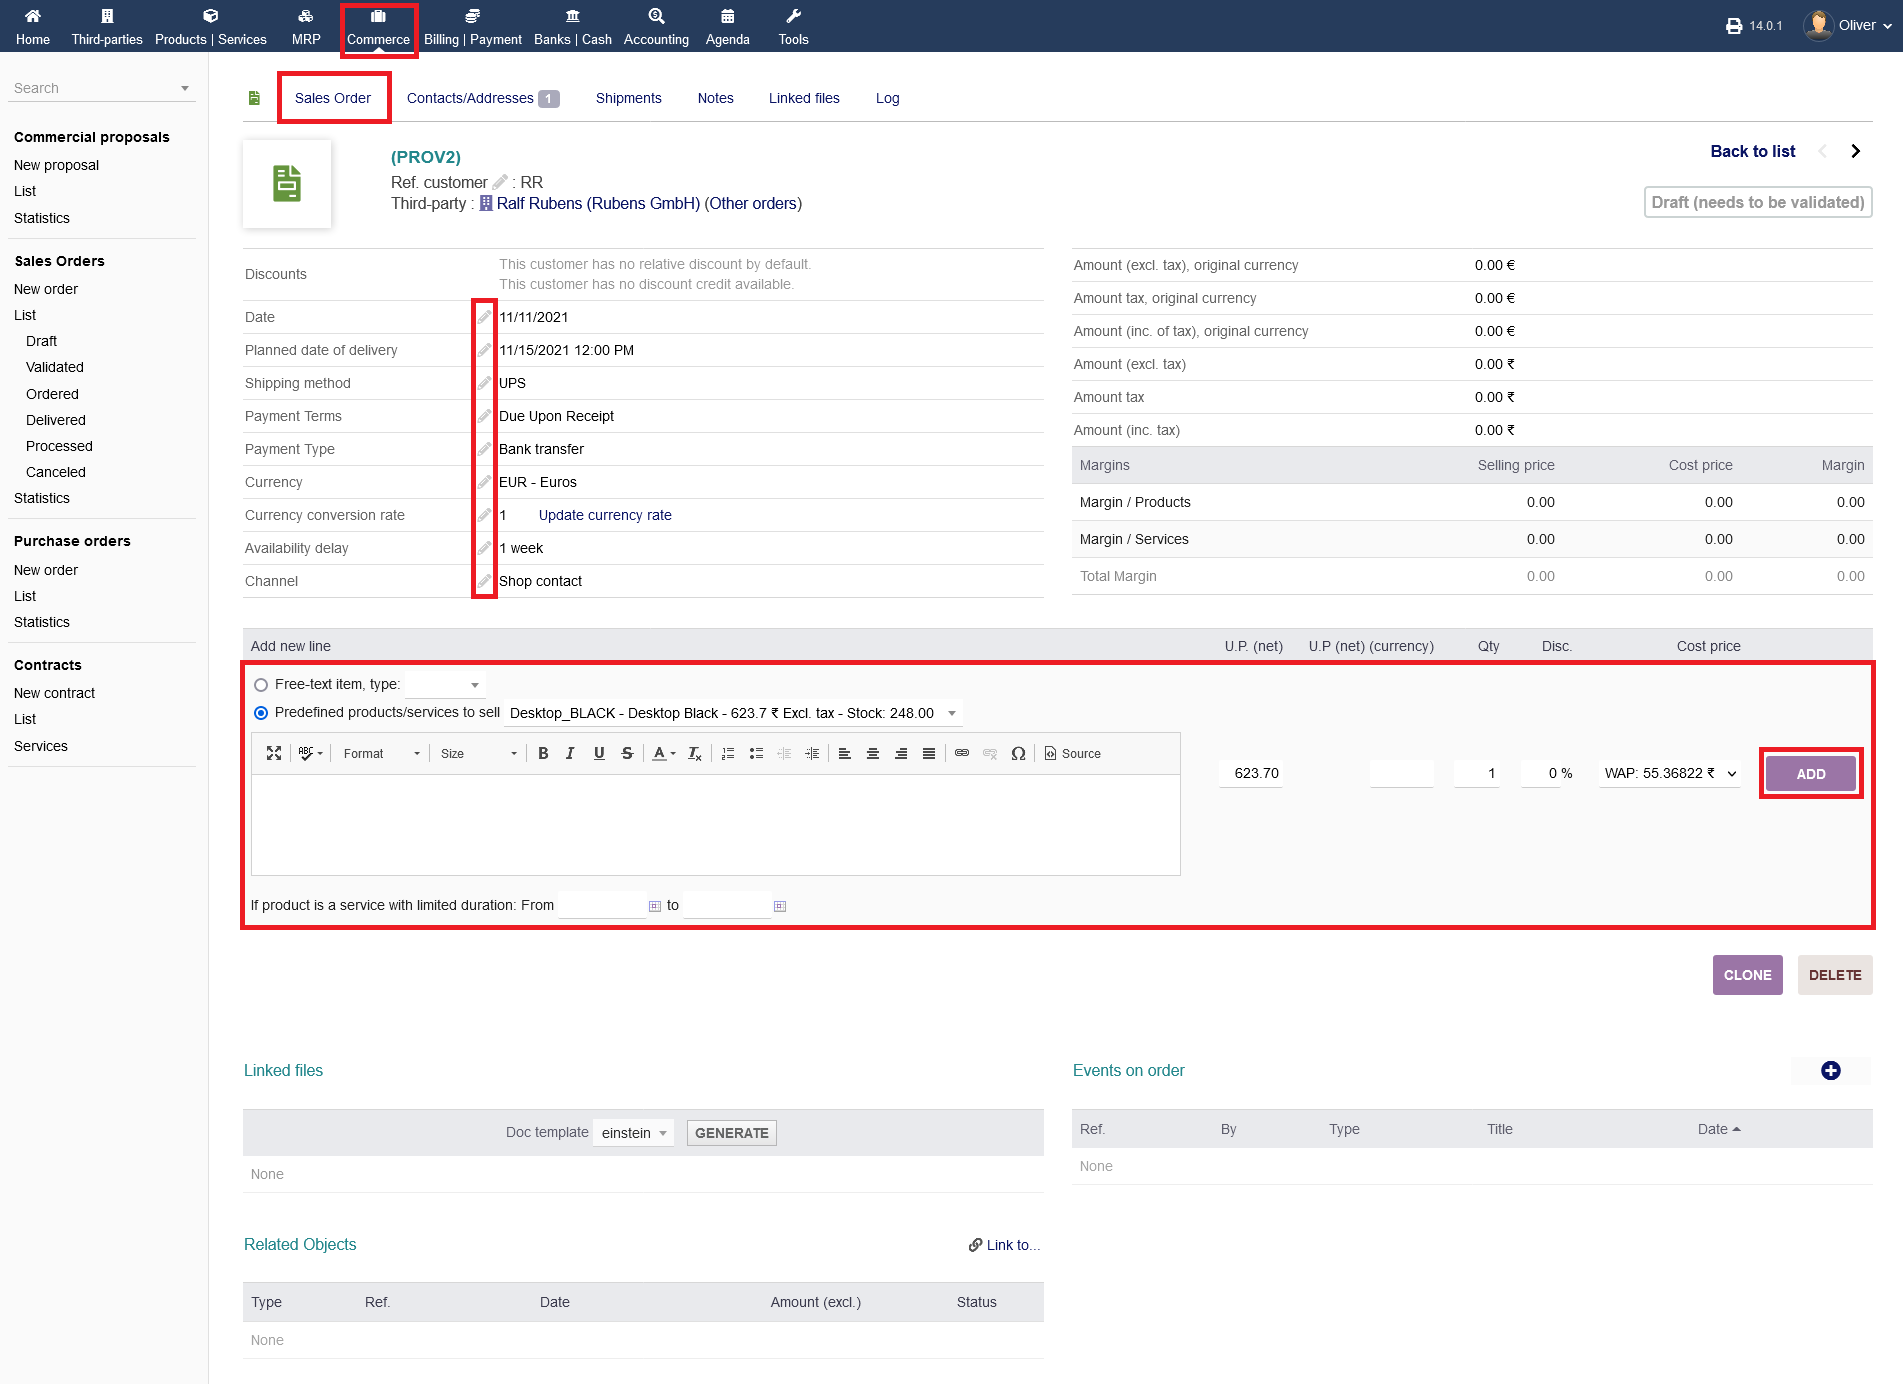
After creating the draft, you have to list the products and services to the order. You can either make a free text entry or choose a predefined item from the drop down menu. Click "ADD" to add your product/service to the listing. If you need to change any order details, click on the "pen" icon.
Validating sales orders:
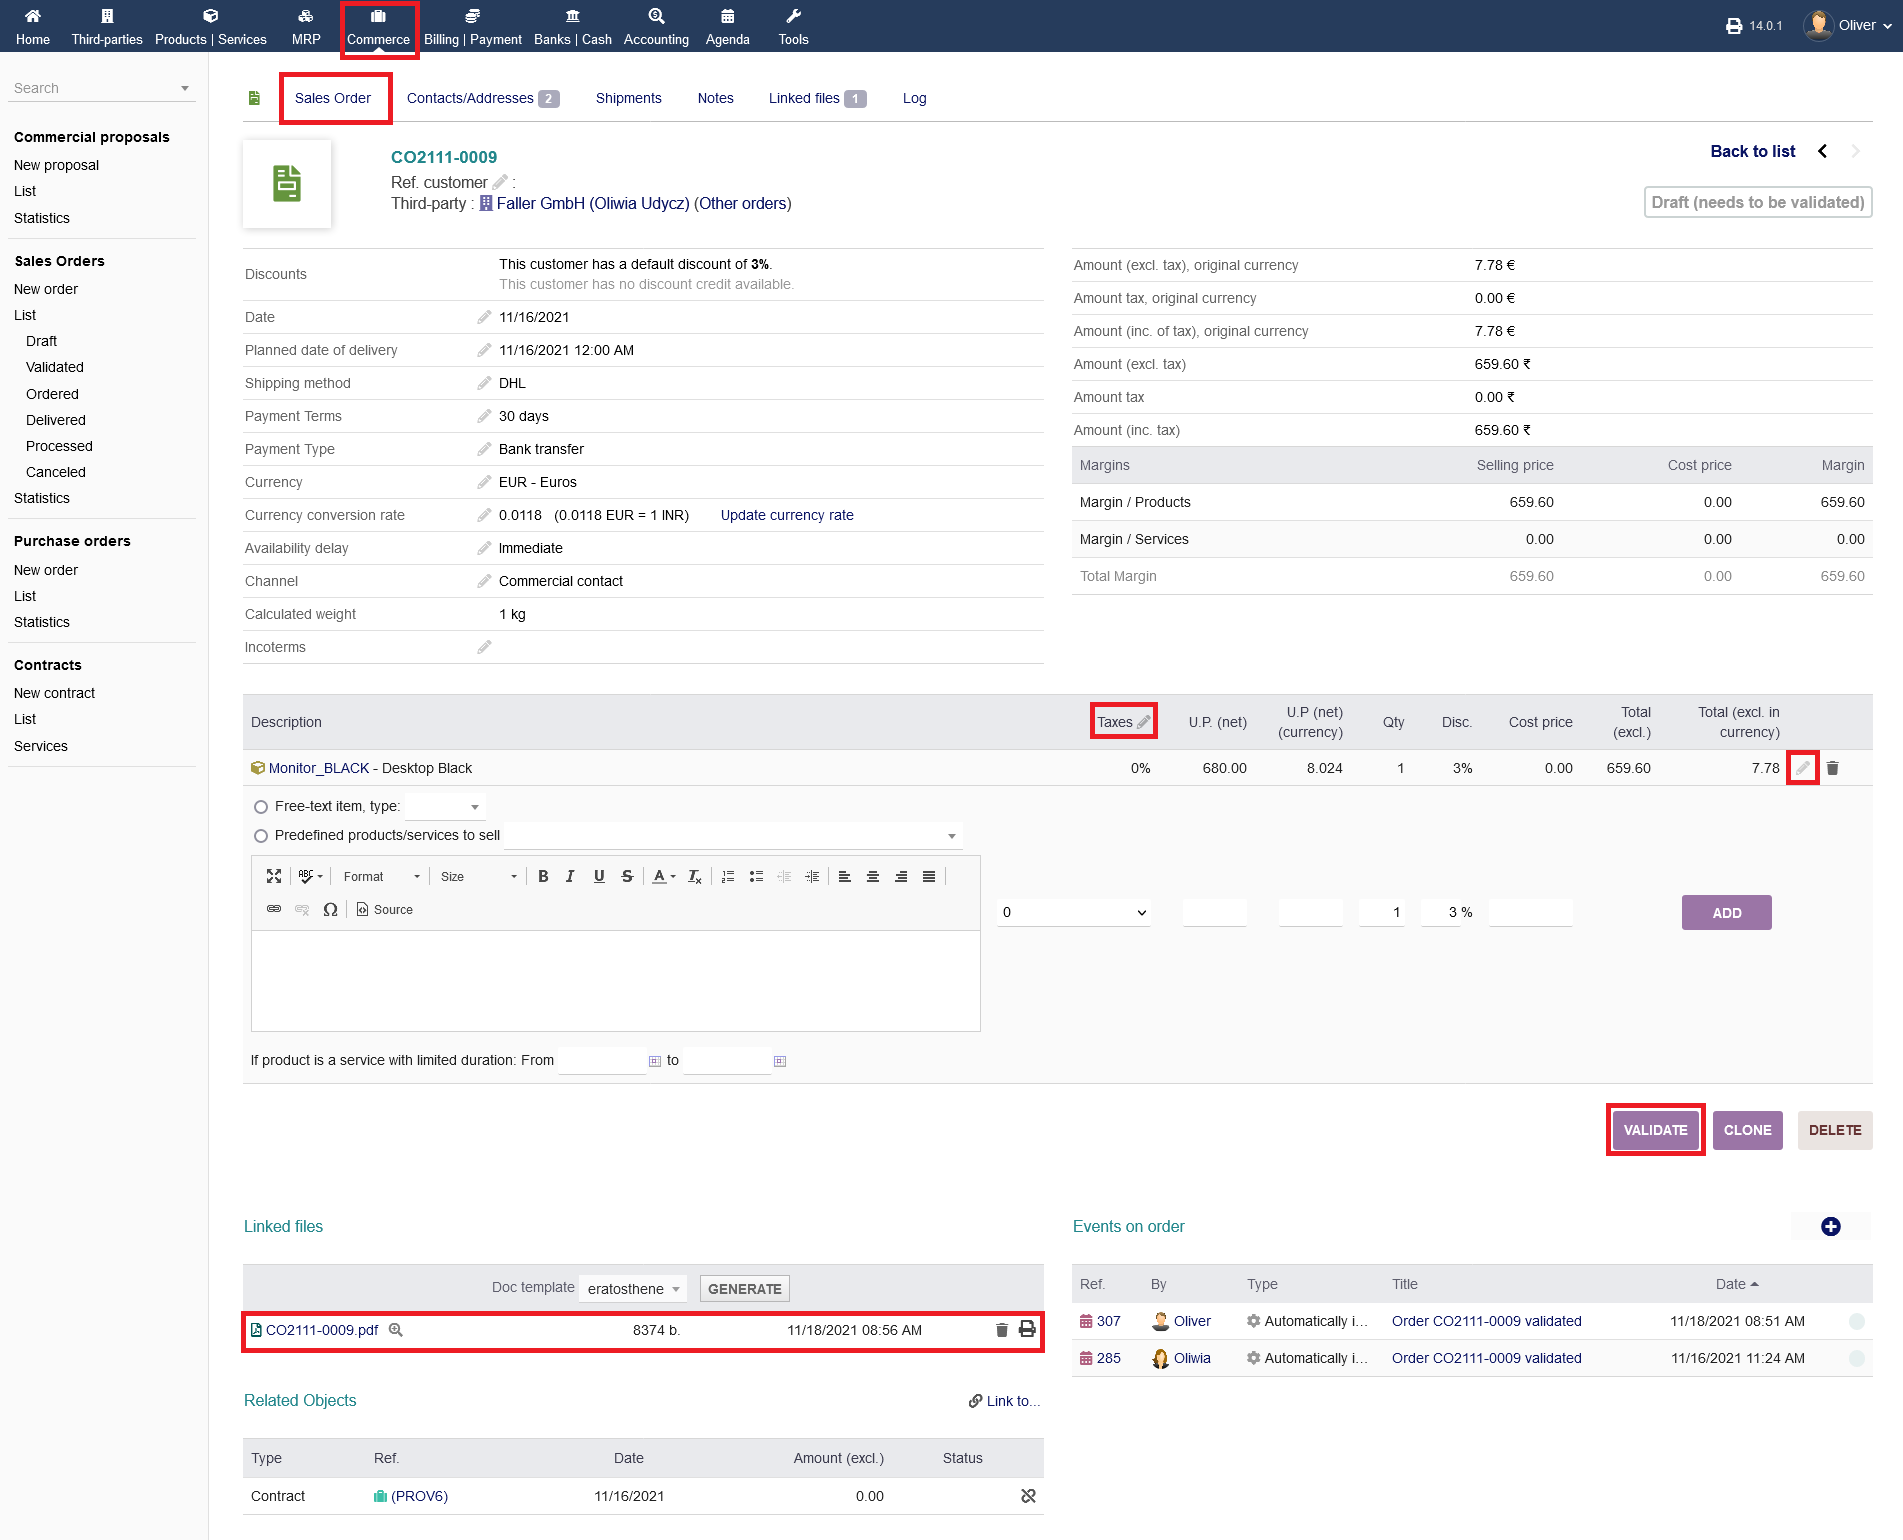
After adding all items, the finished draft needs to be confirmed. Click on "VALIDATE" to confirm the drafted order. Note, that after adding the items to your order listing, you will see an order form under the section "Linked files". You can preview, download, print and delete the order form.
If you want to update the taxes field you can either click on the "pen" icon under the section "Taxes" to change the tax rate for all lines, or click on the "pen" icon next to the "trash" icon to change anything just for that one item. If you go with the first option, a drop down menu will open in the title row where it say "Taxes". You can choose your tax rate there and click "Update" in the end. Don't leave it empty or it will change the tax rate to 0.
After validating the draft, you have multiple options on how you can proceed. You can send the customer an E-Mail by clicking on "SEND EMAIL" or edit the orders details by clicking on "MODIFY". You can create a contract if necessary by clicking on "CREATE CONTRACT". Refer to the respective documentation for everything regarding contracts.
Furthermore, you can directly make shipment ready by clicking on "CREATE SHIPMENT". If you have sent the order already, you can set the order as delivered by clicking on "CLASSIFY DELIVERED". You also can create the invoice for that order by clicking on "CREATE INVOICE". For invoicing, please refer to the documentation on "Invoicing".
You also can set the order as billed already by clicking on "CLASSIFY BILLED". Finally, you have the usual option of modifying/editing the order details, cloning the order, canceling or deleting the order. Click on the respective buttons for that.
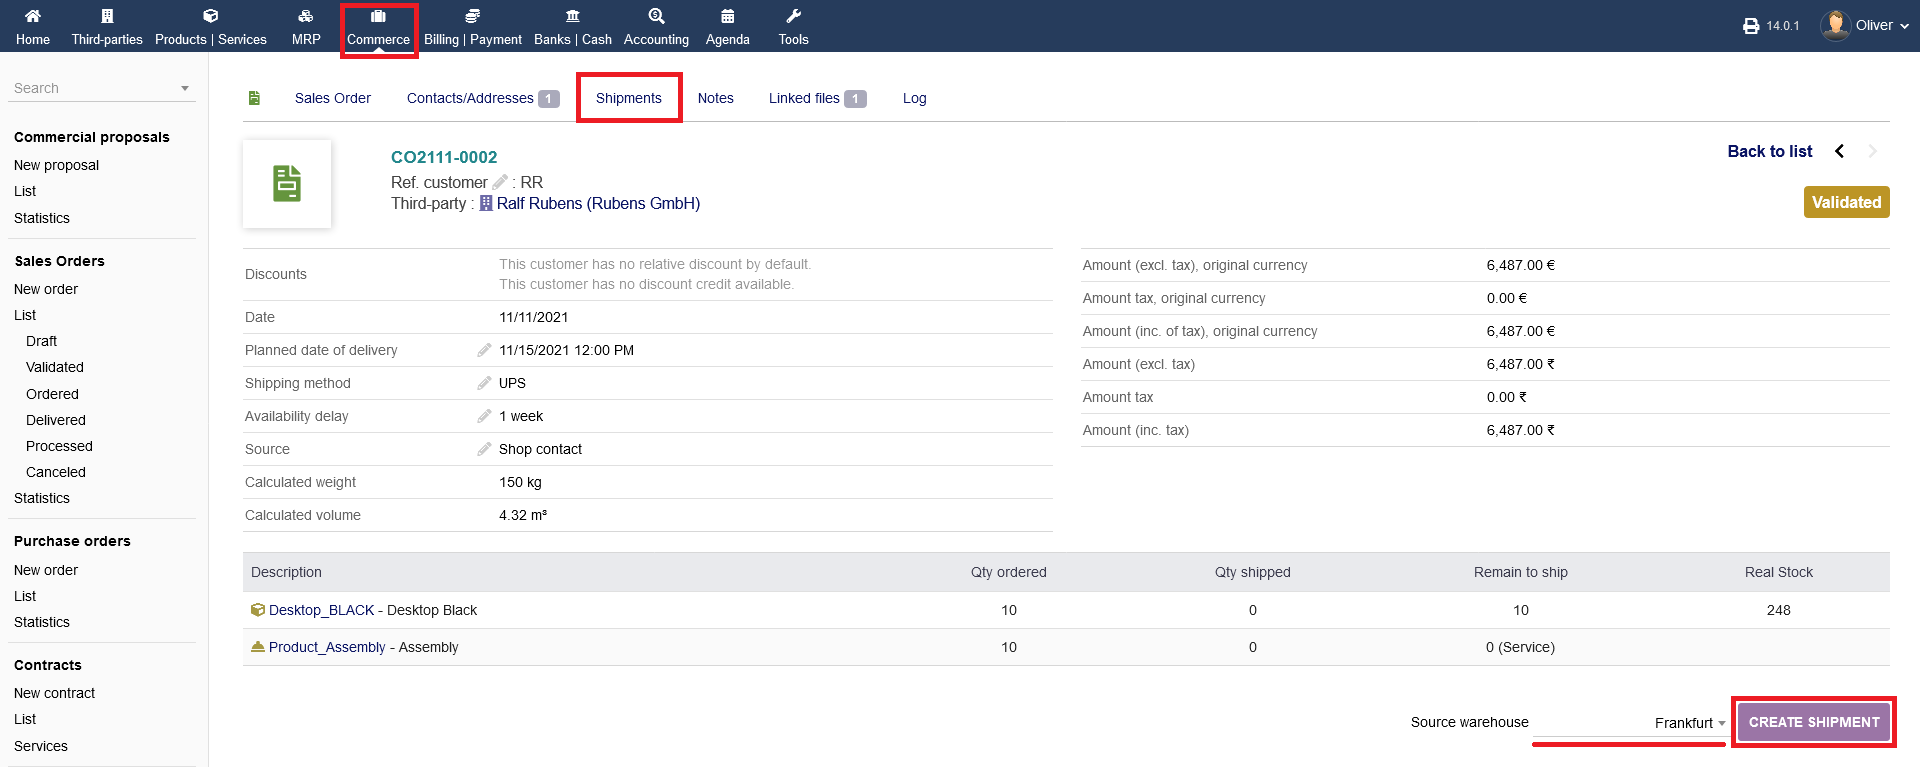
 Since the topics on invoicing and contracting are covered separately, we will continue with the shipping process. Click on "CREATE SHIPMENT" (see screenshot above). The tabbed menu is going to change to "Shipments" automatically. Choose a "Source warehouse" and click on "CREATE SHIPMENT".
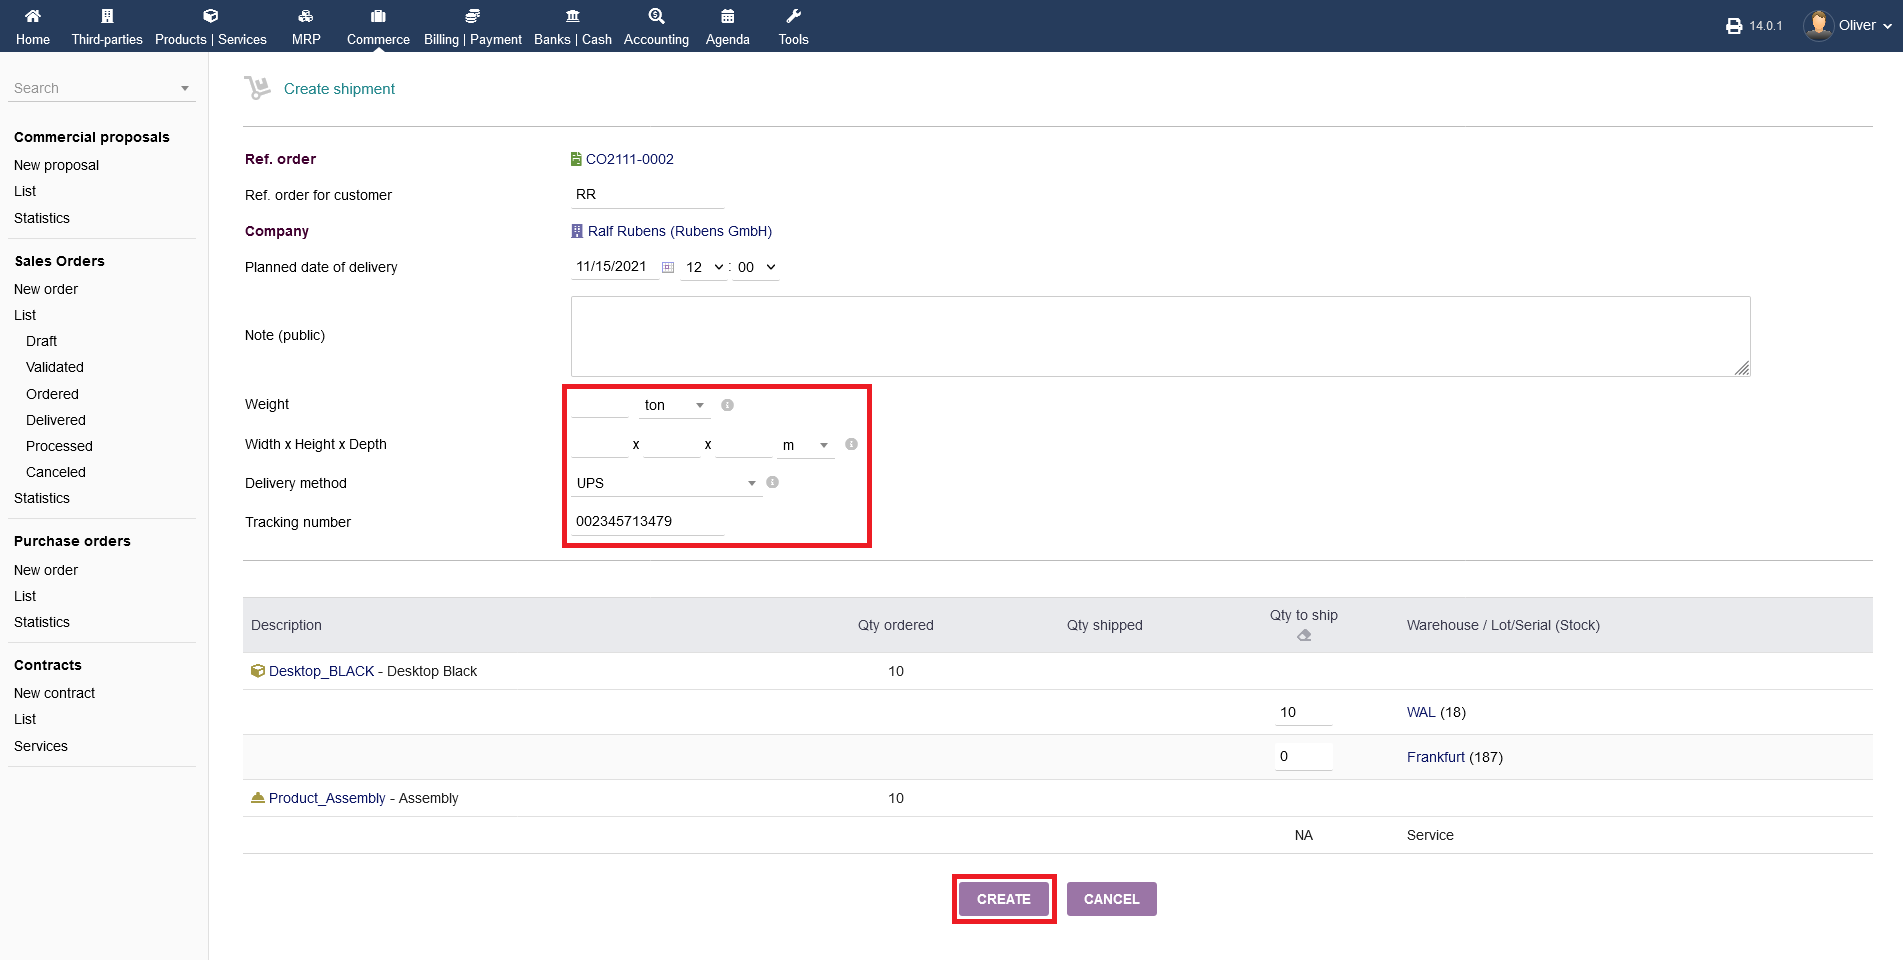
After that, fill out the upcoming form with all necessary details and click on "CREATE" when you are done.
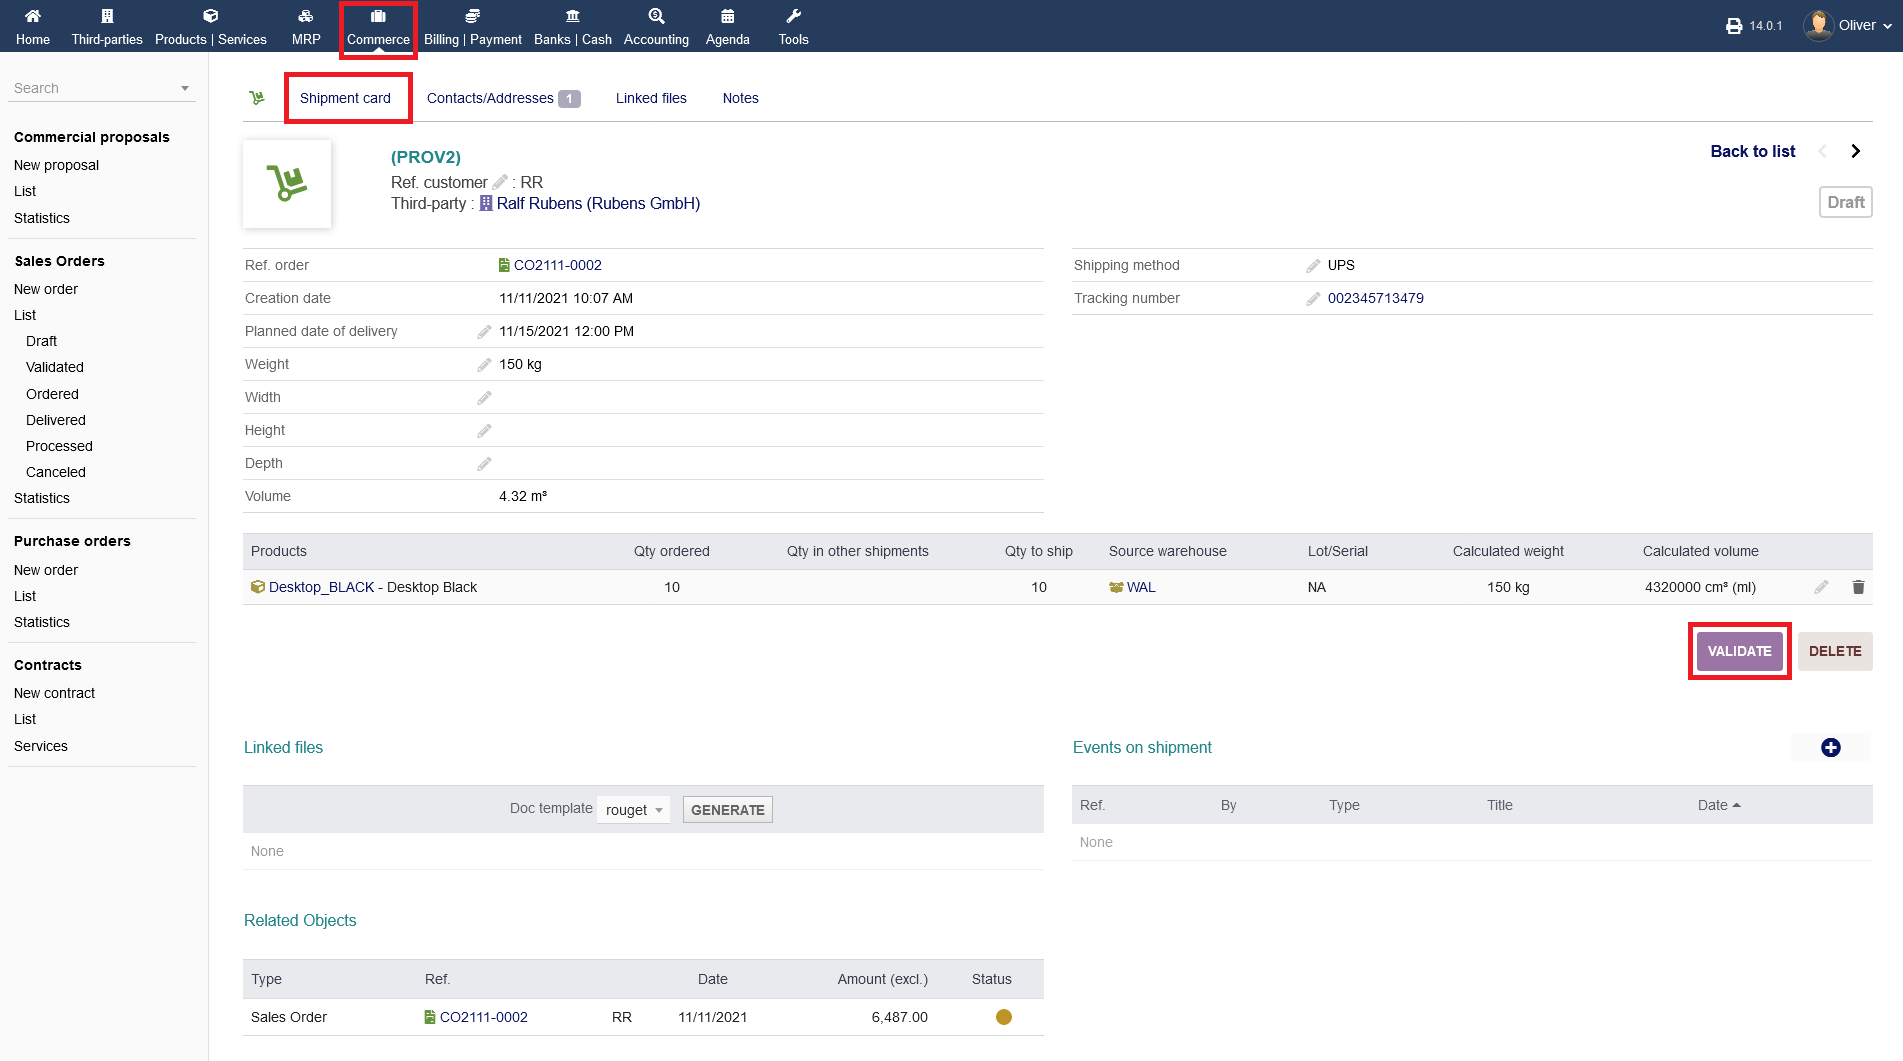
After creating the shipment, you will be redirected to the shipment card, where you have to validate the drafted shipments entry. Click on "VALIDATE".
Close sales orders :
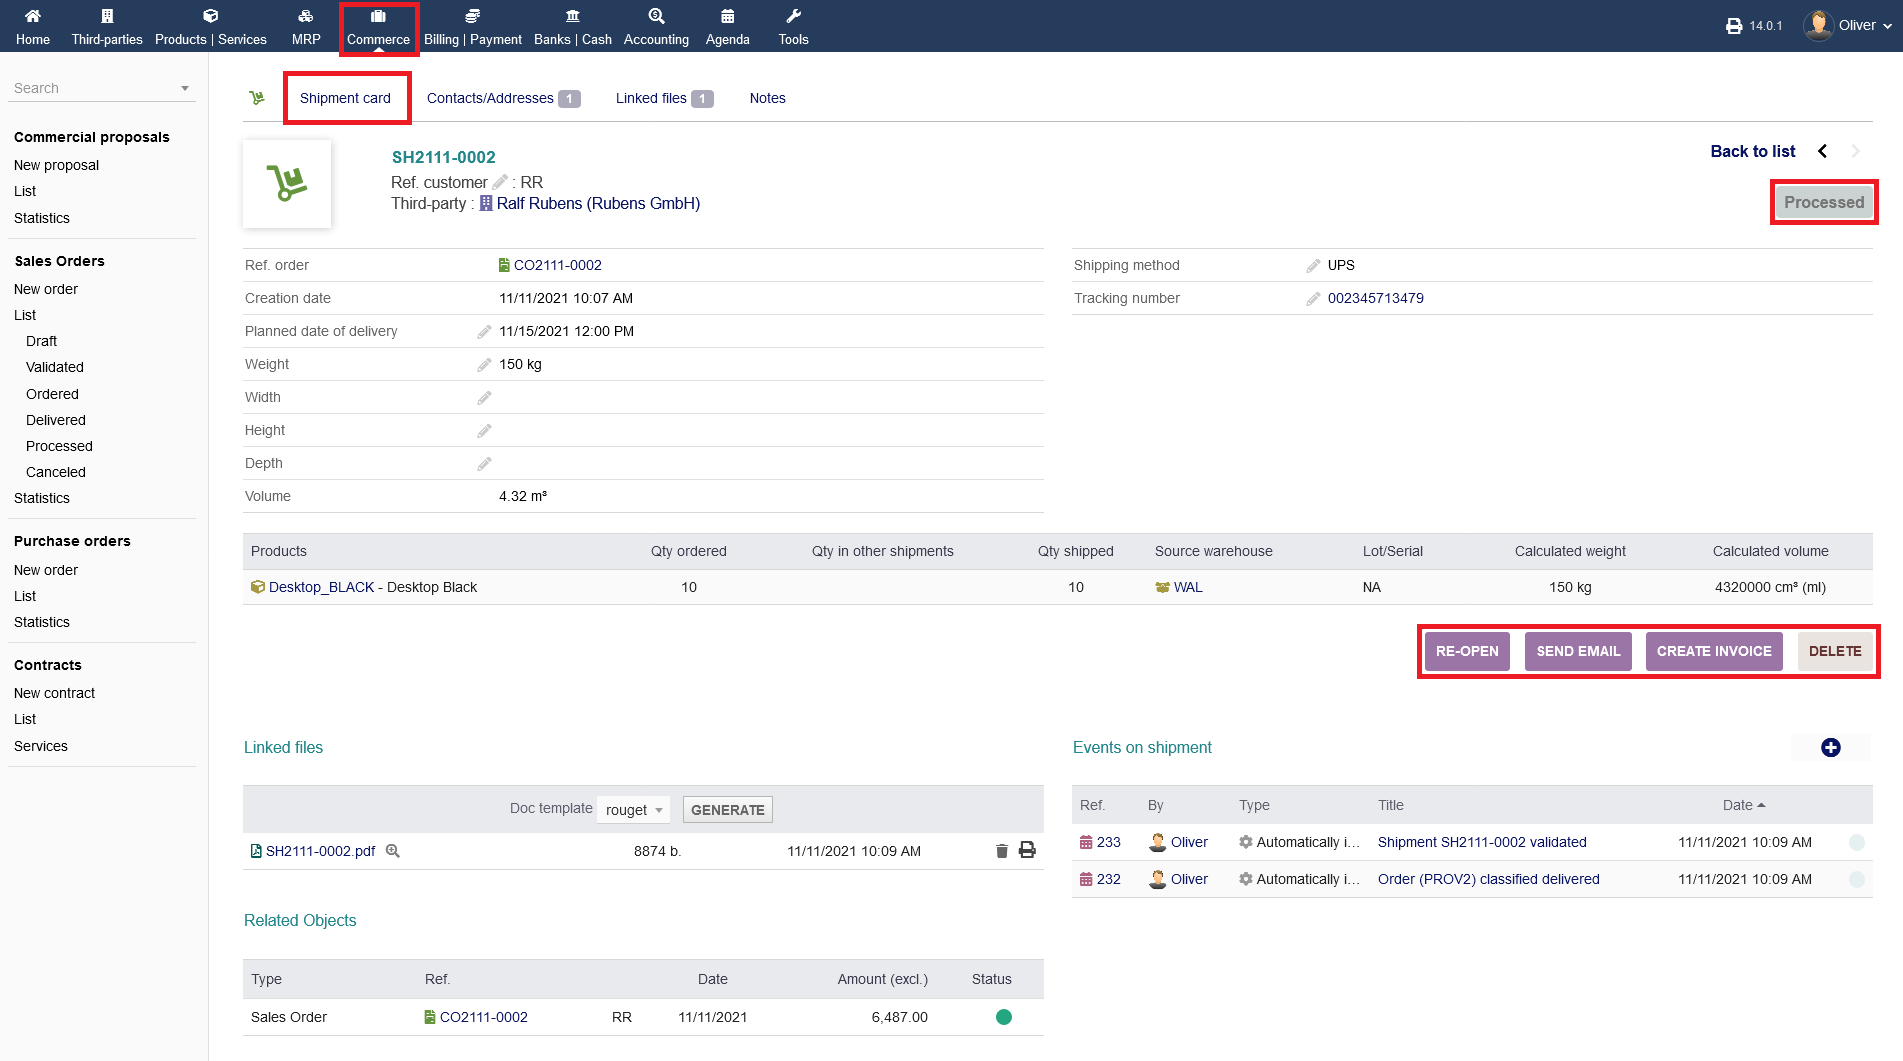
After validation, the status will change to "Validated (products to ship or already shipped)". Now, you can proceed with invoicing or close the shipping process by clicking on "CLOSE".
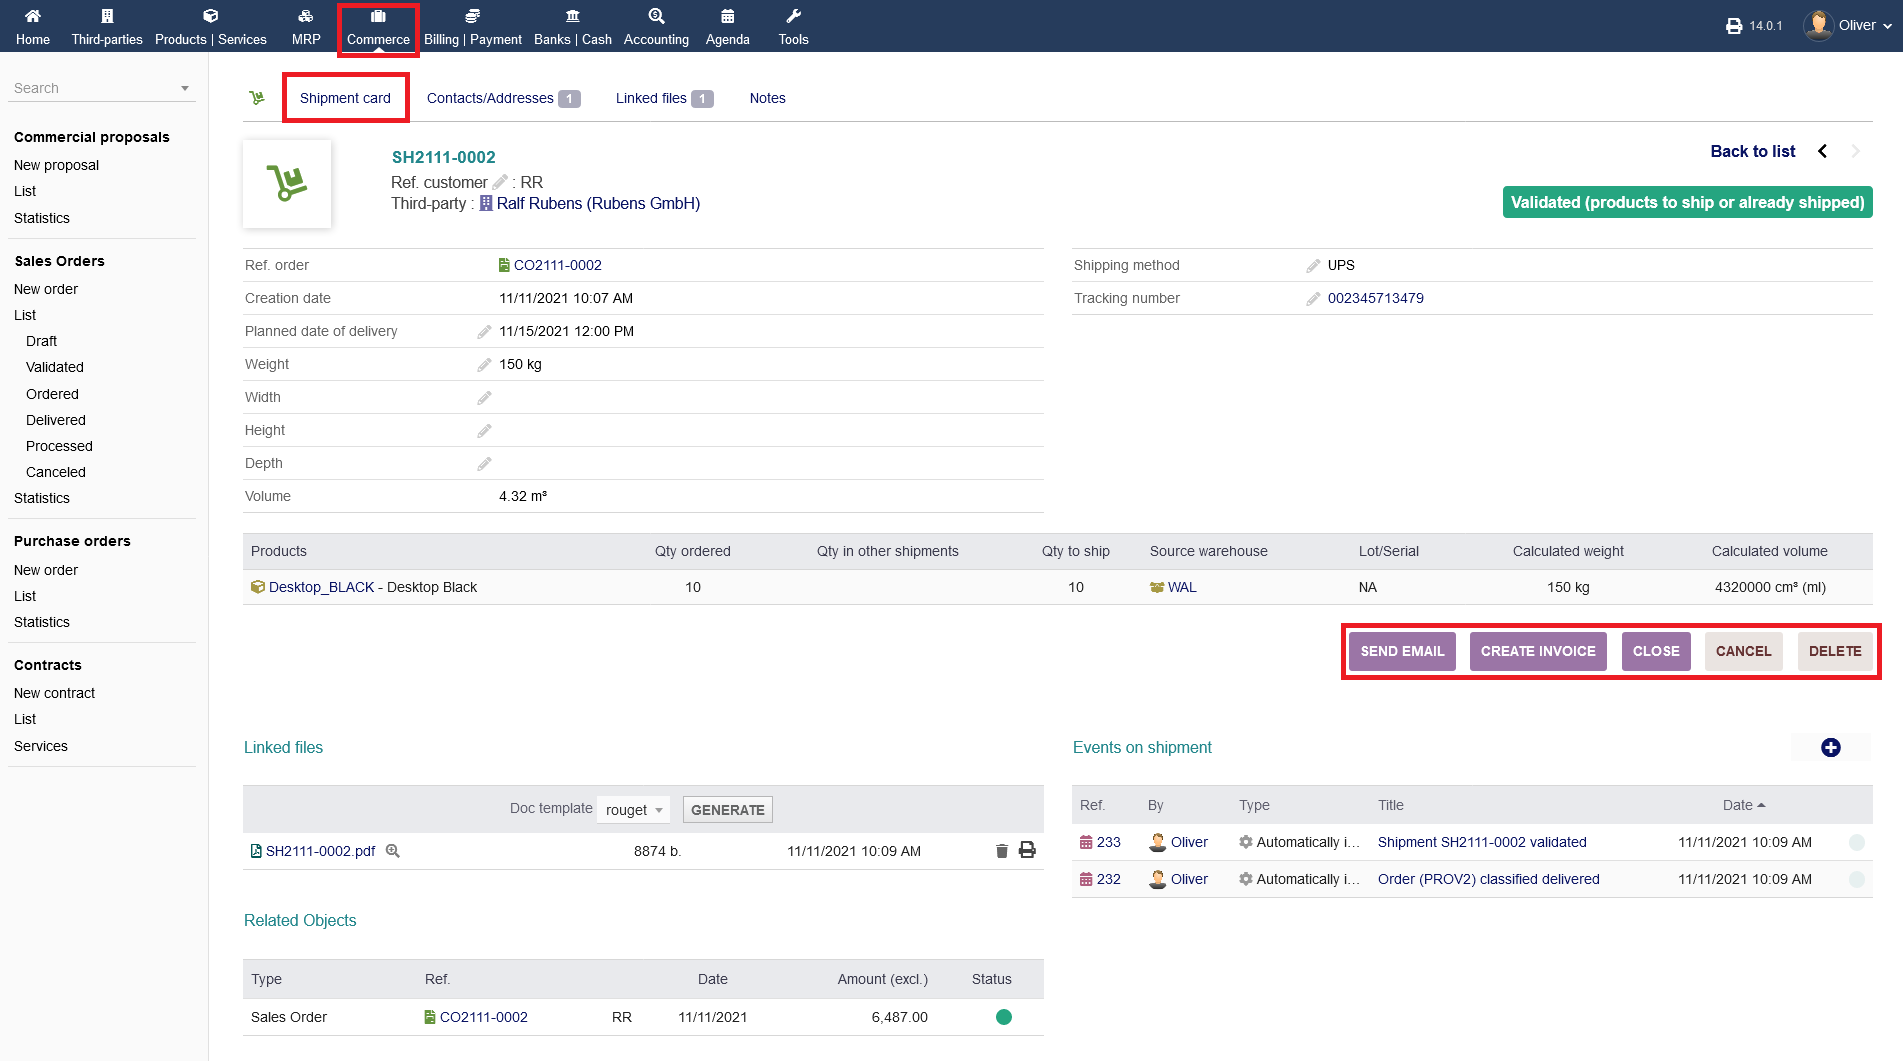
After closing the process, you can still re-open the shipping card or still proceed with invoicing by clicking on the respective buttons.
On the bottom of the list, you will see the respective sales order under the section "Related Objects" and the shipment sheet under the section "Linked files". and the Events that took place for this shipment under "Events on shipment " section . At this point, you are done.