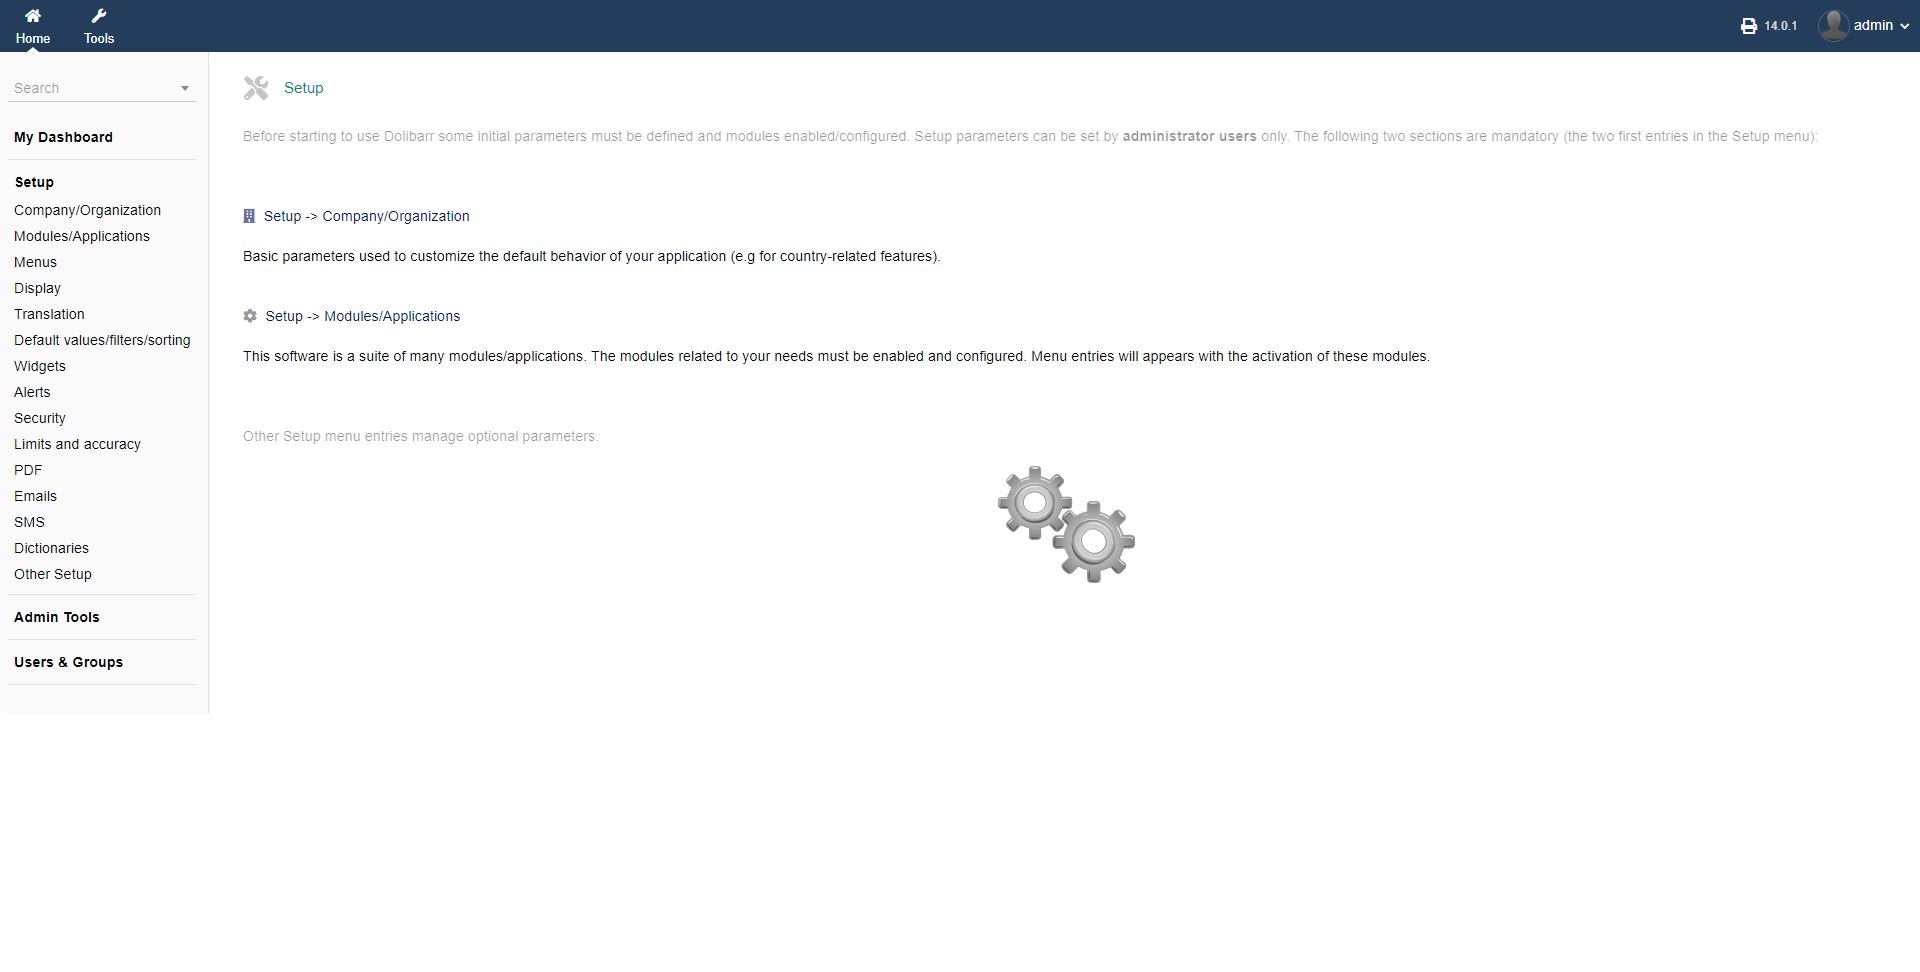
In order to use intERP for your purposes, you need to setup the software accordingly with all the necessary information unter "Setup". Additionally, you can toggle intERP modules on or off that you need to use for your purposes.
2.1 Company/Organisation
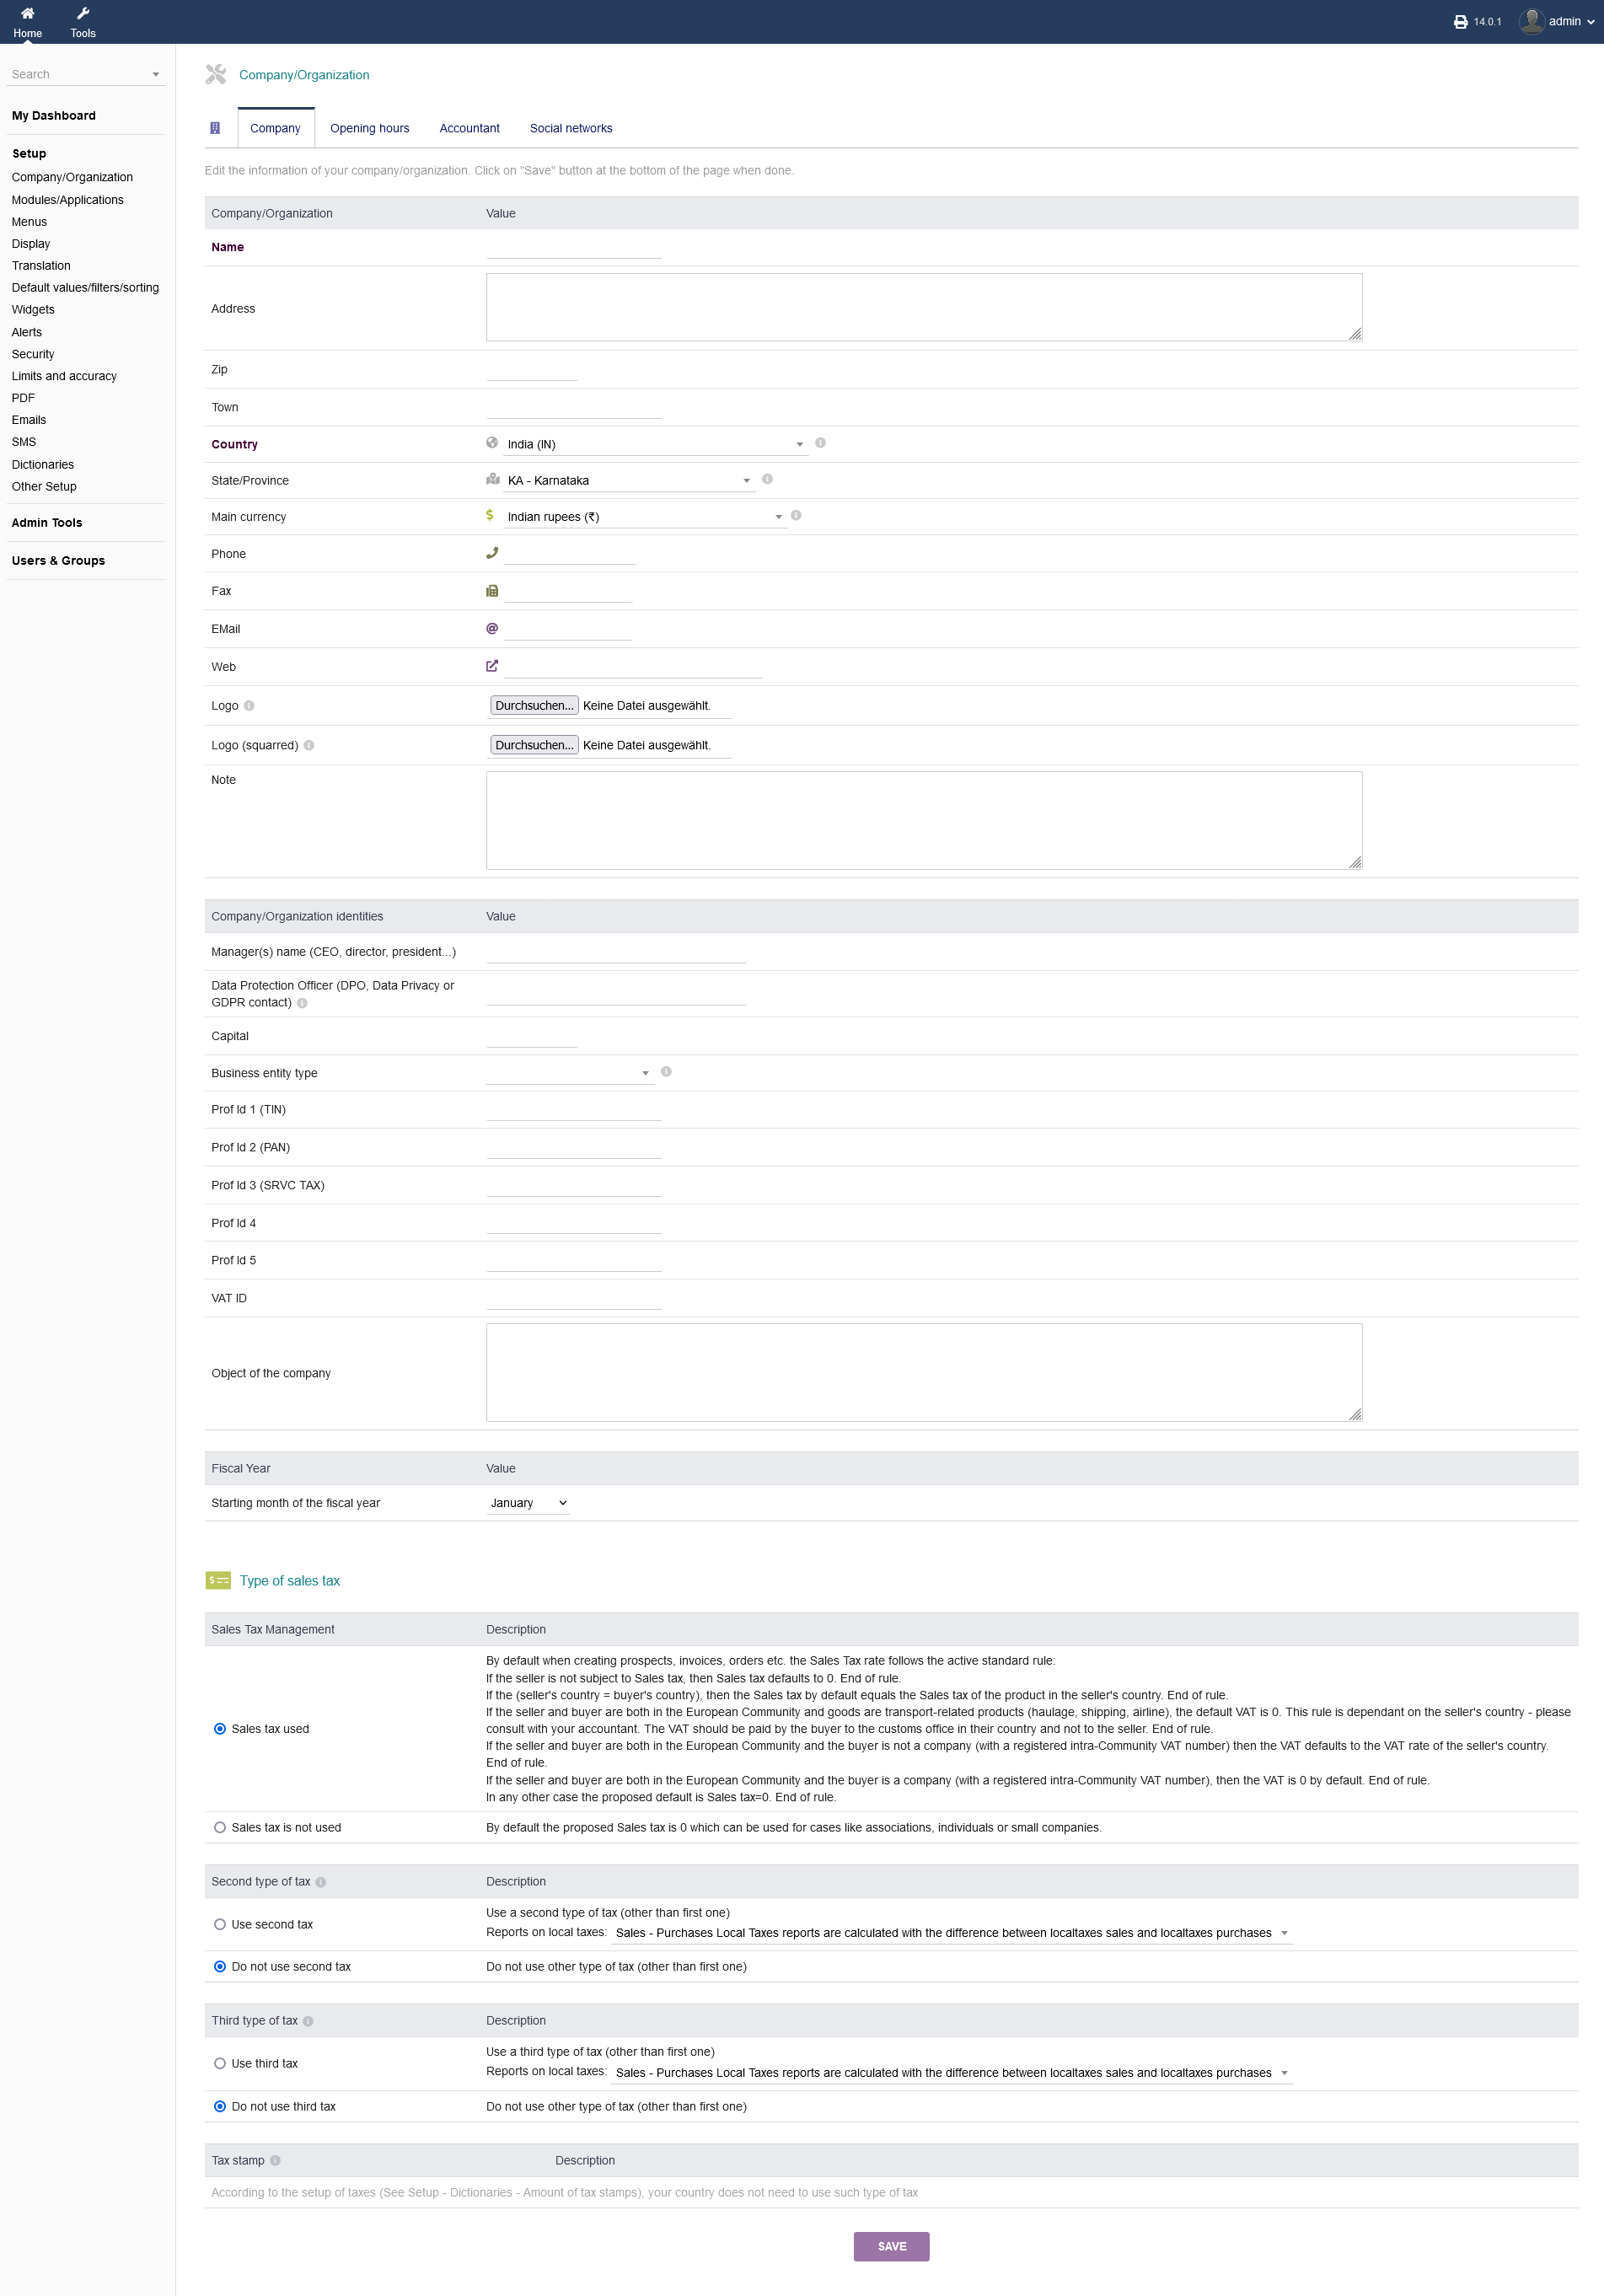
Under the option "Setup -> Company/Organisation" in your left side panel, you can set up all necessary information such as the basic "Company" details, your "Opening hours", the "Accountant" information if you have an external accountant and any "Social networks" you may use for your business.
2.1.1 Company
You basic information is required under the "Company" option. There, you can set all displayed options that fit your business. These information get pulled in other intERP modules (e.g. address, currency etc. for creating invoices), so it is recommended to fill out everything thoroughly. When you are done, click "SAVE".
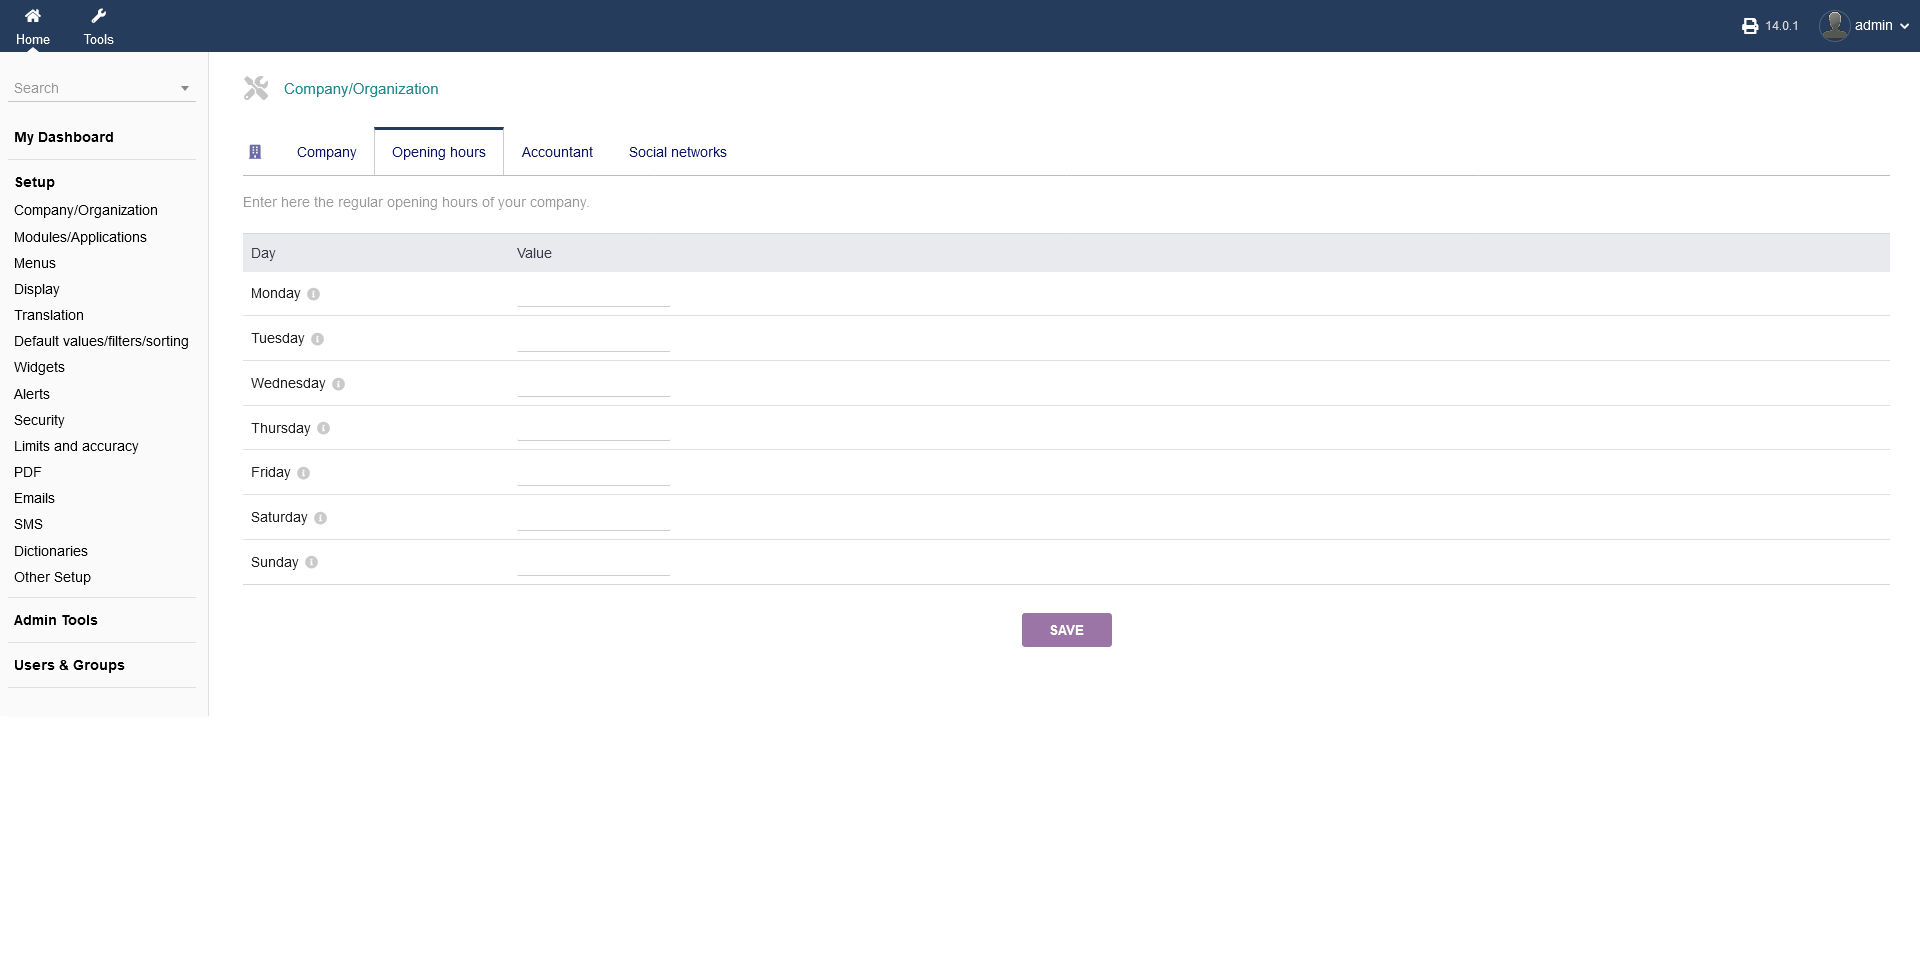
2.1.2 Opening hours
Your data of you "Opening hours" will get pulled as well, depending on the modules you use. When you are done, click "SAVE".
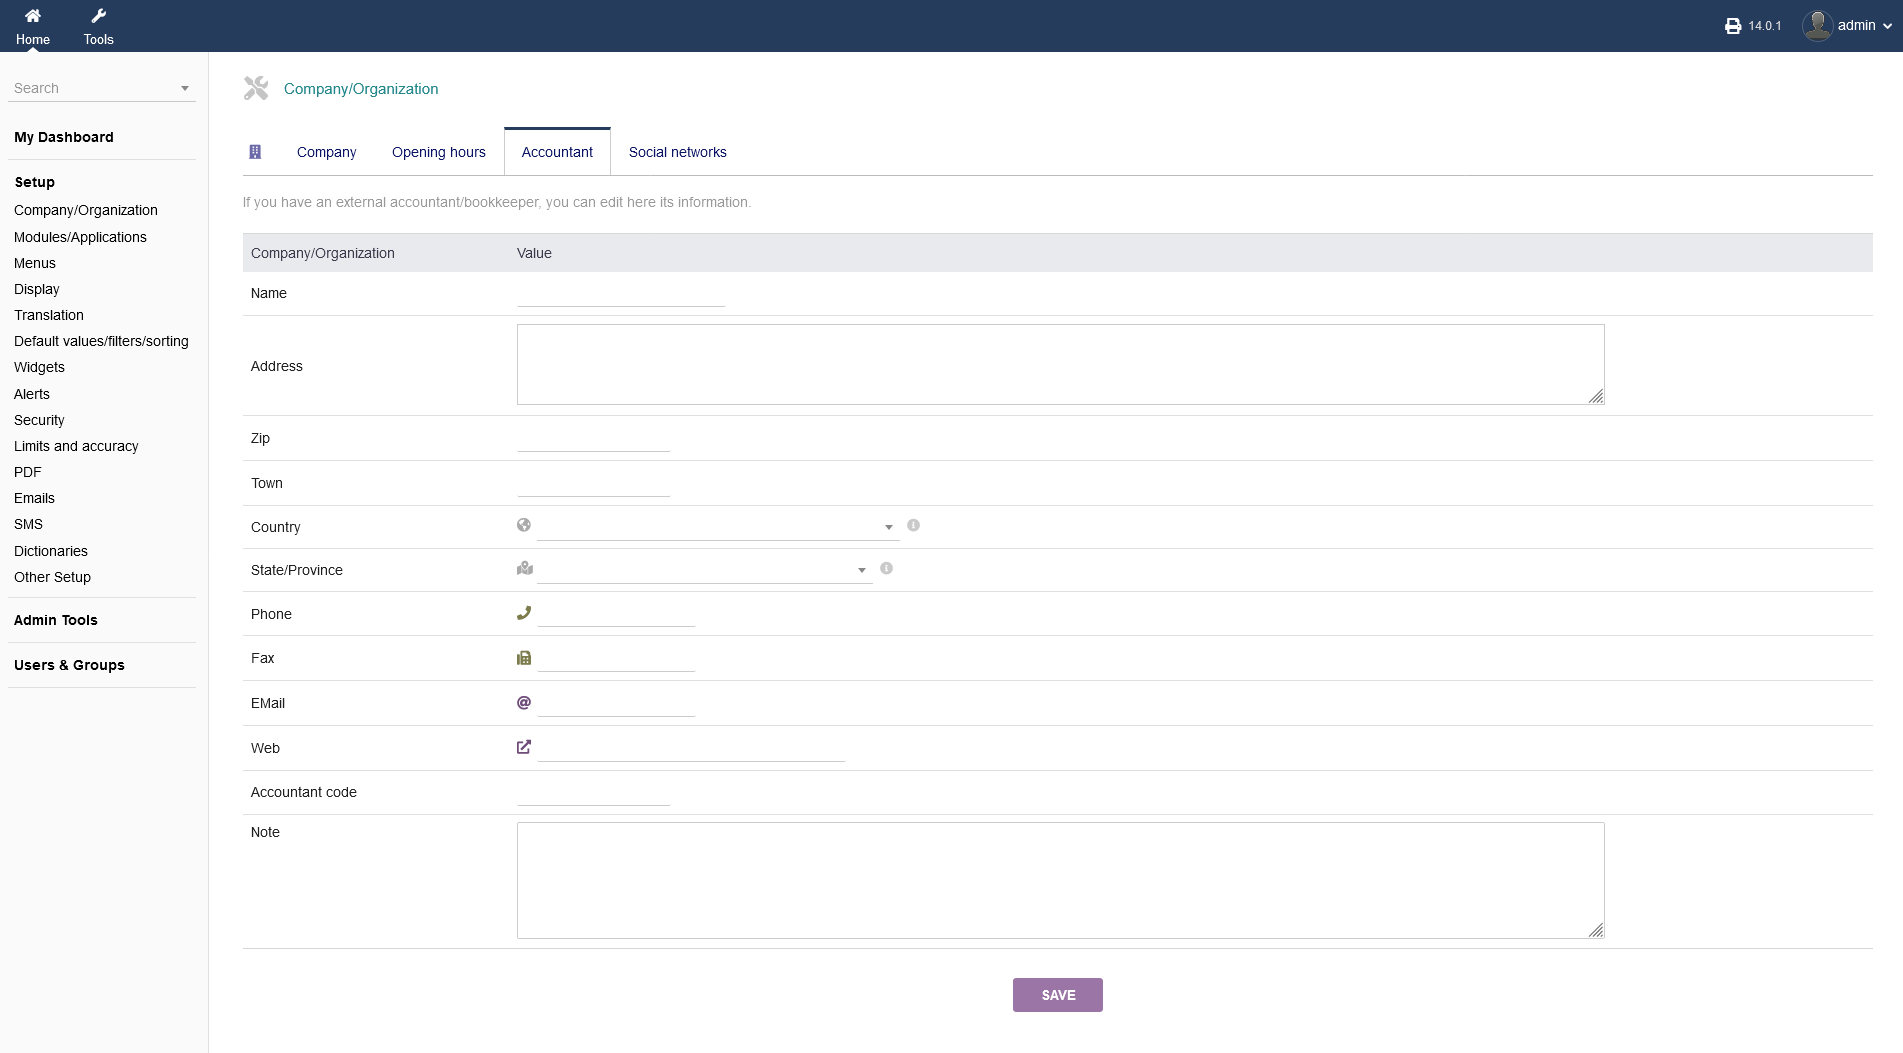
2.1.3 Accountant
In case you use an external "Accountant" for your business, you can set up any details about that person here. If you use multiple accountants, you can use "Accountant code" to differentiate them. When you are done, click "SAVE".
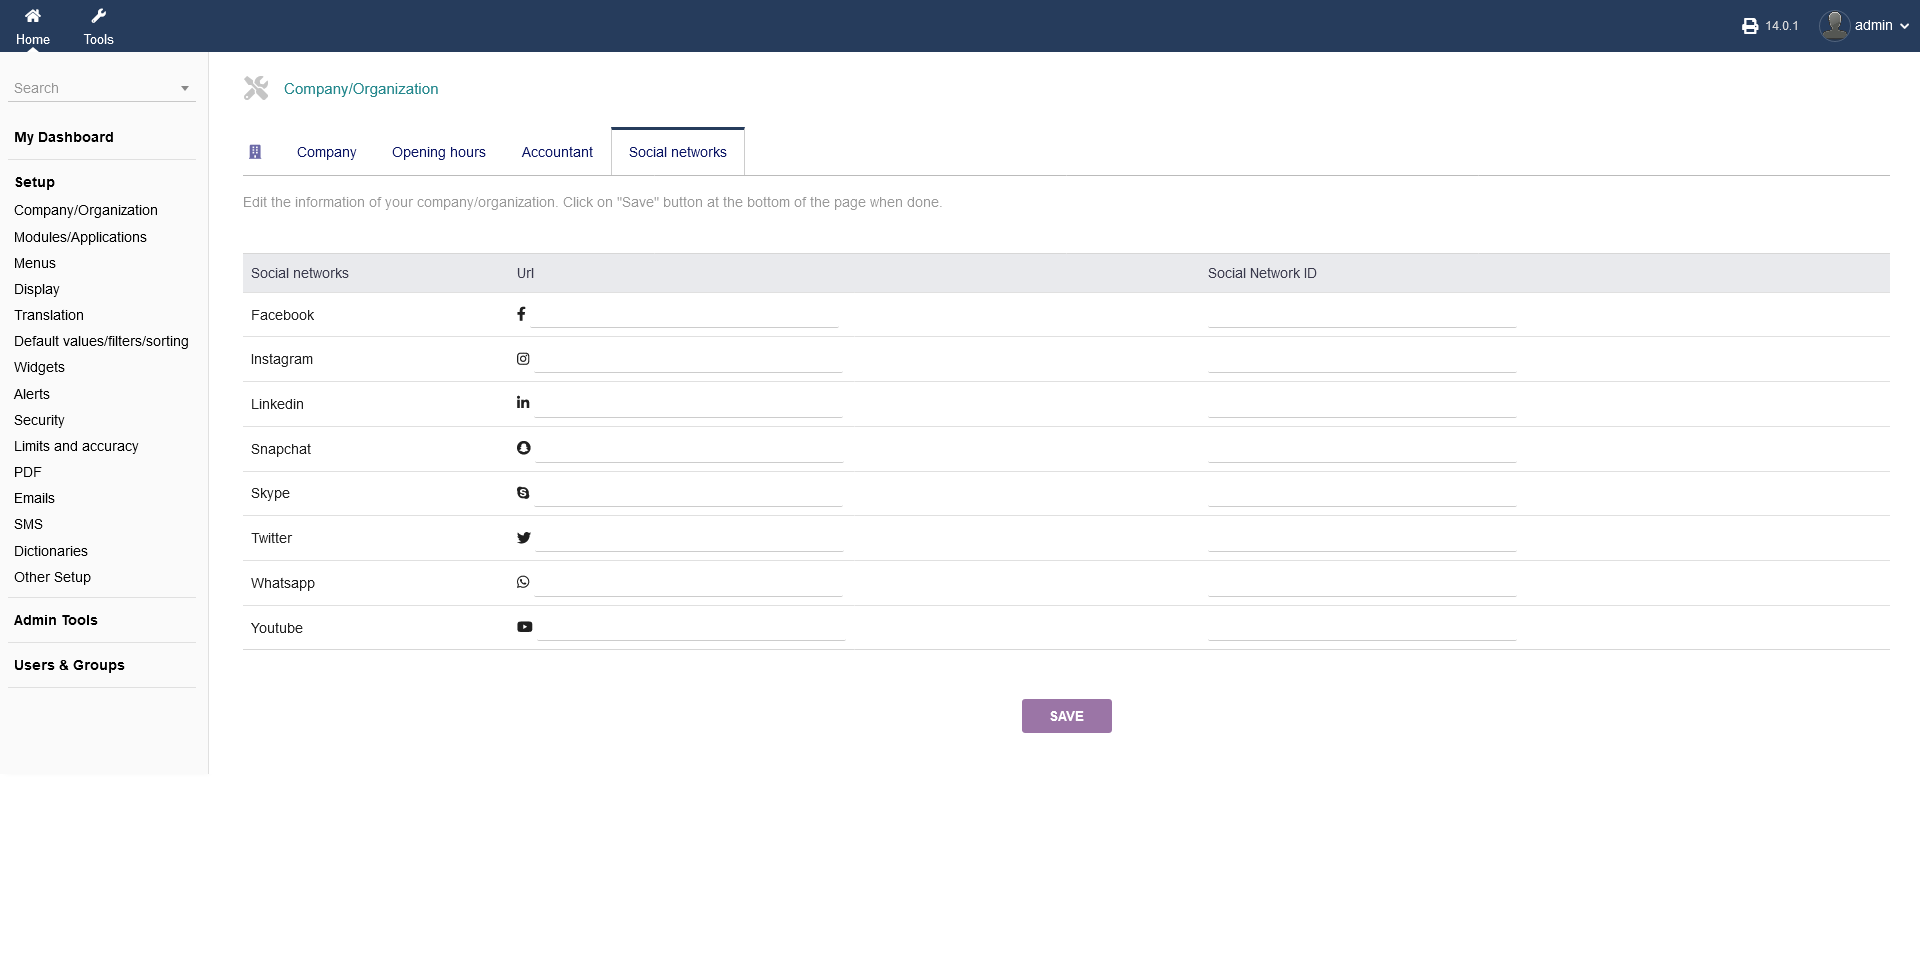
2.1.4 Social Networks
You may use different social media networks as a modern business. To keep track of it, you can save the URL as well as the ID of each network under "Social networks". That data may be pulled by other intERP modules as well. When you are done, click "SAVE".
2.2 Modules/Applications
To use intERP as a ERP/CRM software properly, you want to enable the required modules you need to run your business. You find all availbale intERP modules Under "Setup -> Modules/Applications".
2.2.1 Available Apps/Modules
Following module categories are available to you by default: Human Resource Management (HR), Customer Relationship Management (CRM), Vendor Relationship Management (VRM), Financial Modules (Accounting/Treasury), Product Management (PM), Projects/Collaborative work, Electronic Content Management (ECM), Multi-modules tools, Websites and other frontal application, nterfaces with external systems and System rekated modules.
In order to navigate to a specific module more efficiantly, use eigther the keyword search functionality (left hand side) or toggle the listing view (right hand side). You can use the switch to toggle them on or off. If you have toggled a module on, you can click the gear icon to go to the more indepth module options.
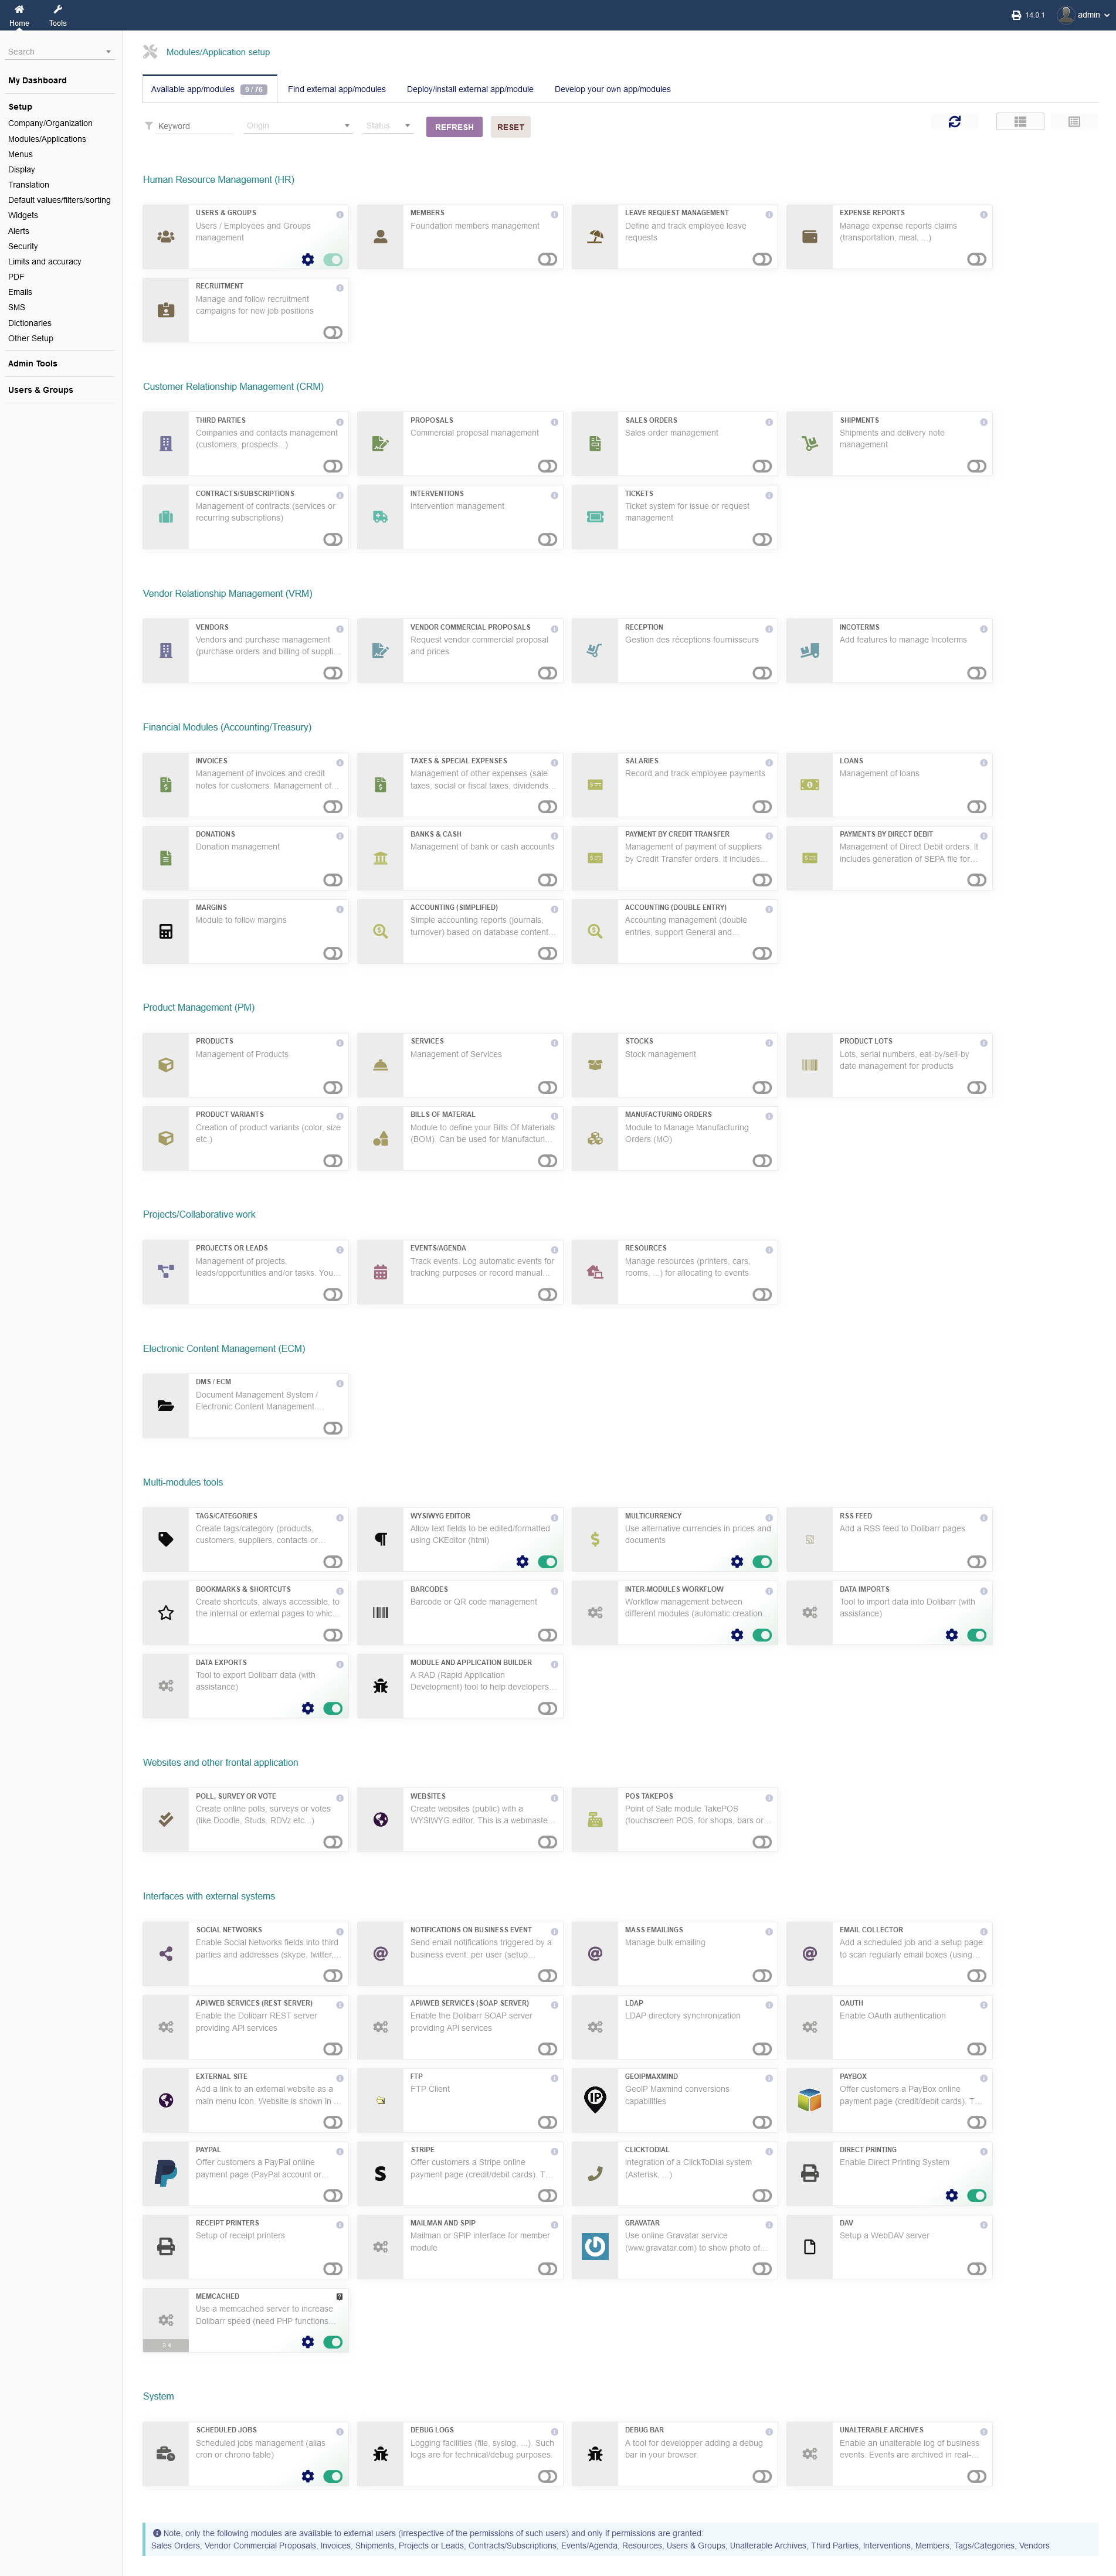
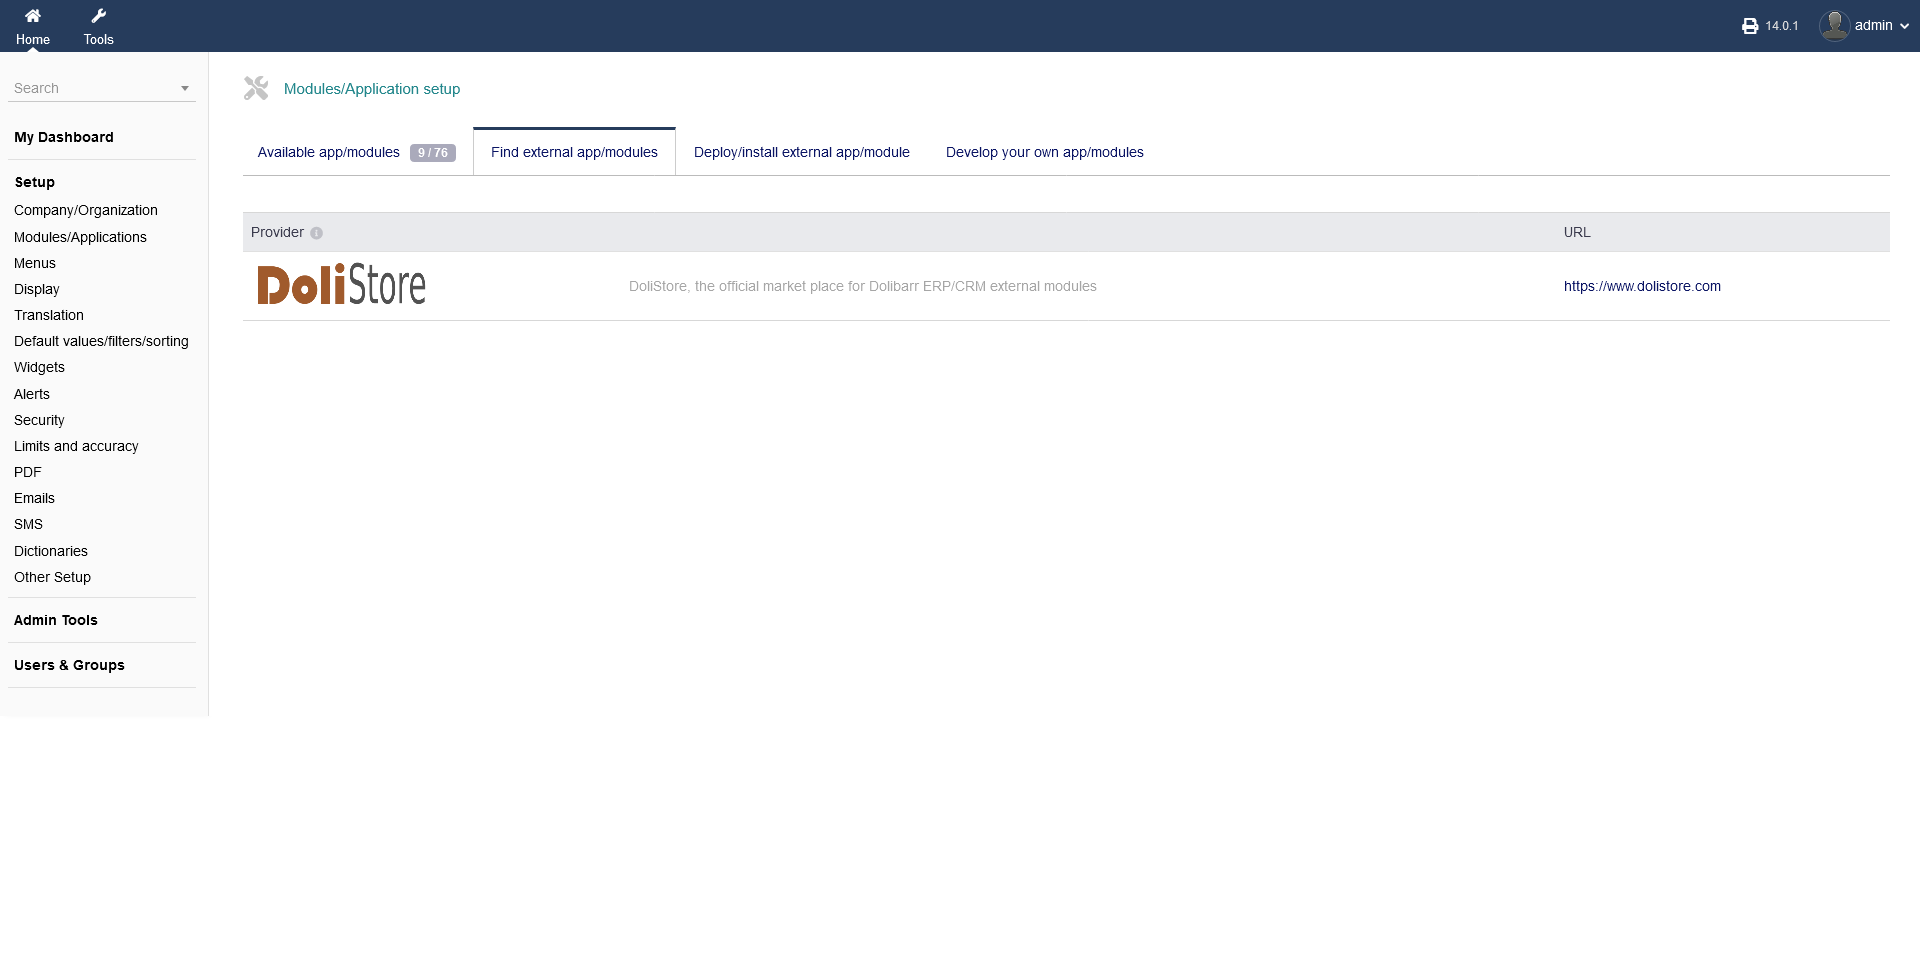
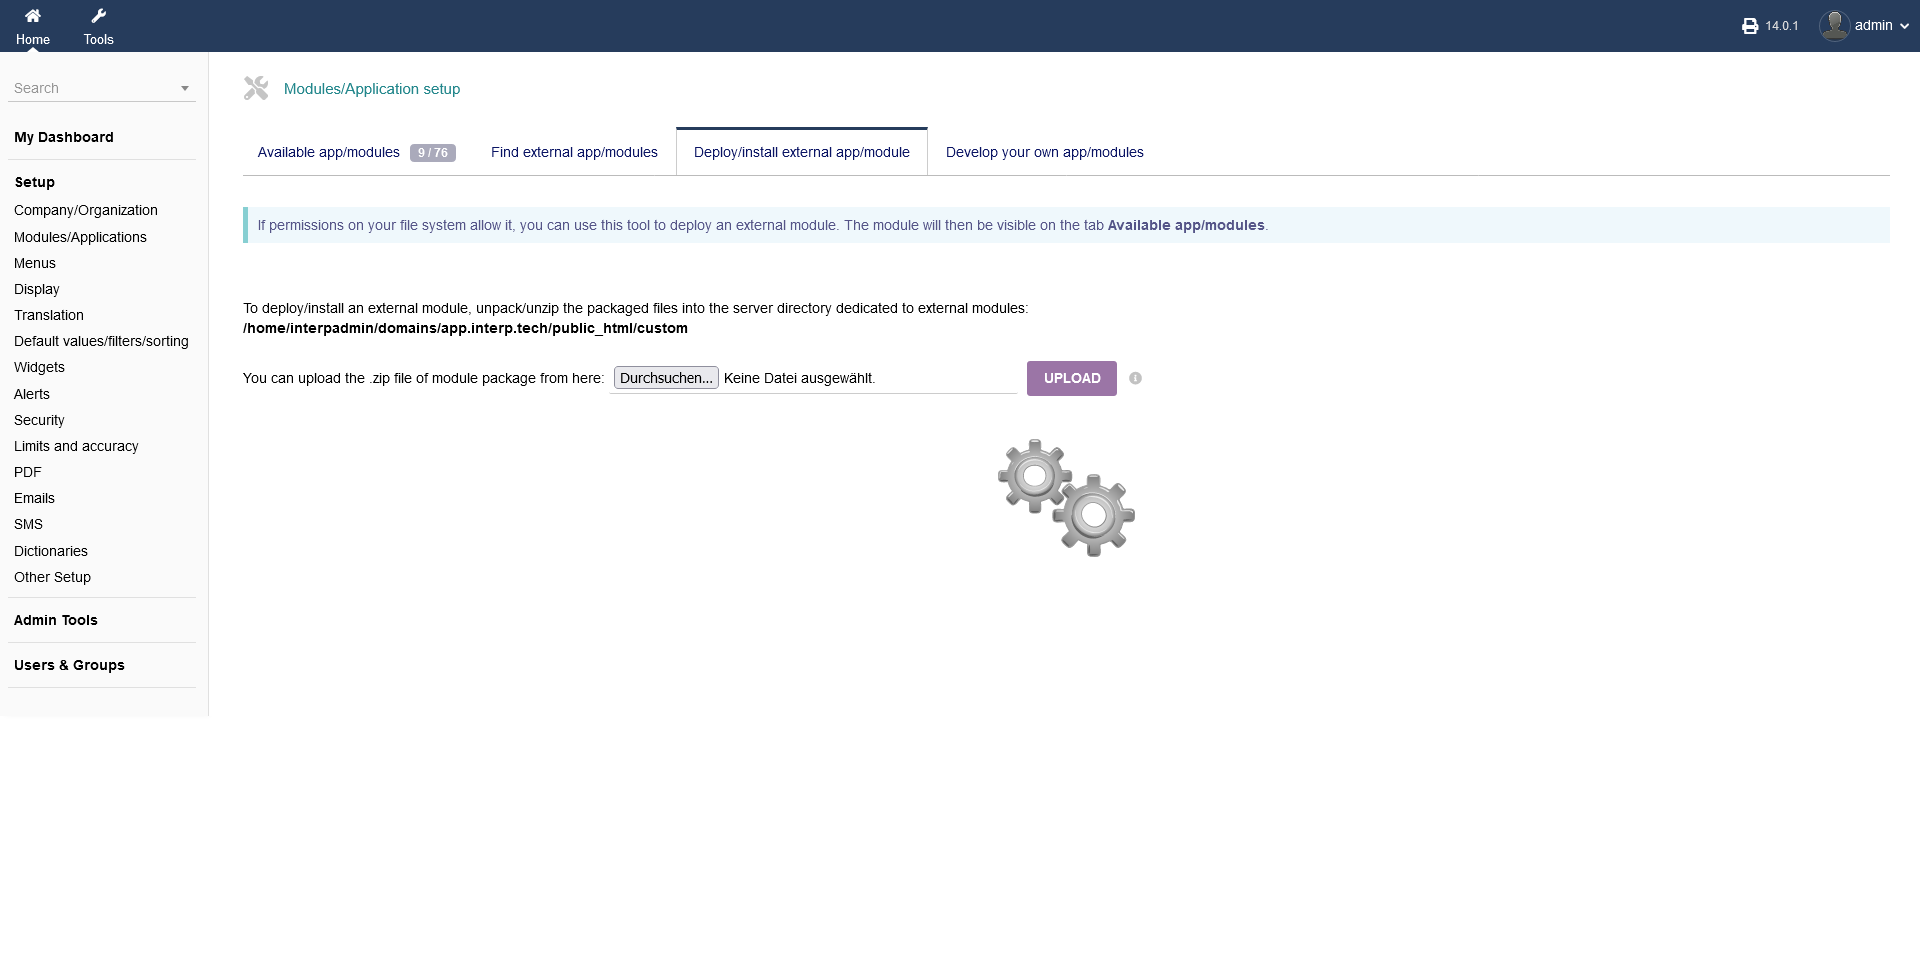
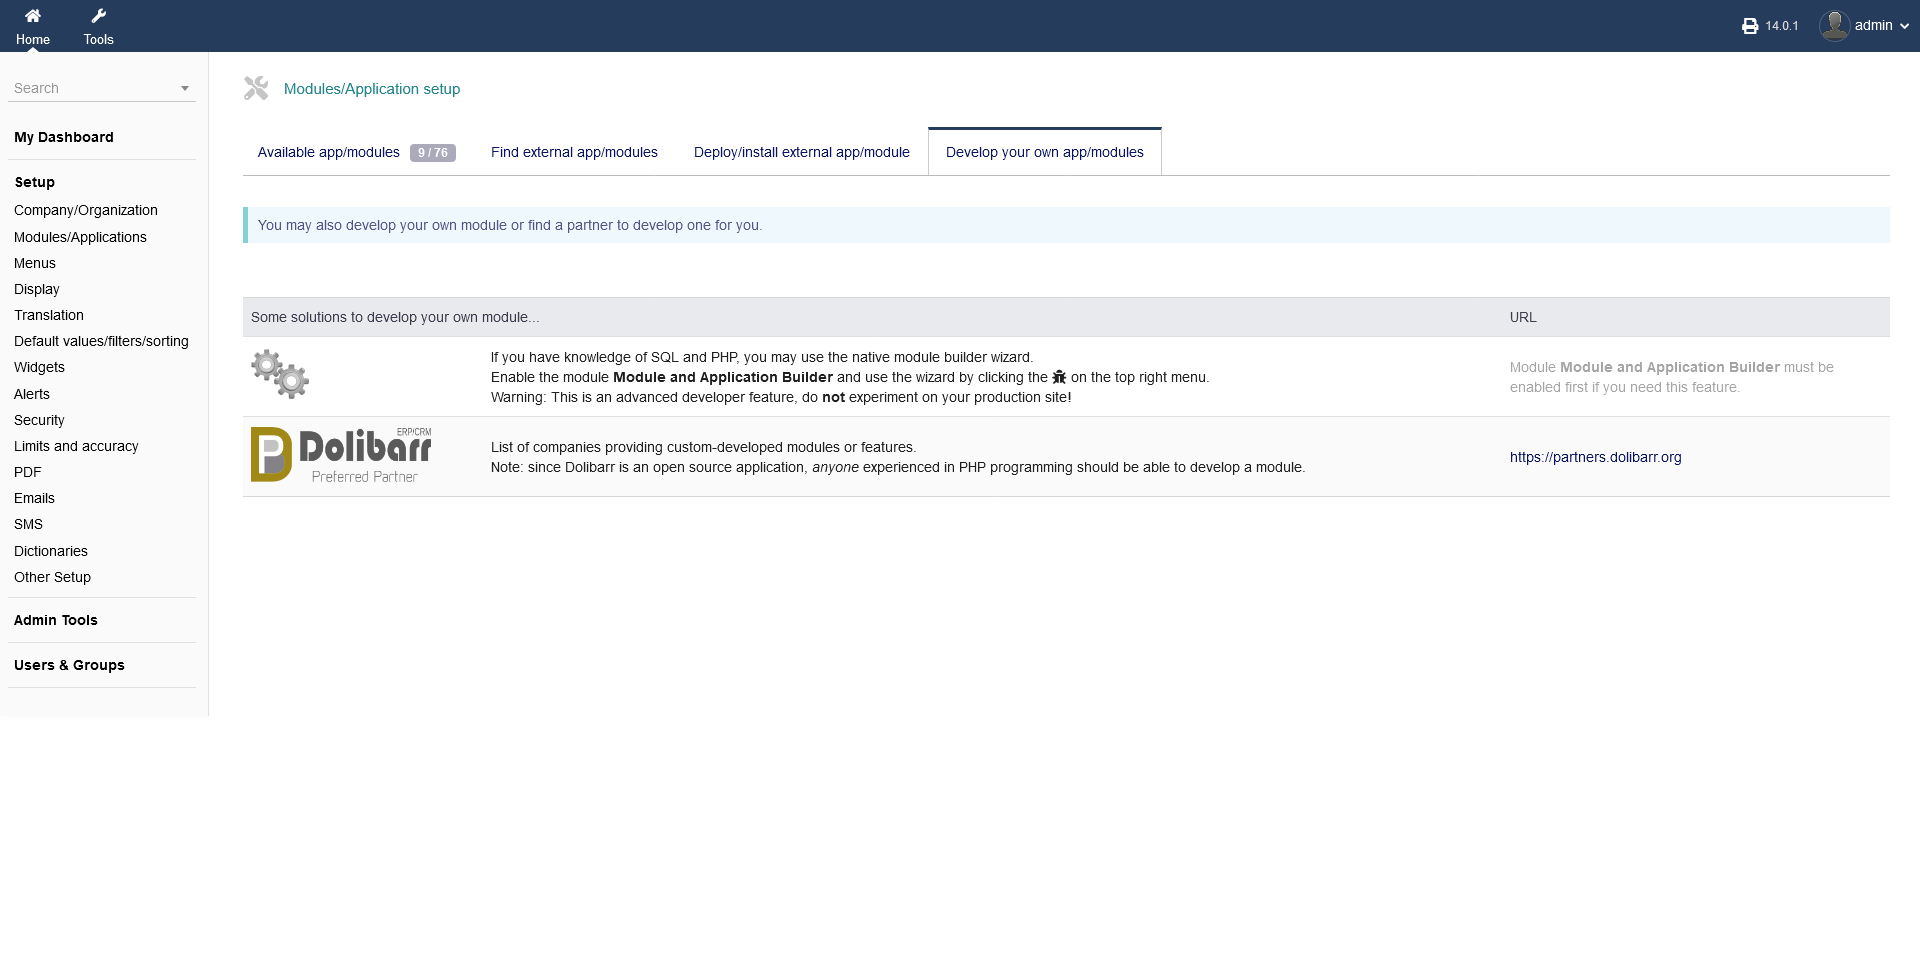
2.2.2 External and own modules
In case a module functionality is missing or not adequate, you can find and install external modules or even develop your own, using a development partner.
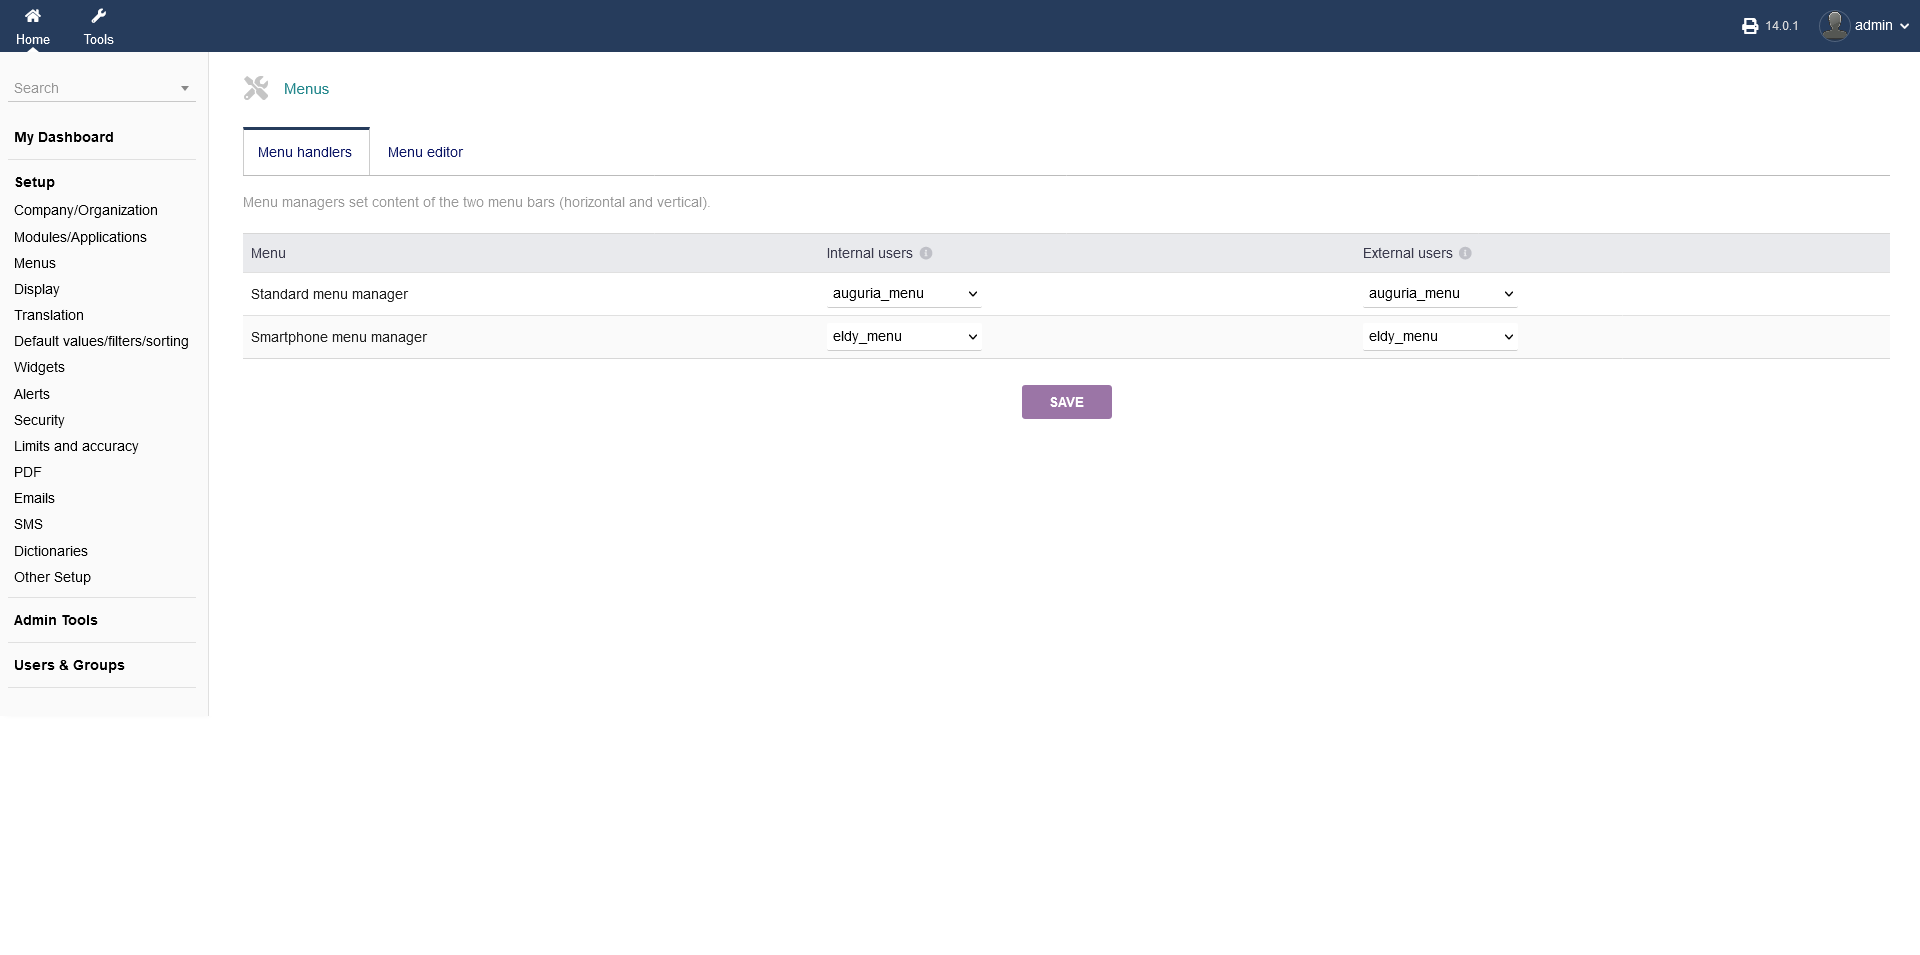
2.3 Menus
Under "Setup -> Menus", you can choose your intERP menu setup, using both menu handlers and the menu editor, to customize your menus.
2.3.1 Menu handler
intERP hand display and manage two different menus, the "Standard menu" and the "Smartphone menu". You can differenciate between "Internal users" and "External users" and set your menus accordingly.
"Internal users" are users of your business or users (not admins) that have access to your intERP system, like partners. "External users" on the other hand are users, which are not related to the business as such (e.g. vendors).
When you are done, click "SAVE".
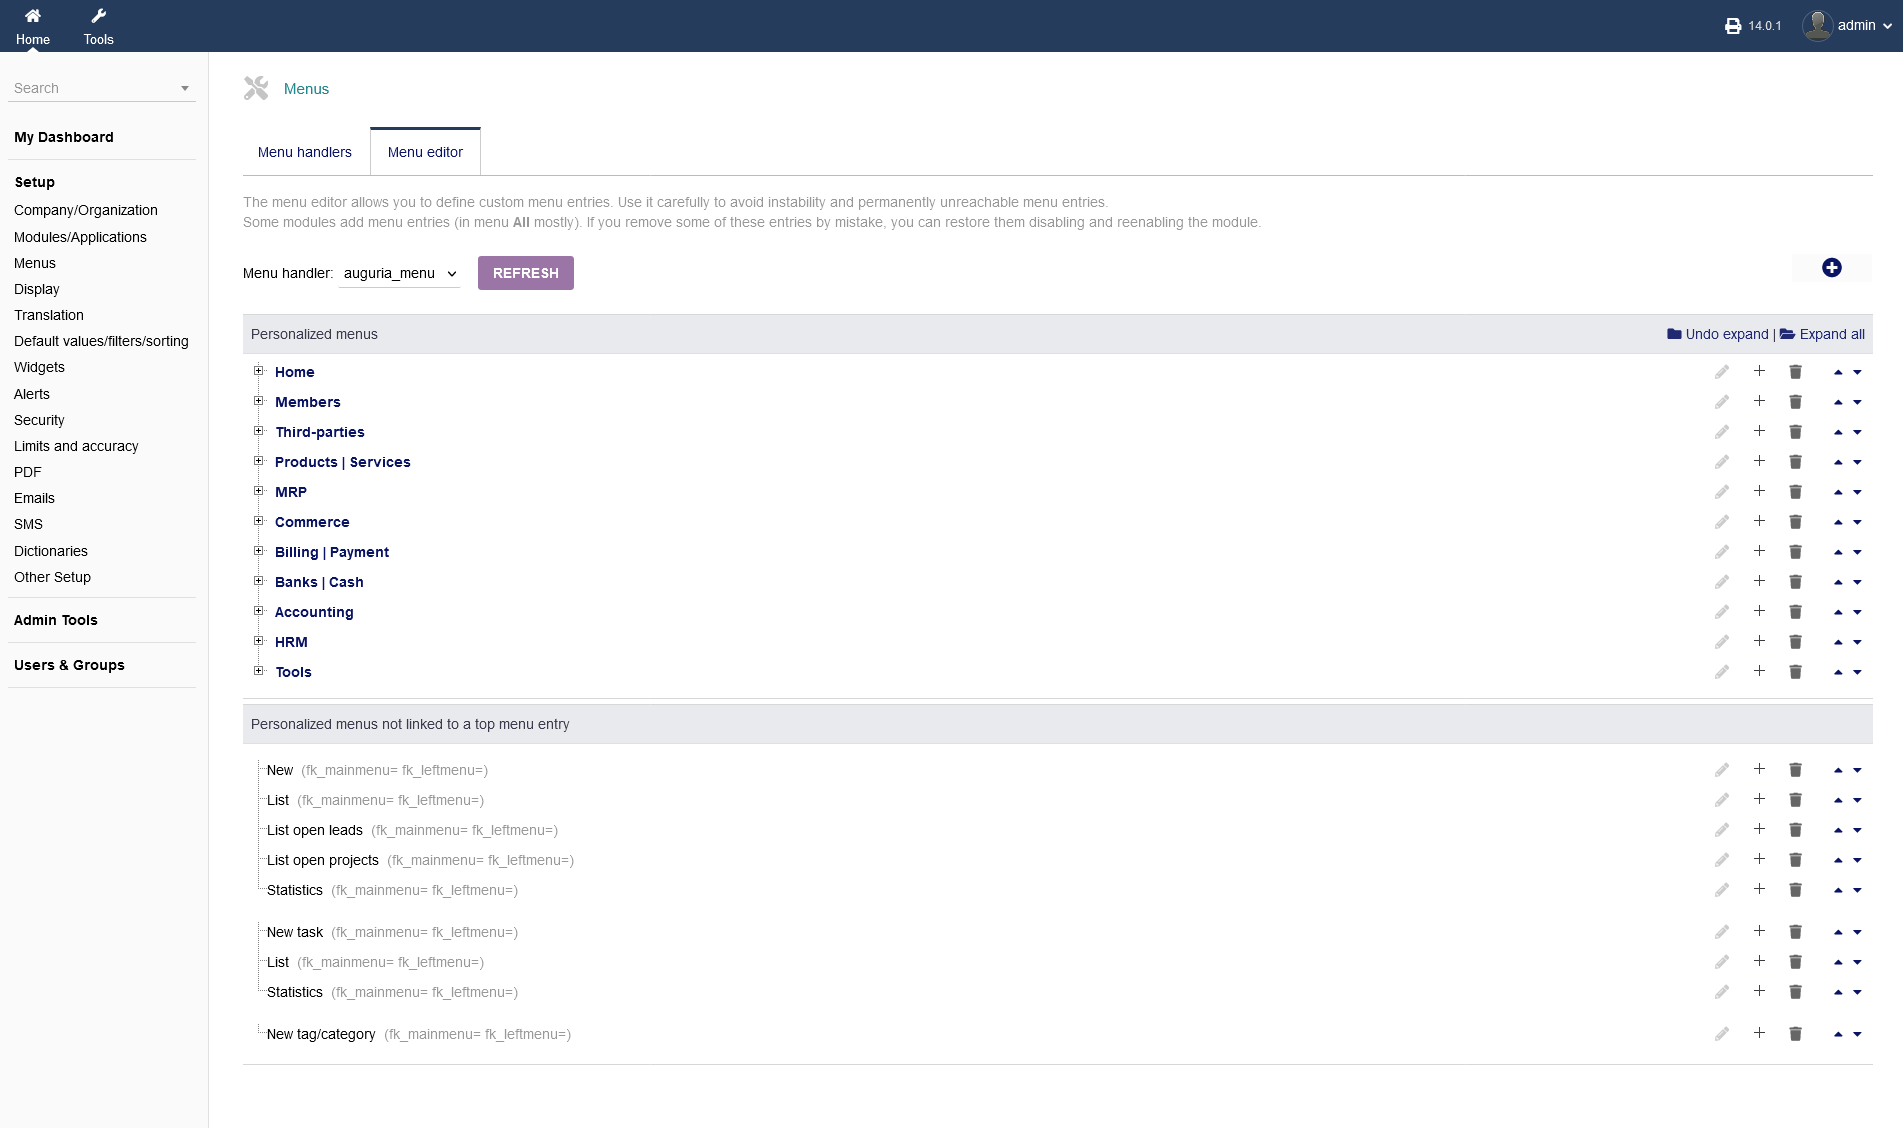
2.3.2 Menu editor
The menu editor is enabling you to create your own menus.
1. You need to choose your menu, you want to edit. When you are done, click "REFRESH". If you dont have any menus or if you want to create a new one, click the circular "plus" button on the right hand side.
2. You can add/delete different menu point using the menu funcionality on your right hand side below "Undo expand/Expand all". You can create child pages and expand each menu point by clicking on the "plus" symbols next to your menu title on the left hand side ord using the functionalities on the right hand side below "Undo expand/Expand all".
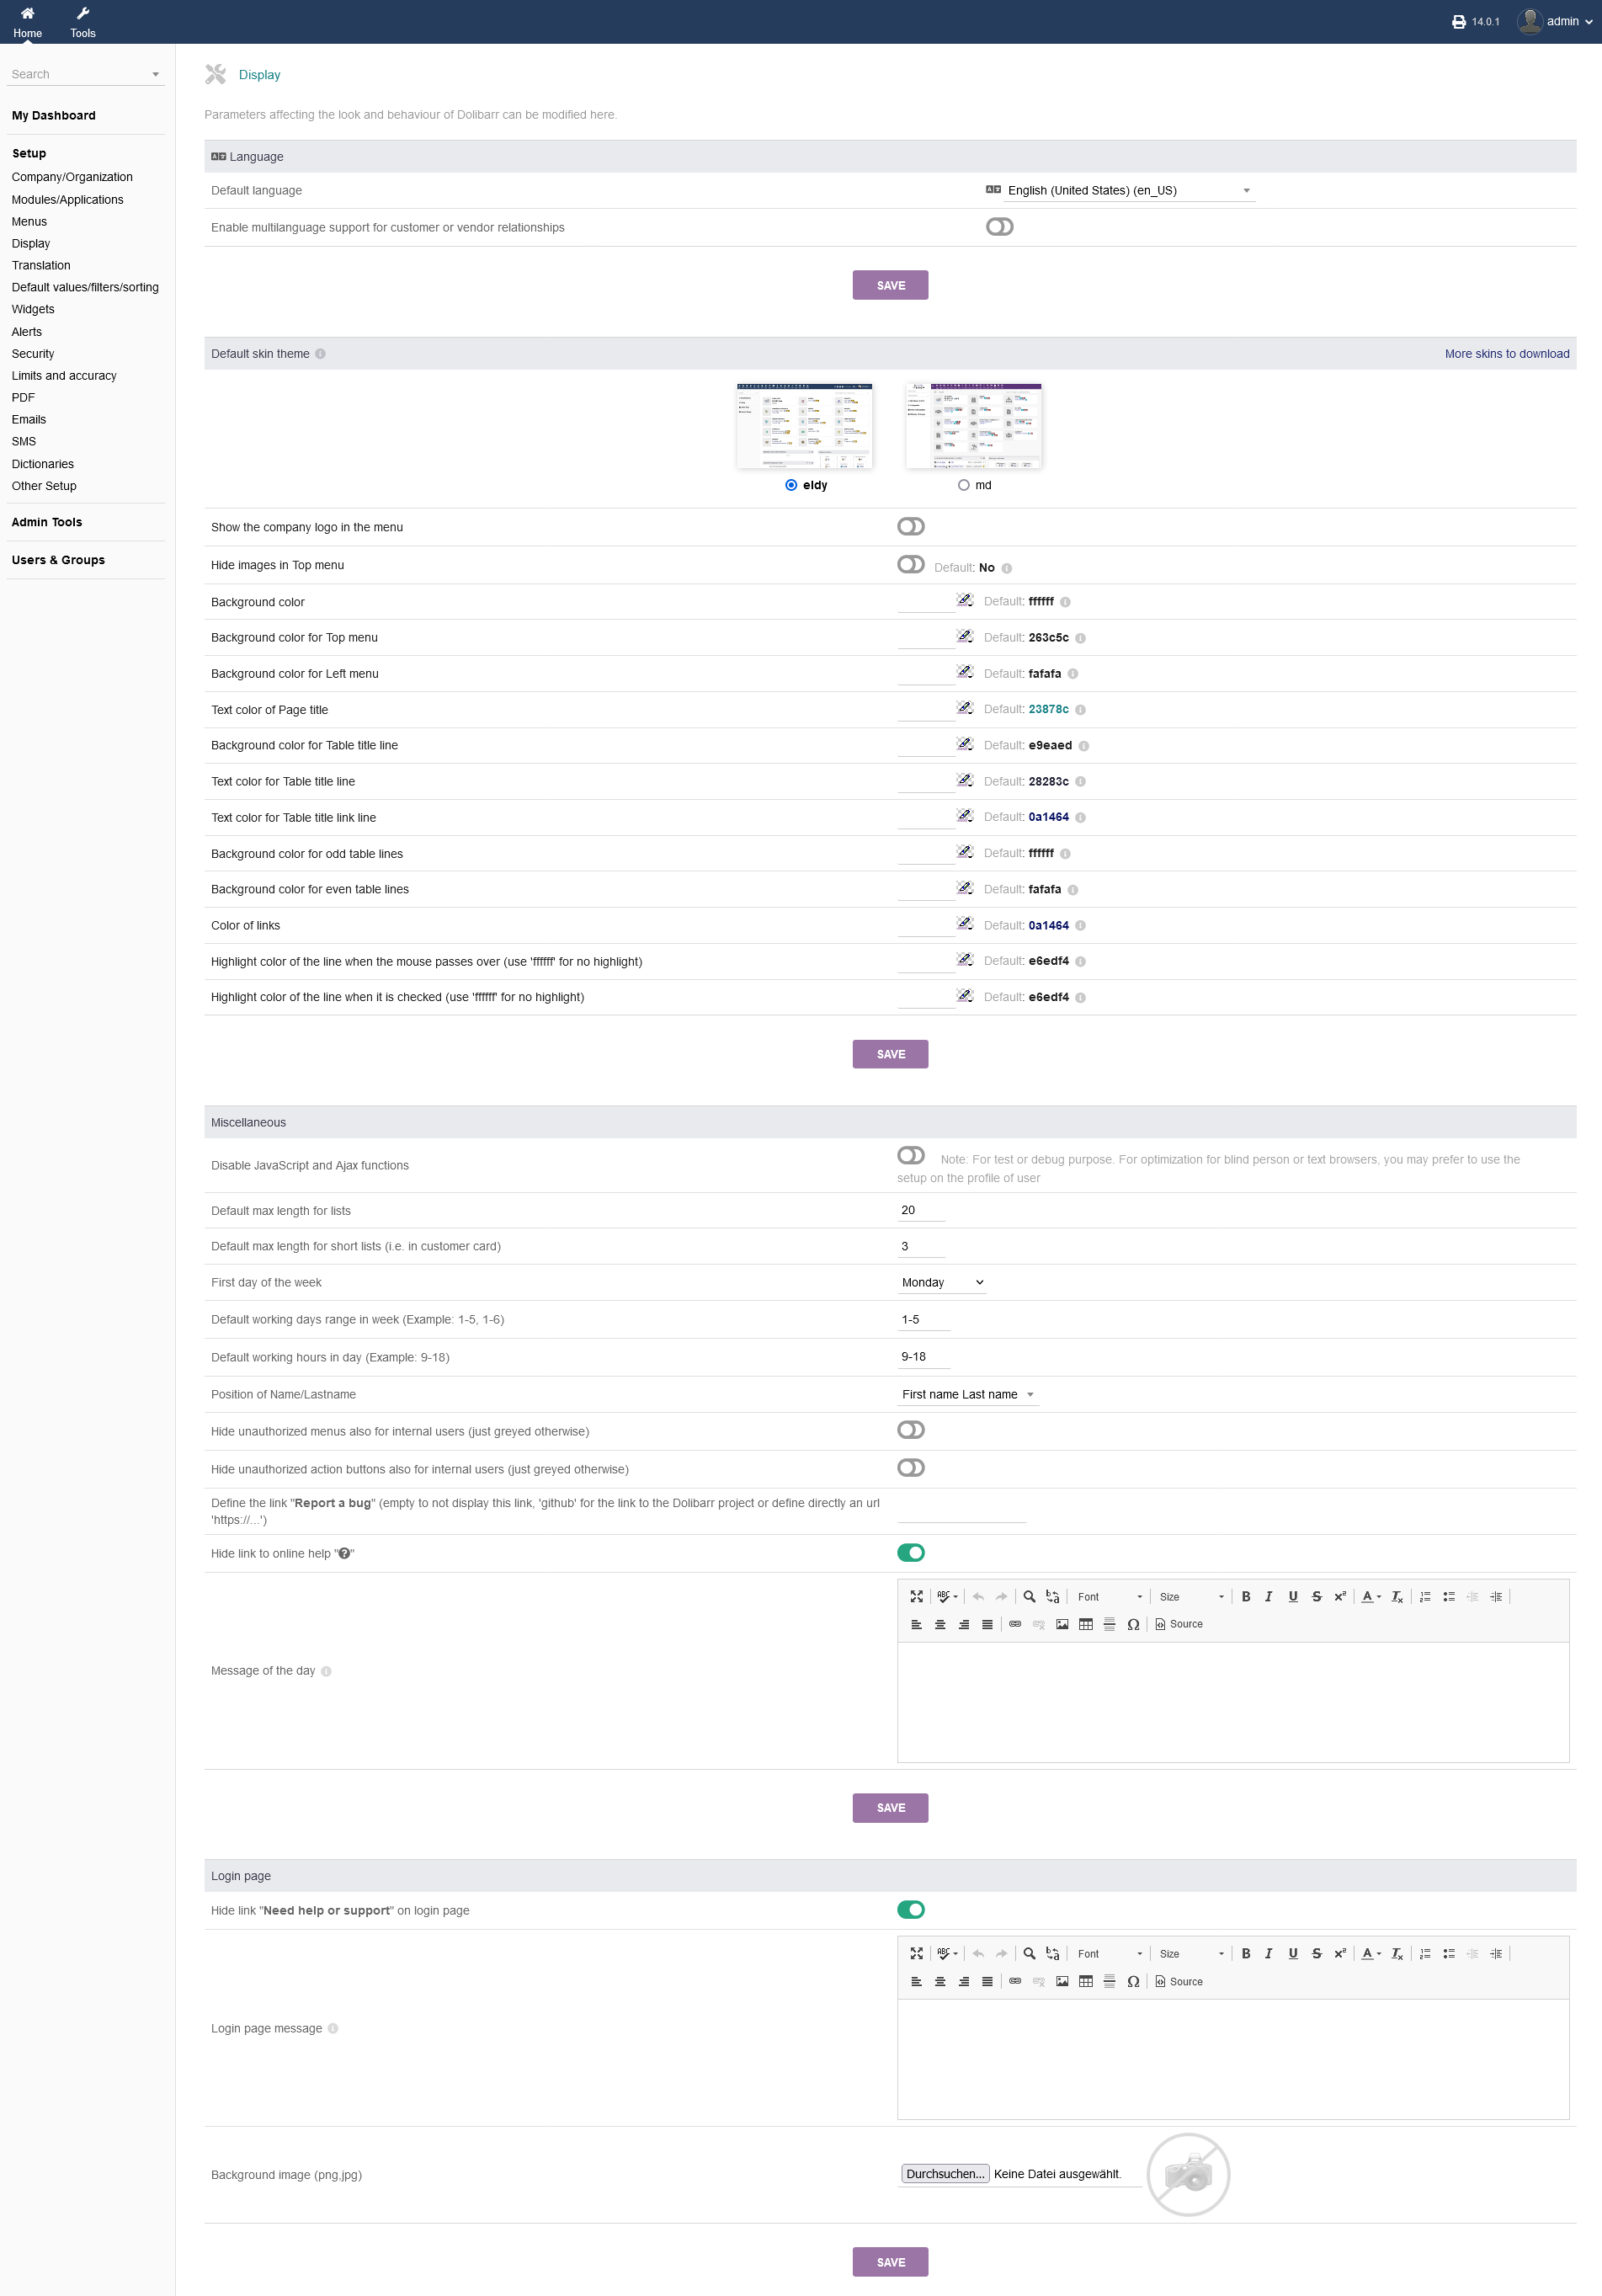
2.4 Display
Under "Setup -> Display" you can change the look and feel of your intERP installation.
The main options you can change are the "language" that intERP will be displayed in, the "skin colour scheme" with the option to set "custom colours", "miscellaneous" settings to set list length, date and time settings, name order and basic "login screen" settings.
Remember to click "SAVE" after you made any changes.
2.5 Translation
intERP offers key and string translation under "Setup -> Translation".
2.5.1 Search a translation key or string
In the tab "Search a translation key or string" you can do a search of what is going to be translated. You can choose between several languages, which is currently set as "en_US - English (United States)" as a drop down option.
To add a translation, choose the string or key from the listing and click the "plus" symbol on the right and side. It will forward you to the tab "Overwrite a translation string".
![]()
2.5.2 Overwrite a translation string
If you want to add a translation without searching for a string or key (as presented in 2.5.1), you can do it manually in the tab "Overwrite a translation string". You need to choose the language, key and/or string all manually.
![]()
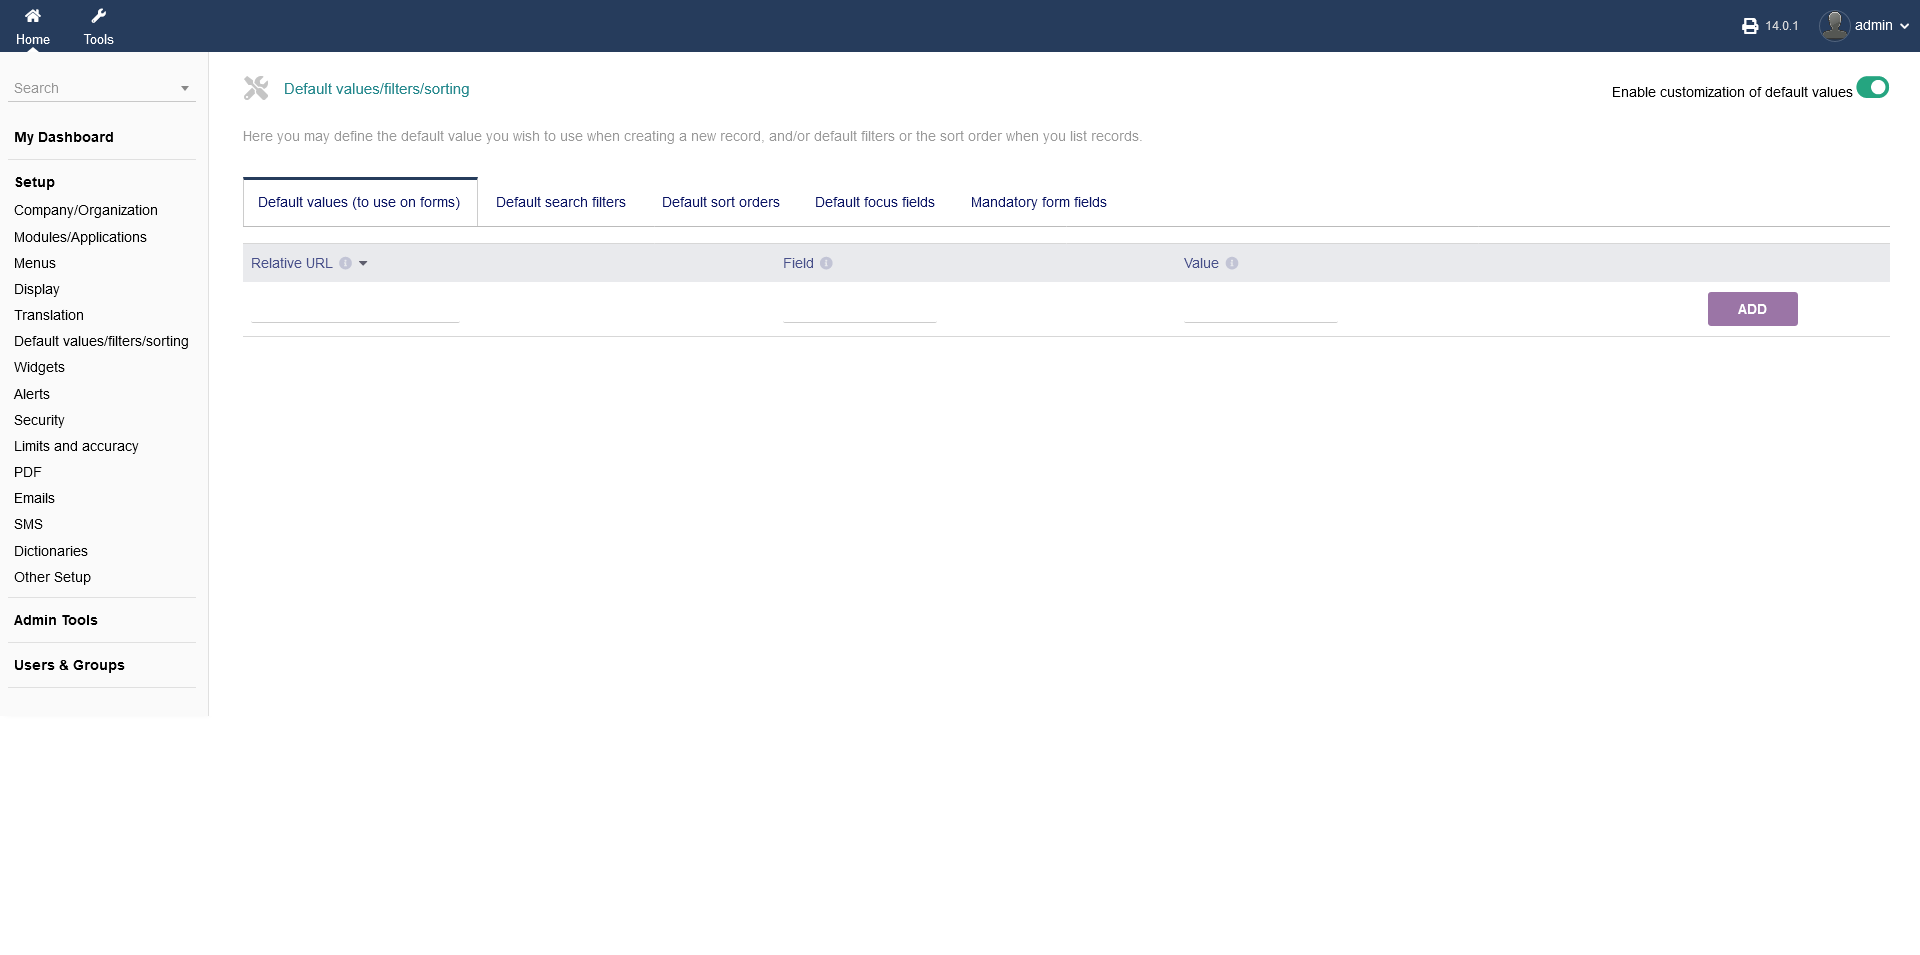
2.6 Default values/filters/sorting
To set default values (to use in forms), default sort orders, default focus fields and mandatory form fields, go to "Setup -> Default values/filters/sorting".
1. You have to set a "relative path of the page URL",
2. put in the "Field" (name of the HTML-Field) and
3. the "value".
4. To end the process, click "ADD".
FOR THIS SETTING, YOU NEED TO HAVE TECHNICAL KNOWLEDGE OF HTML, IN ORDER TO KNOW WHAT TO TYPE INTO THE FIELDS!!!
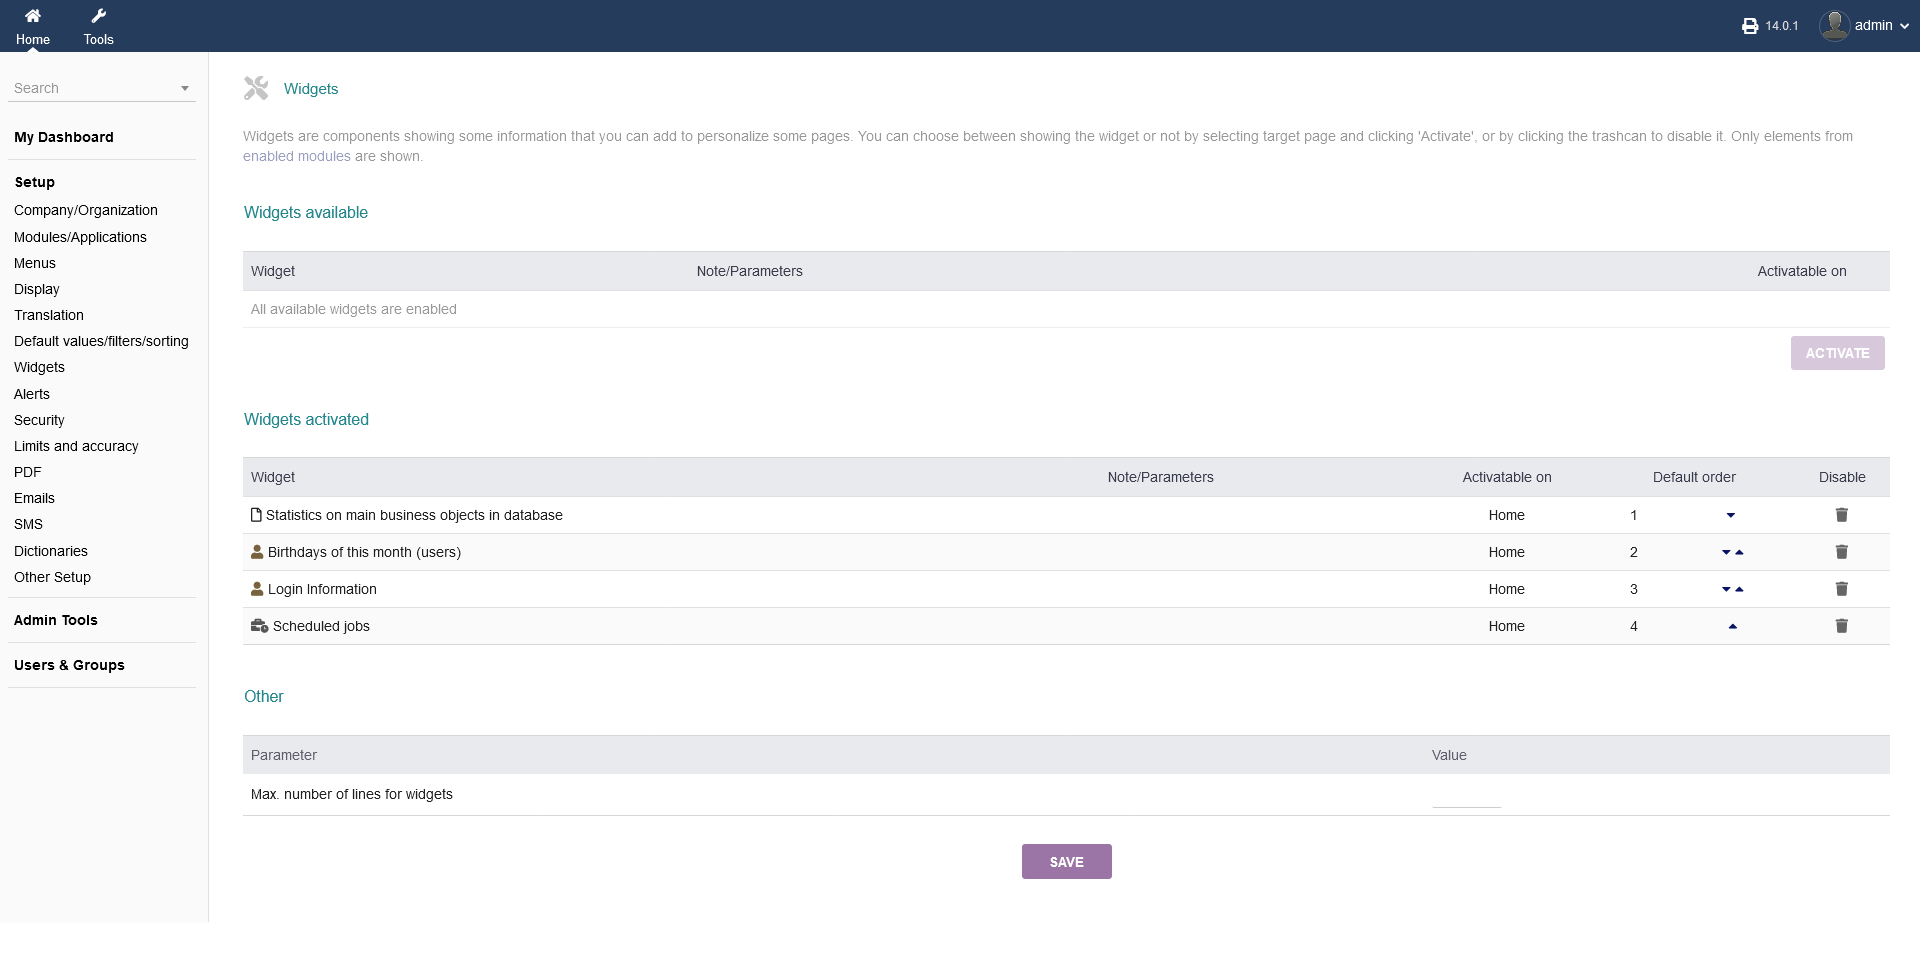
2.7 Widgets
At "Setup -> Widgets" you can enable or disbale 1-4 widgets that will be displayed on your Dashboard. You can change the order of display on the right hand side.
You can set the maximum number of lines, that a widget can display.
If you want to activate a widget, you can choose where it is going to be displayed ("Home" in general, "Home" for users & groups, "Home" in Membership, "Home" in Thirdparties, "Home" in Tickets or "Home" in Accountancy)
When you are done, click "SAVE".
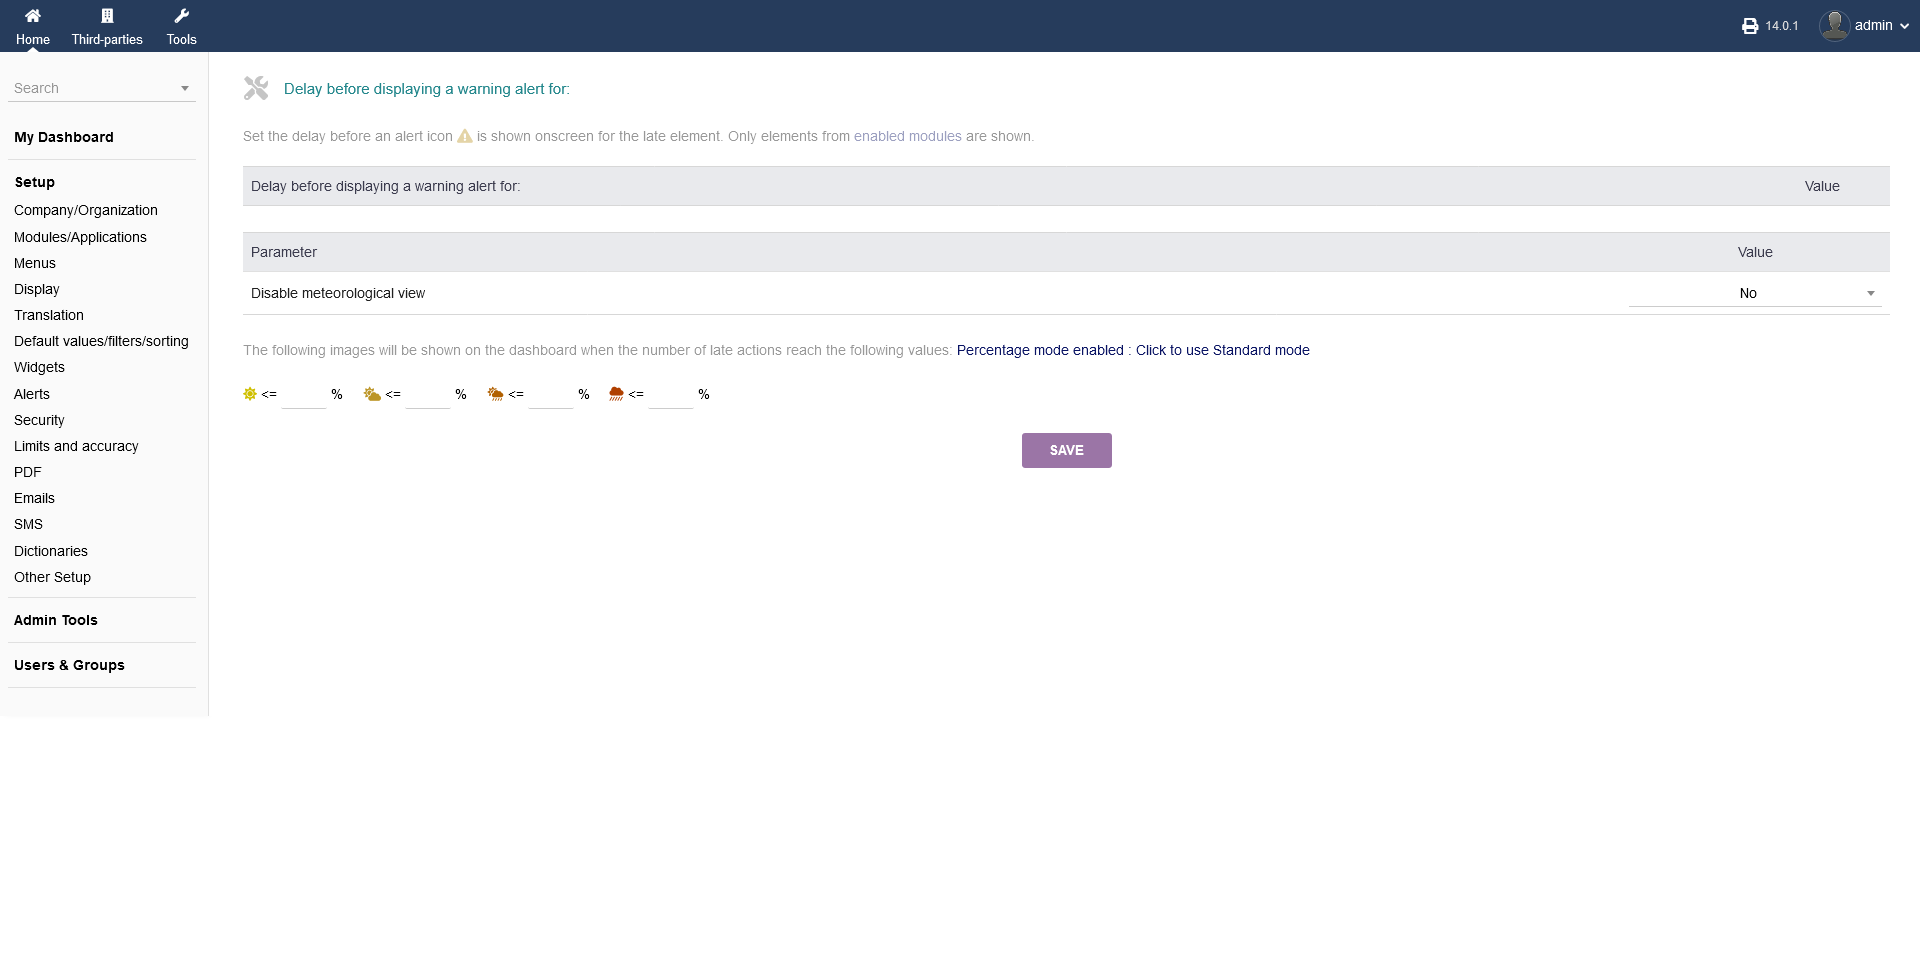
2.8 Alerts
You can set alerts for enabled modules at "Setup -> Alerts" to be reminded if something is overdue.
It is possible to set a delay before a warning accurs, the parameters for an application (e.g. "No", "Yes", "On small screen (smartphone only)")
Additionally, you can swith modes from "Percentage mode" to "Standard mode" (shows values instead of percentages) and vice versa.
When you are done, click "SAVE".
2.9 Security
The intERP security options can be found at "Setup -> Security".
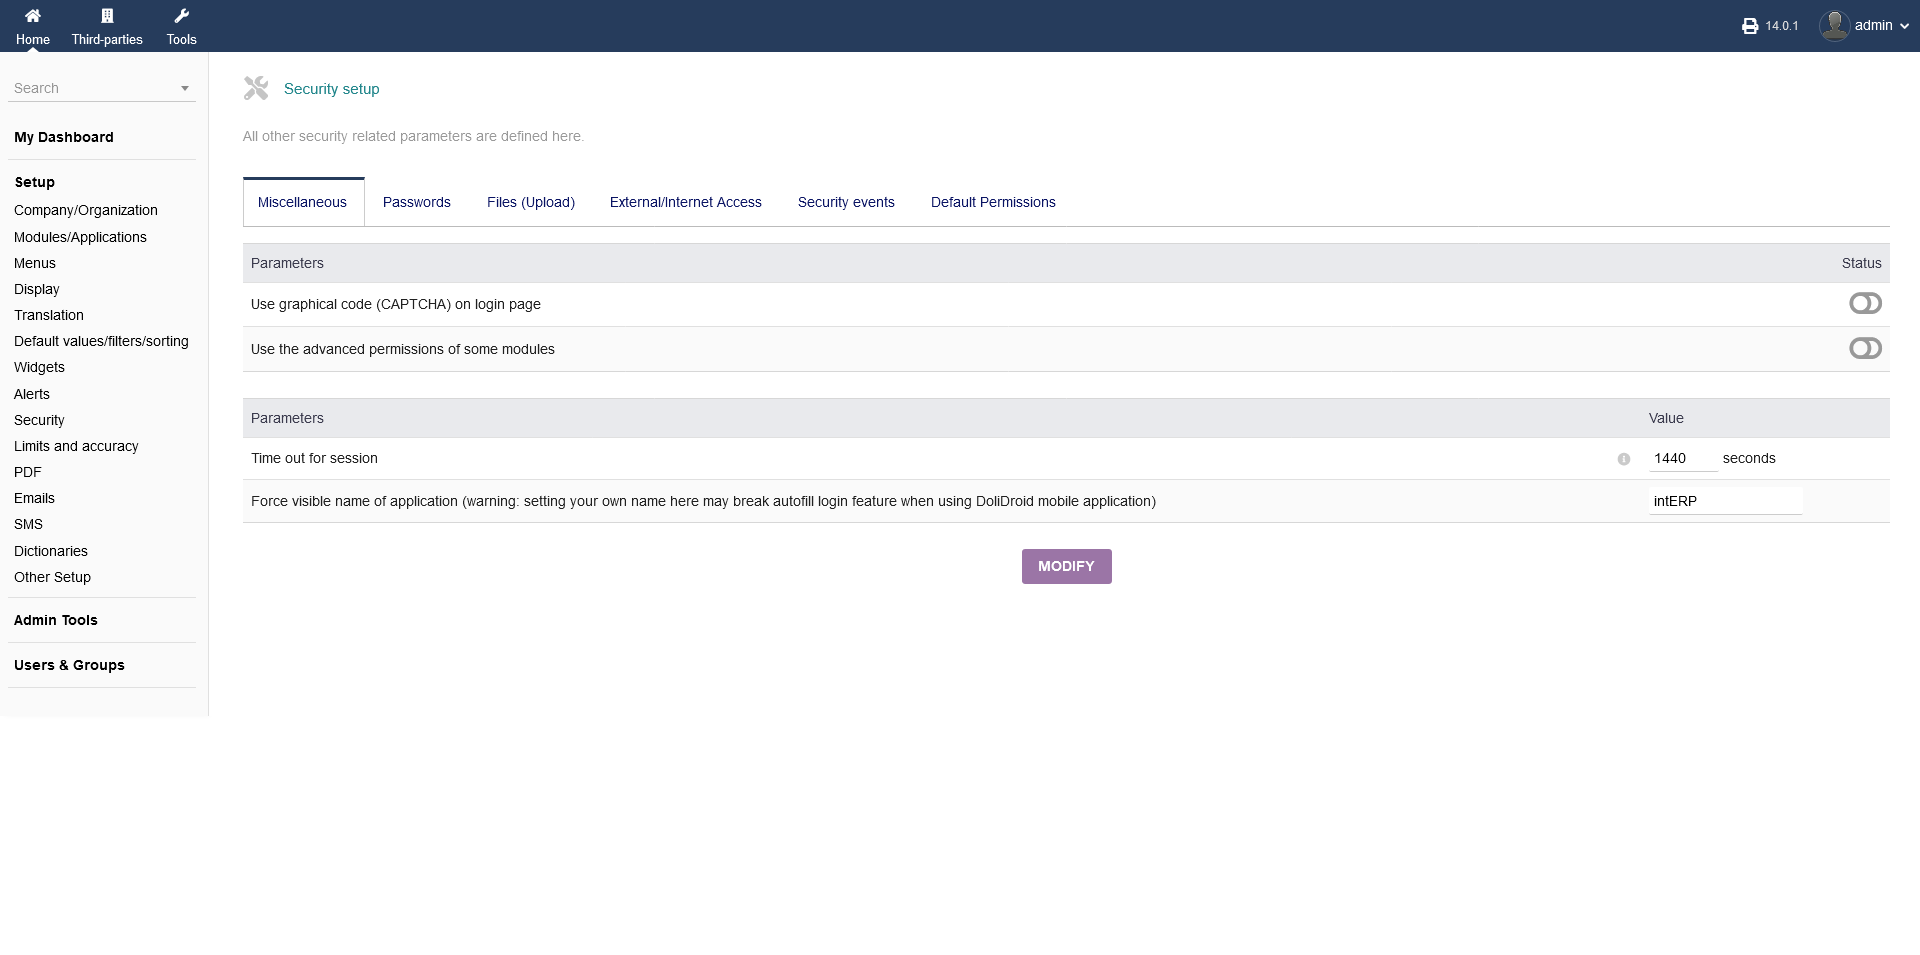
2.9.1 Miscellaneous
Under "Setup -> Security -> Miscellaneous" you can set following security settings:
1. CAPTCHA for login page
2. advanced permissions of intERP modules
3. Time out (in seconds) for you intERP session
4. Force visible name of application (your own name, e.g. intERP)
When you are done, click "SAVE".
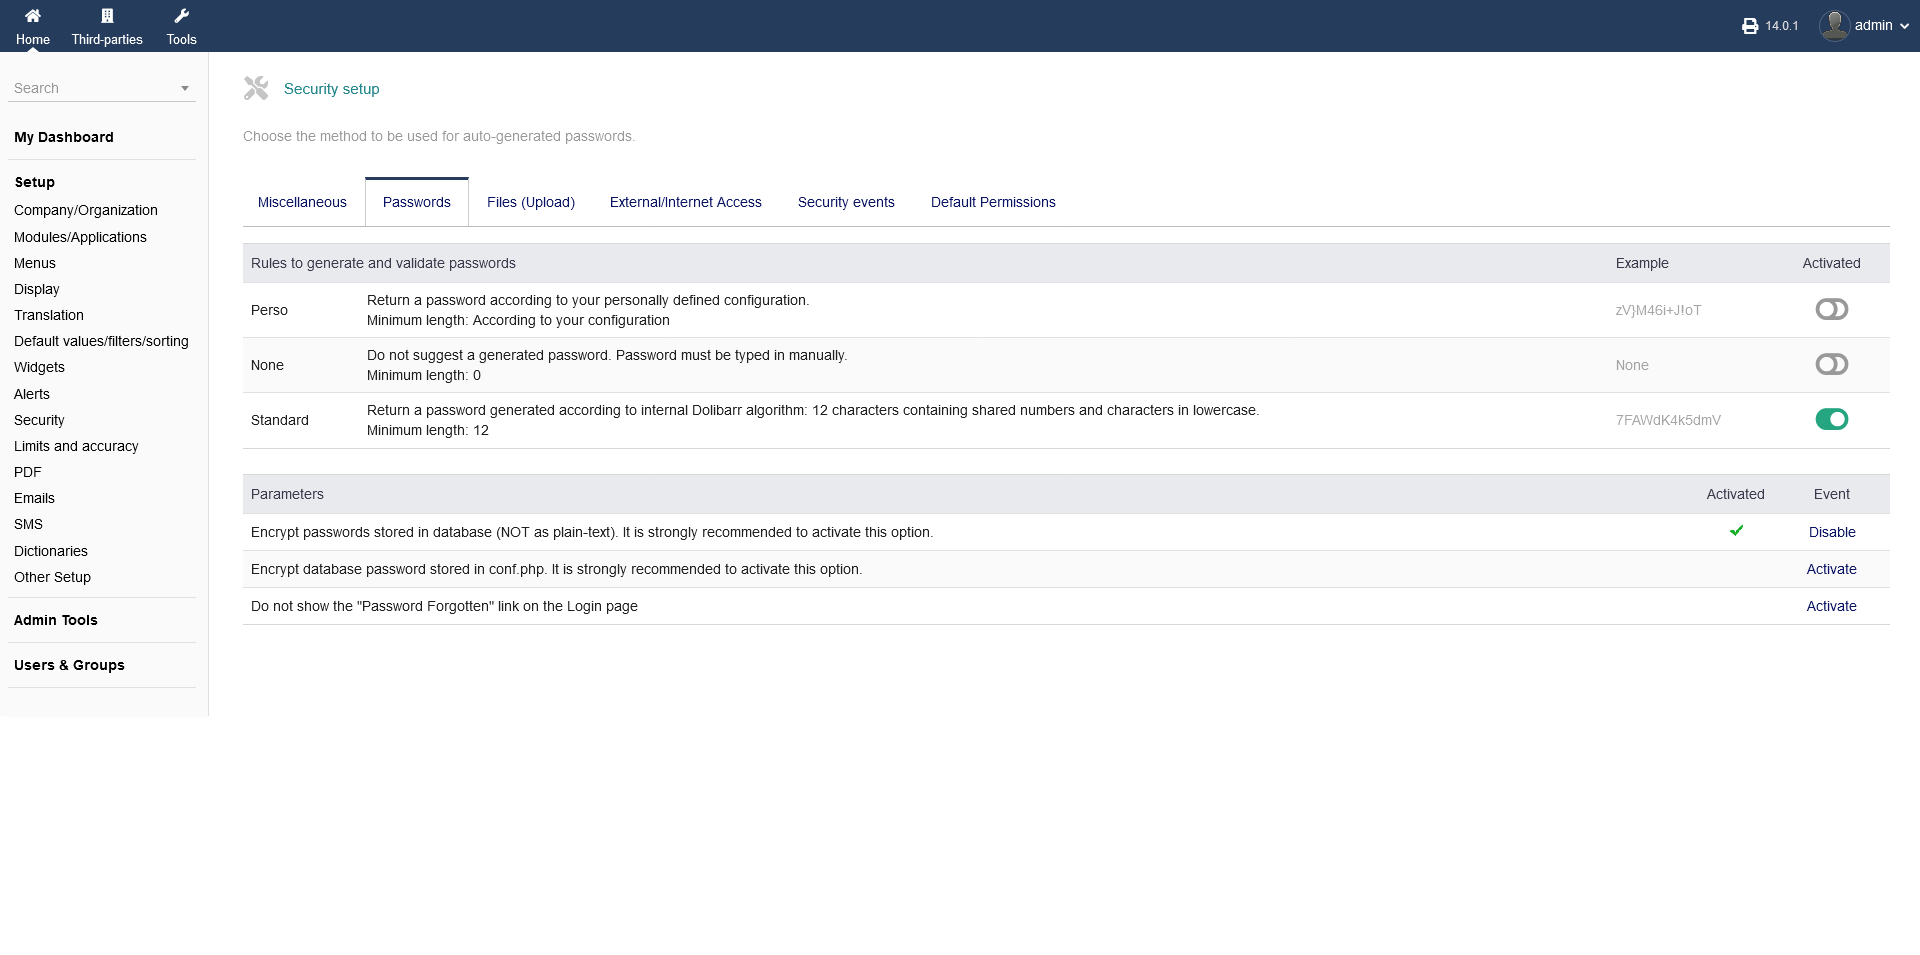
2.9.2 Passwords
All password related settings can be found under "Settings -> Security -> Passwords".
You can set rules to generate and validate passwords. The options "Perso", "None" and "Standard" are alternativ, not cumulative options. Depending on the option you have activated, you will see all relevant options under "Parameters".
If you choos "Perso", you can set options like password length, used characters etc. under "Parameters"
When you are done, click "SAVE".
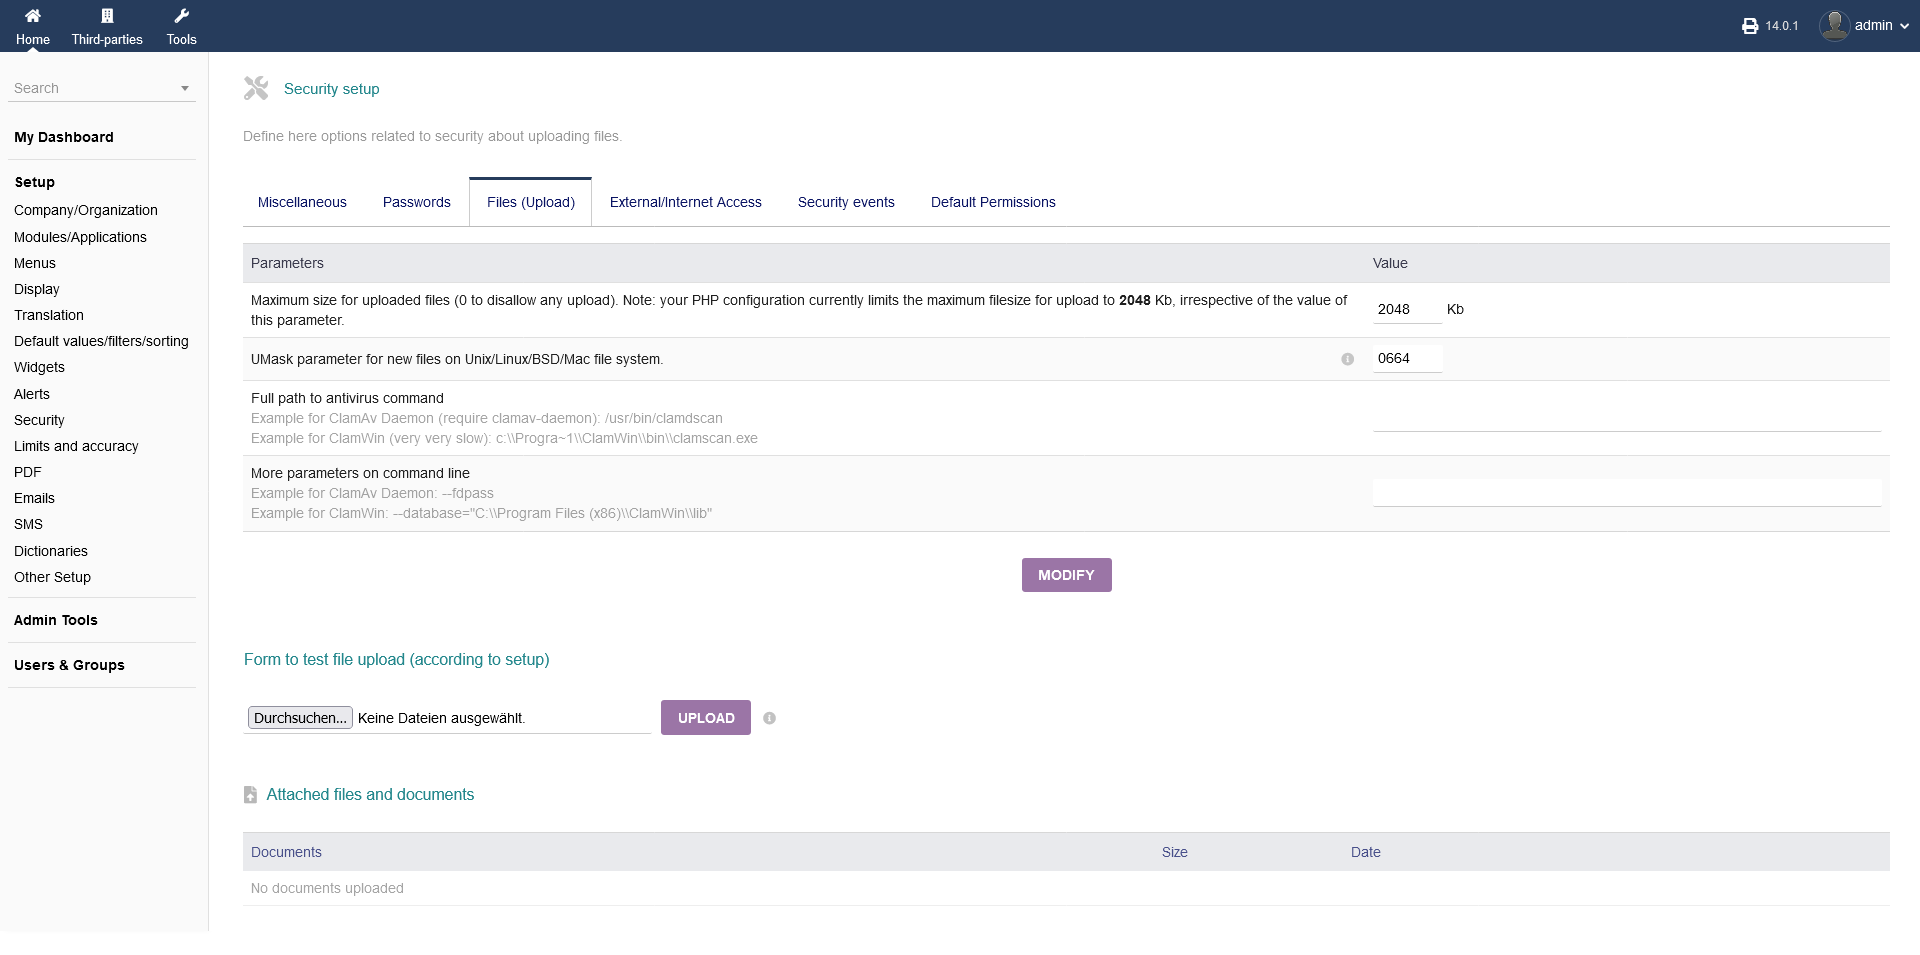
2.9.3 Uploading files
To set security options regarding the upload of files, go to "Setup -> Security -> Files (Upload)"
You can set the maximum file size and parameters for new files in your OS related file system. When you are done, click "MODIFY".
Below, you can do a test upload by choosing a file and clicking "UPLOAD". It will use your settings you have set above.
At the end, you see a listing of all documents that were uploaded.
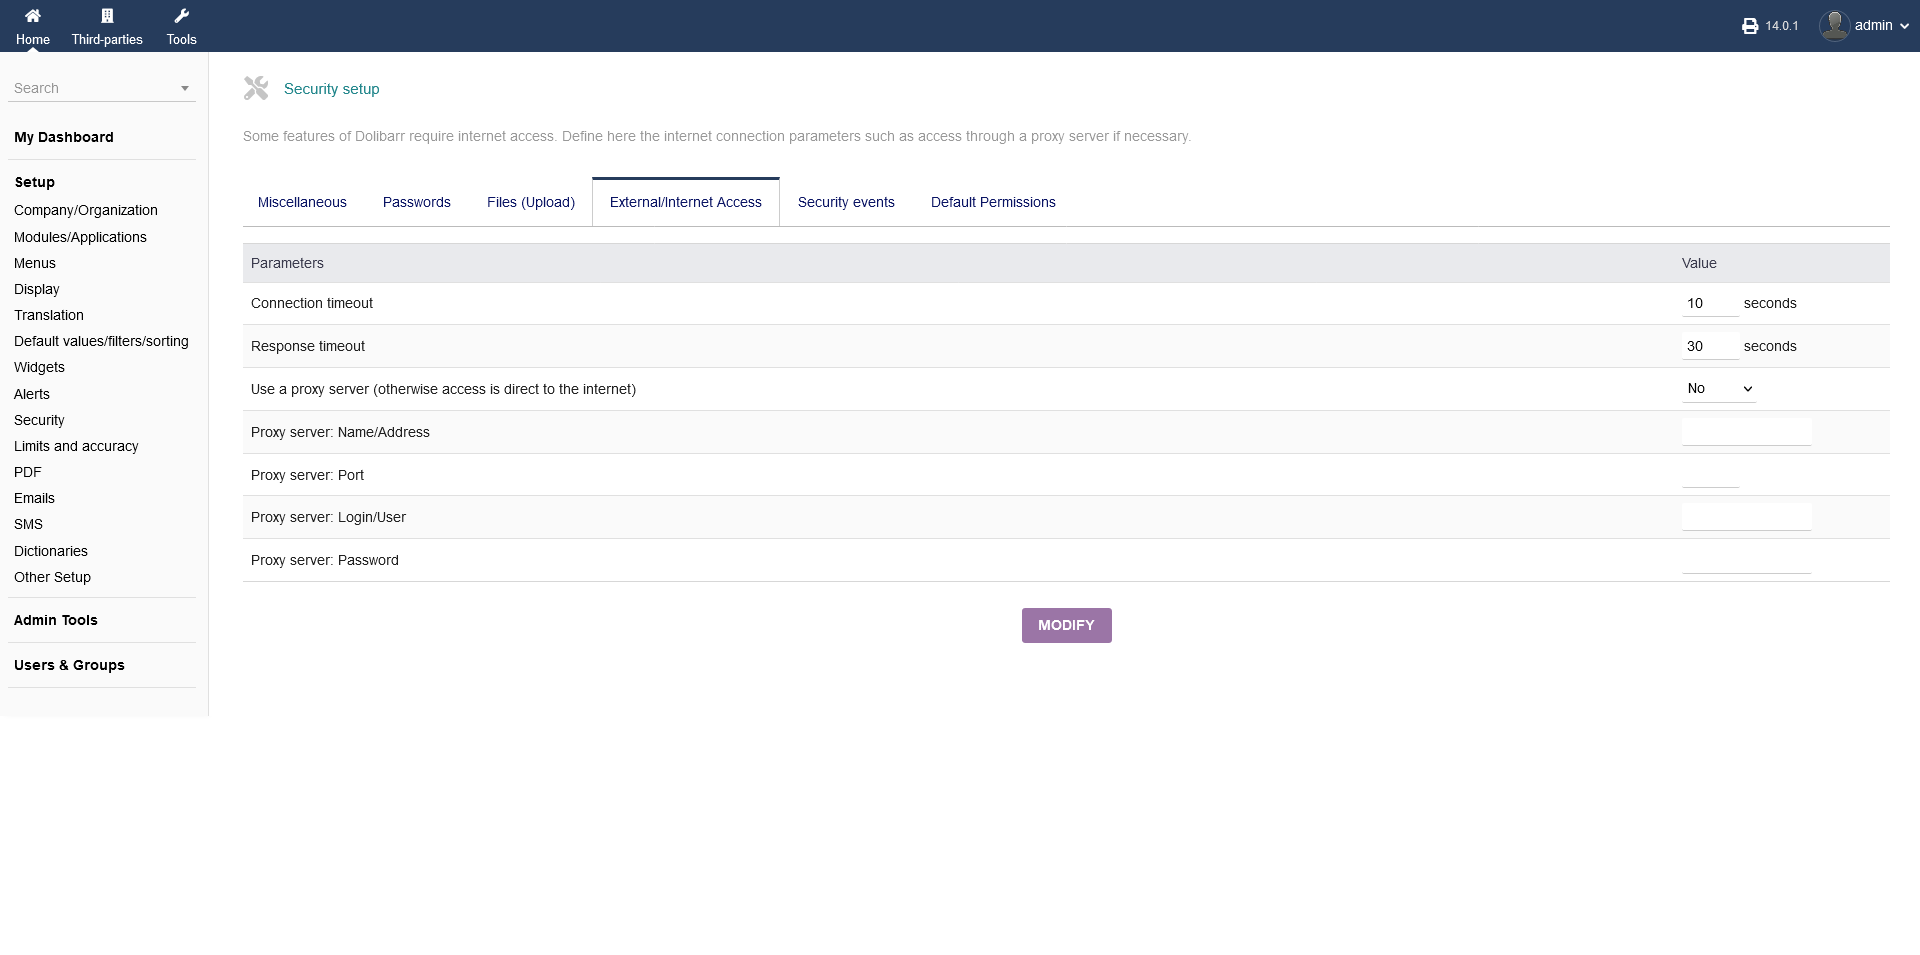
2.9.4 External/Internet Access
Any internet settings can be set under "Setup -> Security -> External/Internet Access".
Here you can set the connection timeout (in seconds), response timeout (in seconds) and proxy server settings (address, port, login/user, password).
When you are done, click "MODIFY".
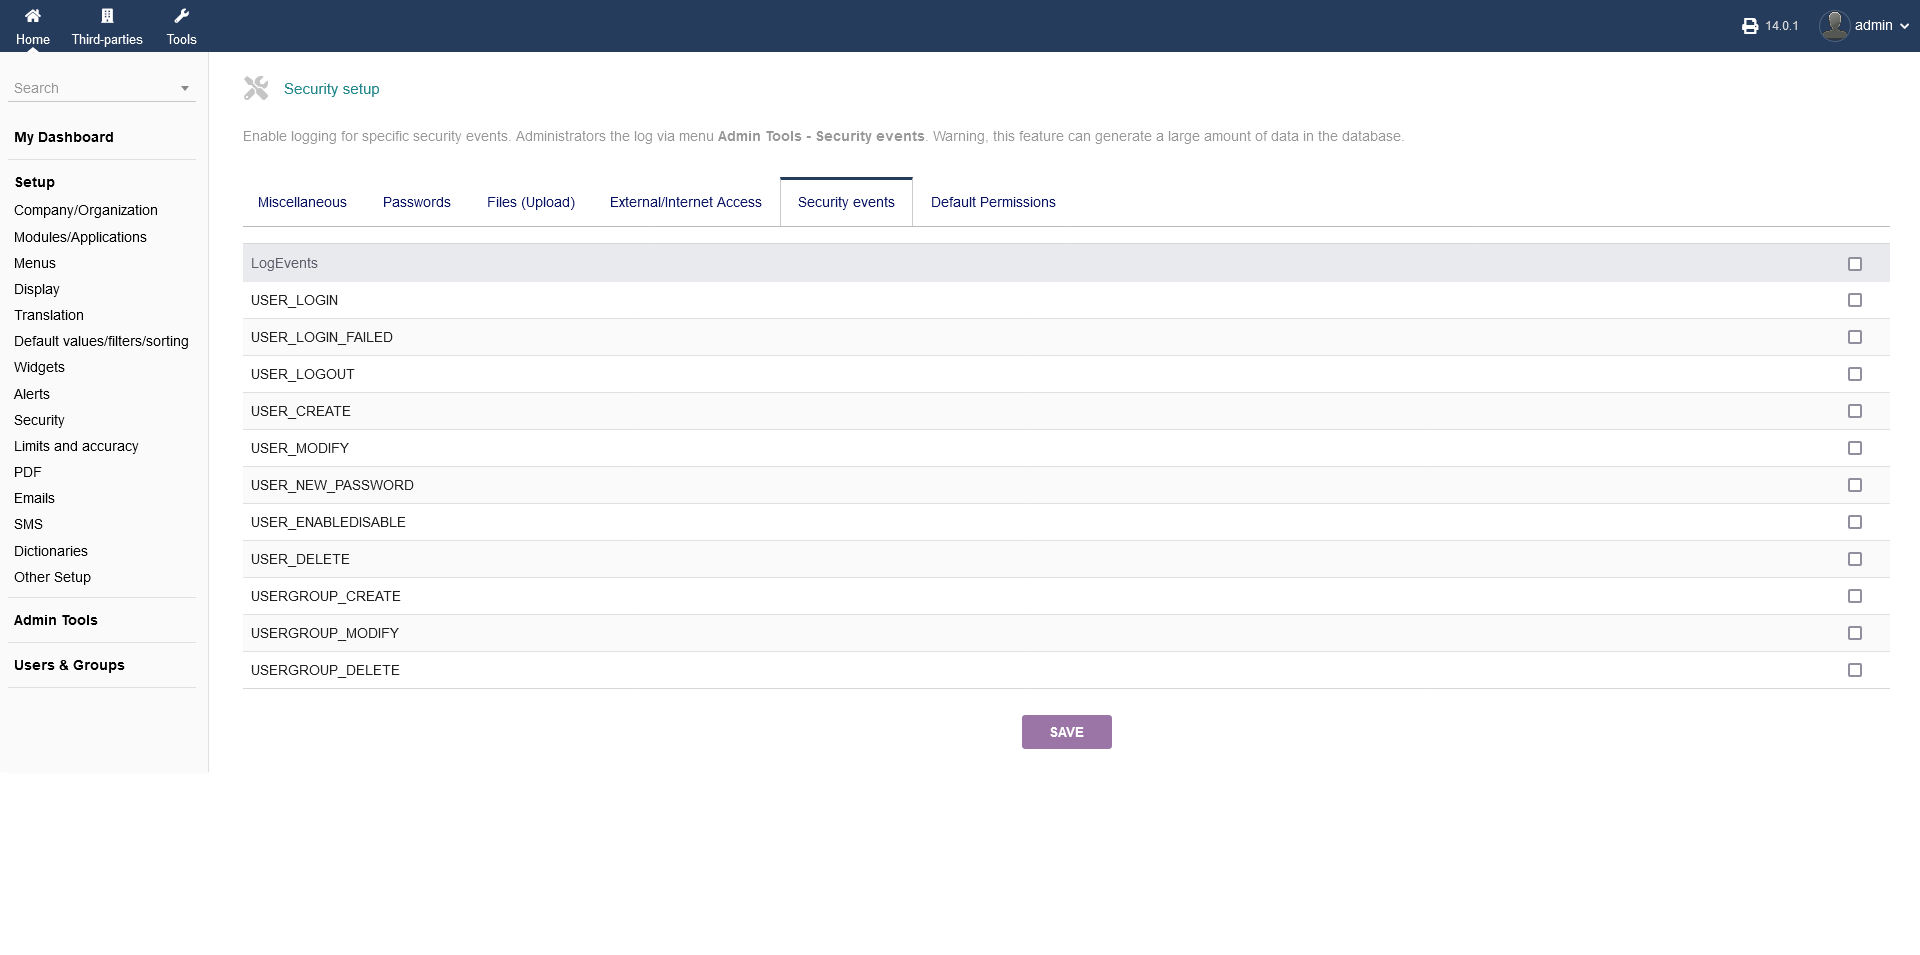
2.9.5 Security events
You can have the option of logging certain security events under "Setup -> Security -> Security events".
You can choose from the listing of possible events by clicking the radio box on the right hand side.
The acutal logs will be created and found under "Admin Tools -> Security events".
When you are done, click "SAVE".
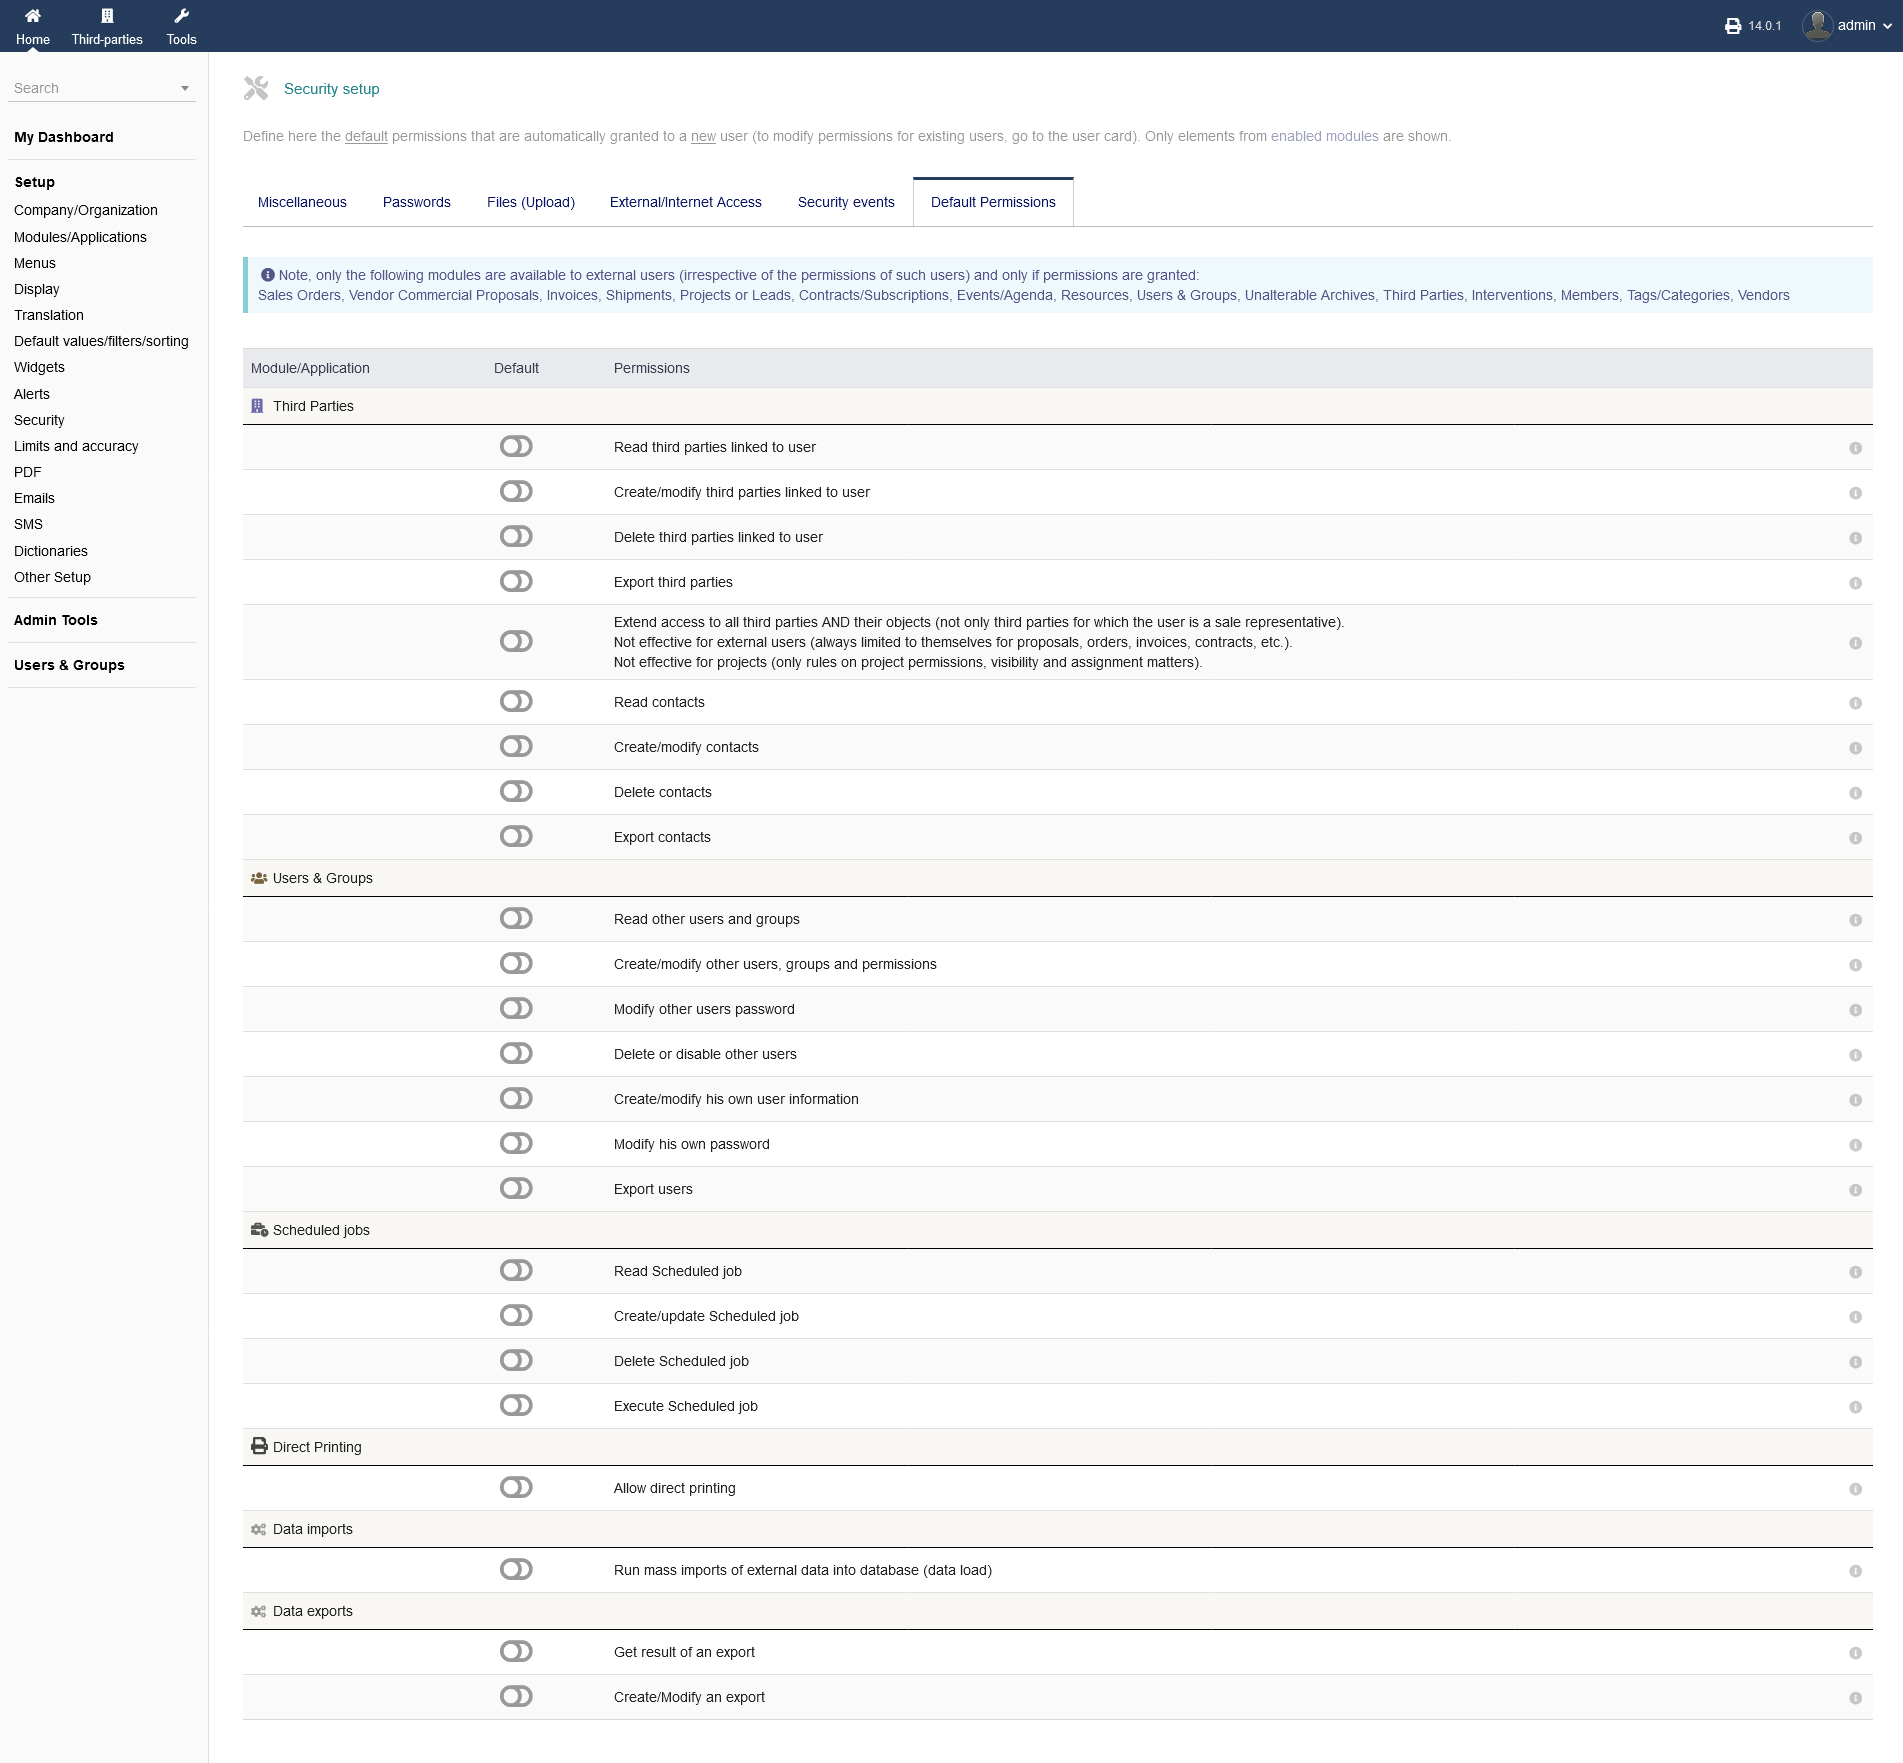
2.9.6 Default Permissions
To set default security related permissions, go to "Setup -> Security -> Default Permissions".
The following modules, which you can enable/disable, are available to external users (irrespective of the permissions of such users) and only if permissions are granted:
Sales Orders, Vendor Commercial Proposals, Invoices, Shipments, Projects or Leads, Contracts/Subscriptions, Events/Agenda, Resources, Users & Groups, Unalterable Archives, Third Parties, Interventions, Members, Tags/Categories, Vendors
To enable/disable an option as default, you can choos so by clinging the button under die header "Default". The granted permission will be described under the header "Permissions".
Make sure to be careful what permissions you are granting!
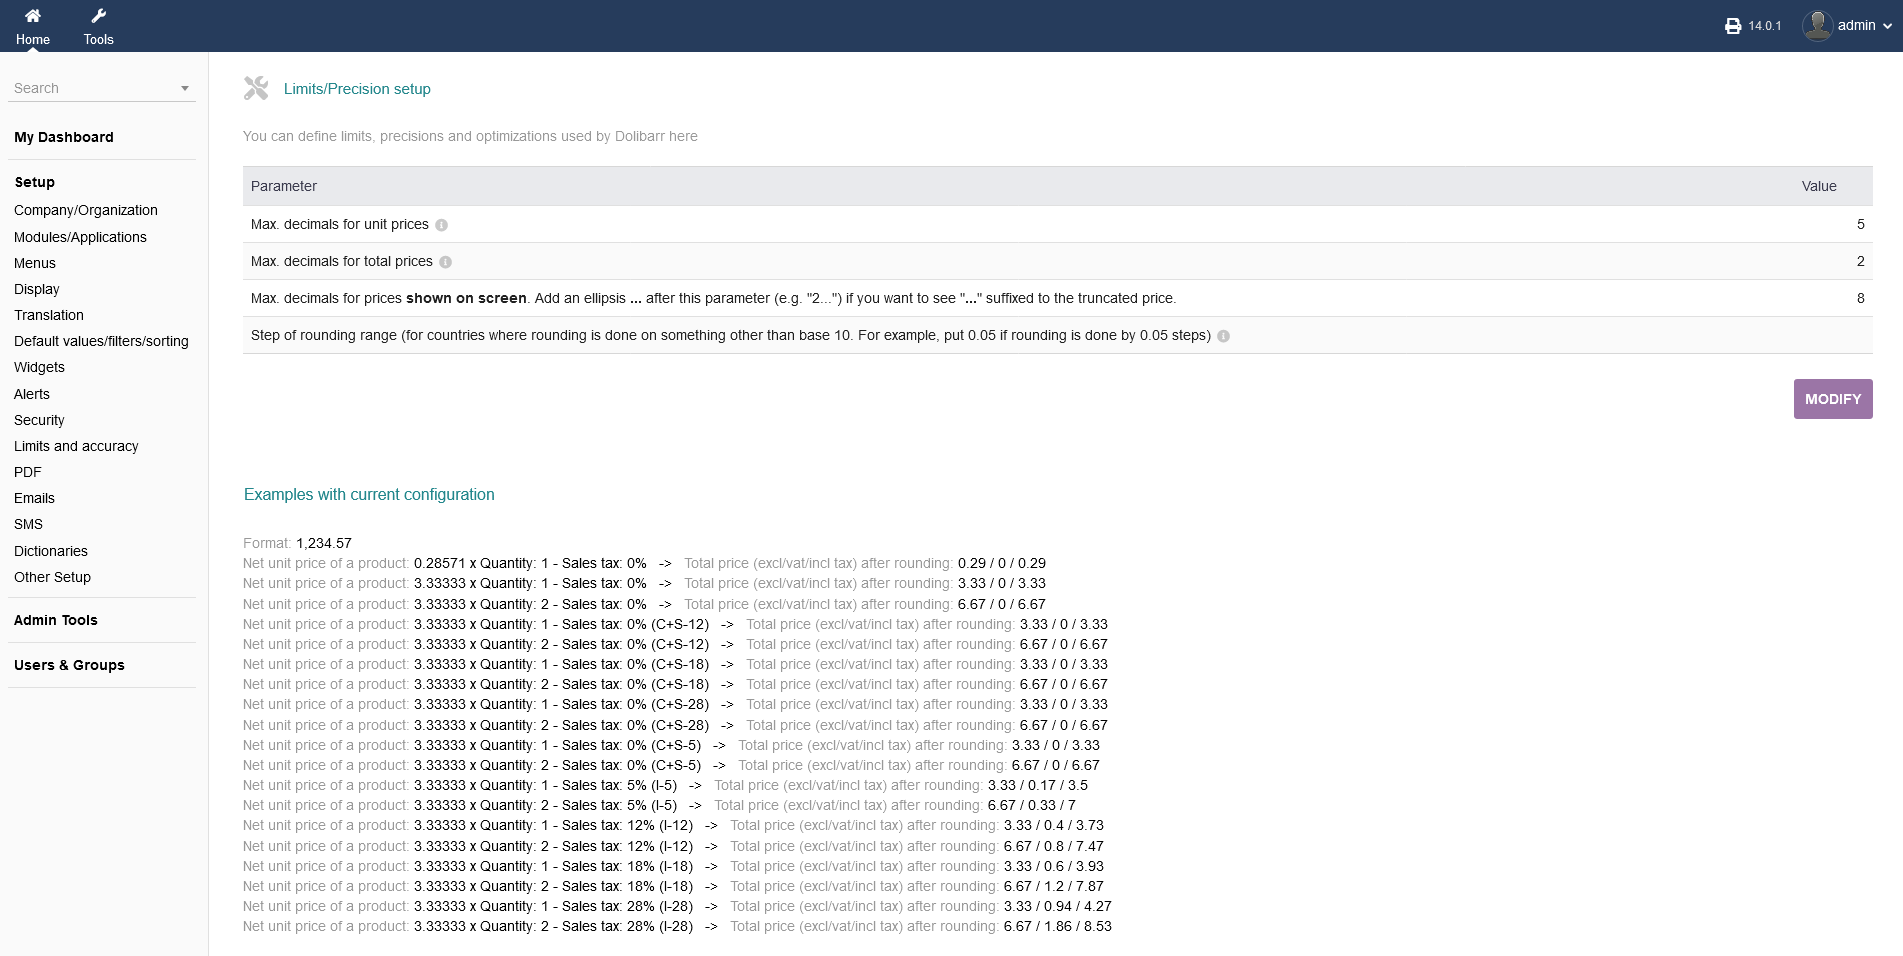
2.10 Limits and accuracy
You can define limits, precisions and optimizations under "Setup -> Security -> Limits and accuracy".
It allows you to set different "Parameters" like the maximum decimals and how to round numbers. The current configuration is shown below as an example.
When you are done, click "MODIFY".
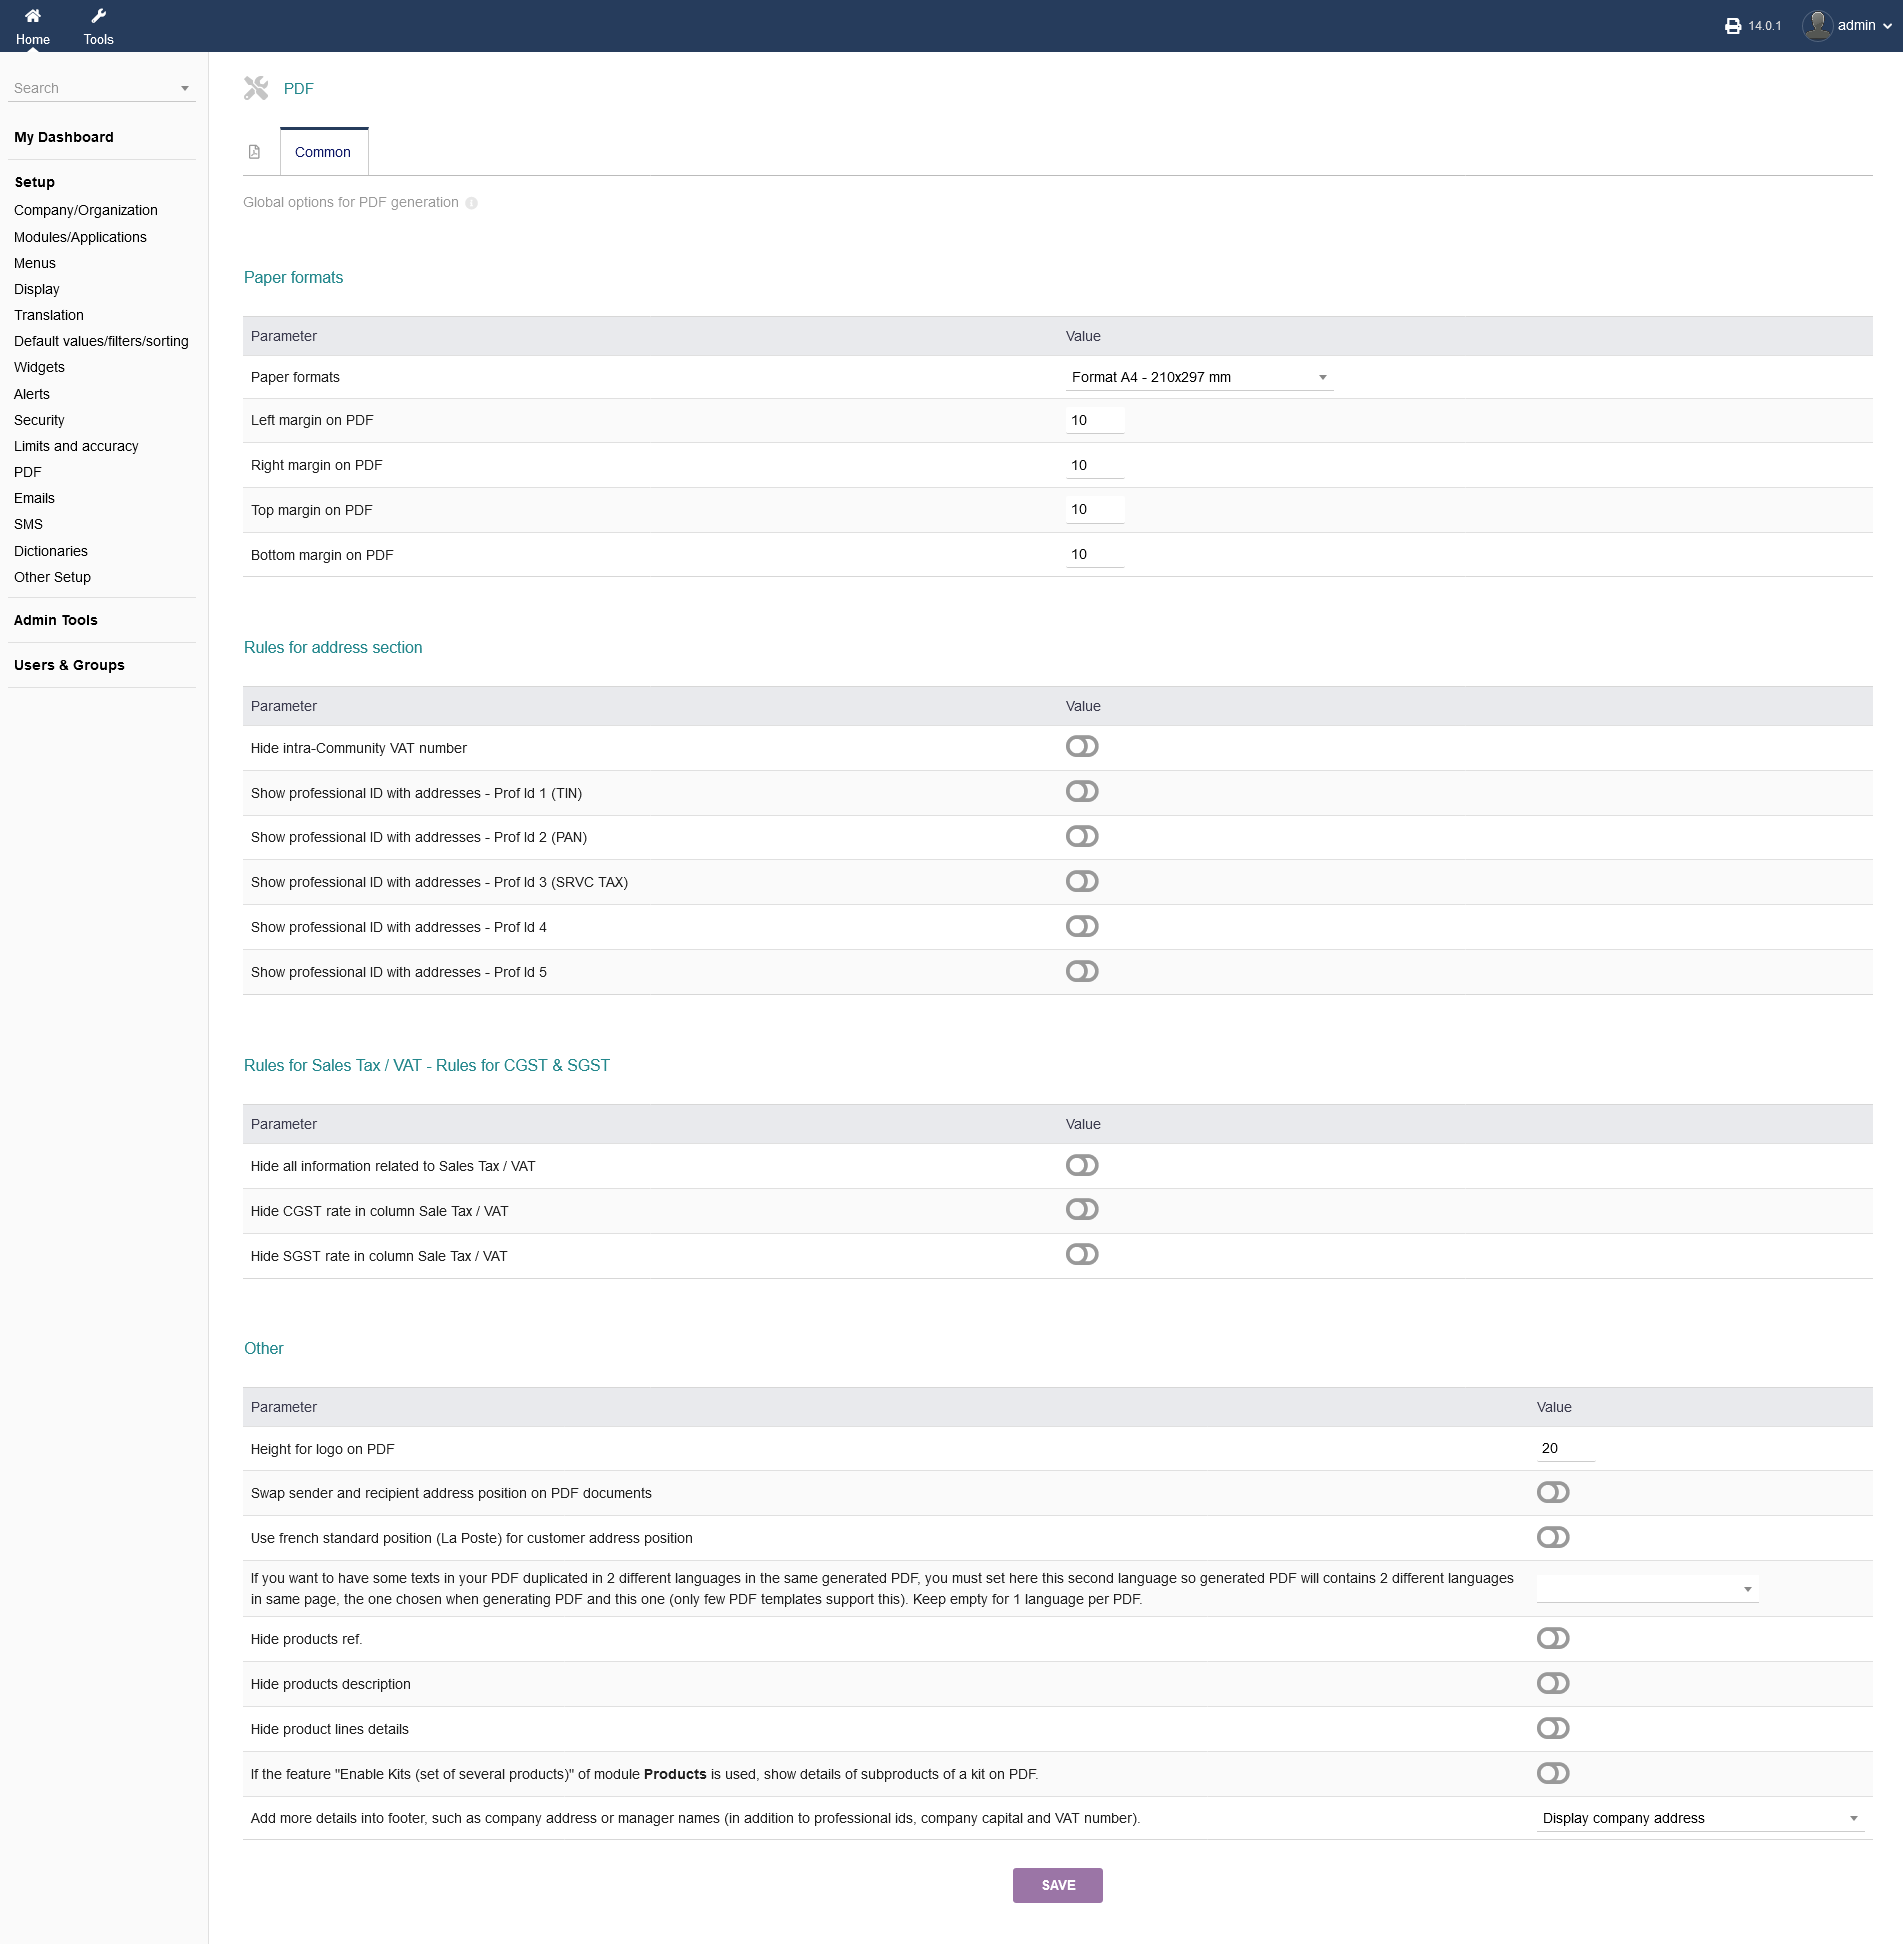
2.11 PDF
intERP can create PDF files like invoices etc. To configure the settings regarding the PDF generation, go to "Setup -> PDF".
You can set paper format, margins, rules for different section on the PDF like address section, tax/vat section and other parameters regarding the logo and genral appearance.
Values are set in mm. To enable/disable an option, click the button under the header "Value".
When you are done, click "SAVE".
Make sure, that you set your options accordingly to the legal requirements of an invoice that are applicable to your area! It can be the case, that certain fields/collums/areas are legally required. Please check that beforehand.
2.12 Emails
intERP can send emails e.g. with your Invoices attached. Any Settings regarding emails can be found under "Setup -> Emails".
2.12.1 Outgoing Emails
Any settings that is related to sending emails can be found under "Setup -> Emails -> Outgoing emails".
Under "Parameter", you can disable sending emails for testing puposes or set an email address where all your email shall go to, to have a pre selected recipient for testing reasons.
At "Email sending method" you can configure your sending method (PHP, SMTP/SMTPS, Swift) as well as all ports and host addresses and encryption details.
"Other Options" you can set an sending email adress, where automated emails get send from (like noreply@youbusiness.com), the default sending email address for manual emails, email adress for recieving error emails, a seperat email address where all emails get copied to, as well as the option that employees get suggested.
To edit those options, click "MODIFY". When you are done, click "SAVE".
You also have the option to test your newly saved settings by sending a test email. Click "TEST SENDING". You will see an email form to pop up below.
If you like to use HTMLfor sending that email, click "TEST SENDING HTML".

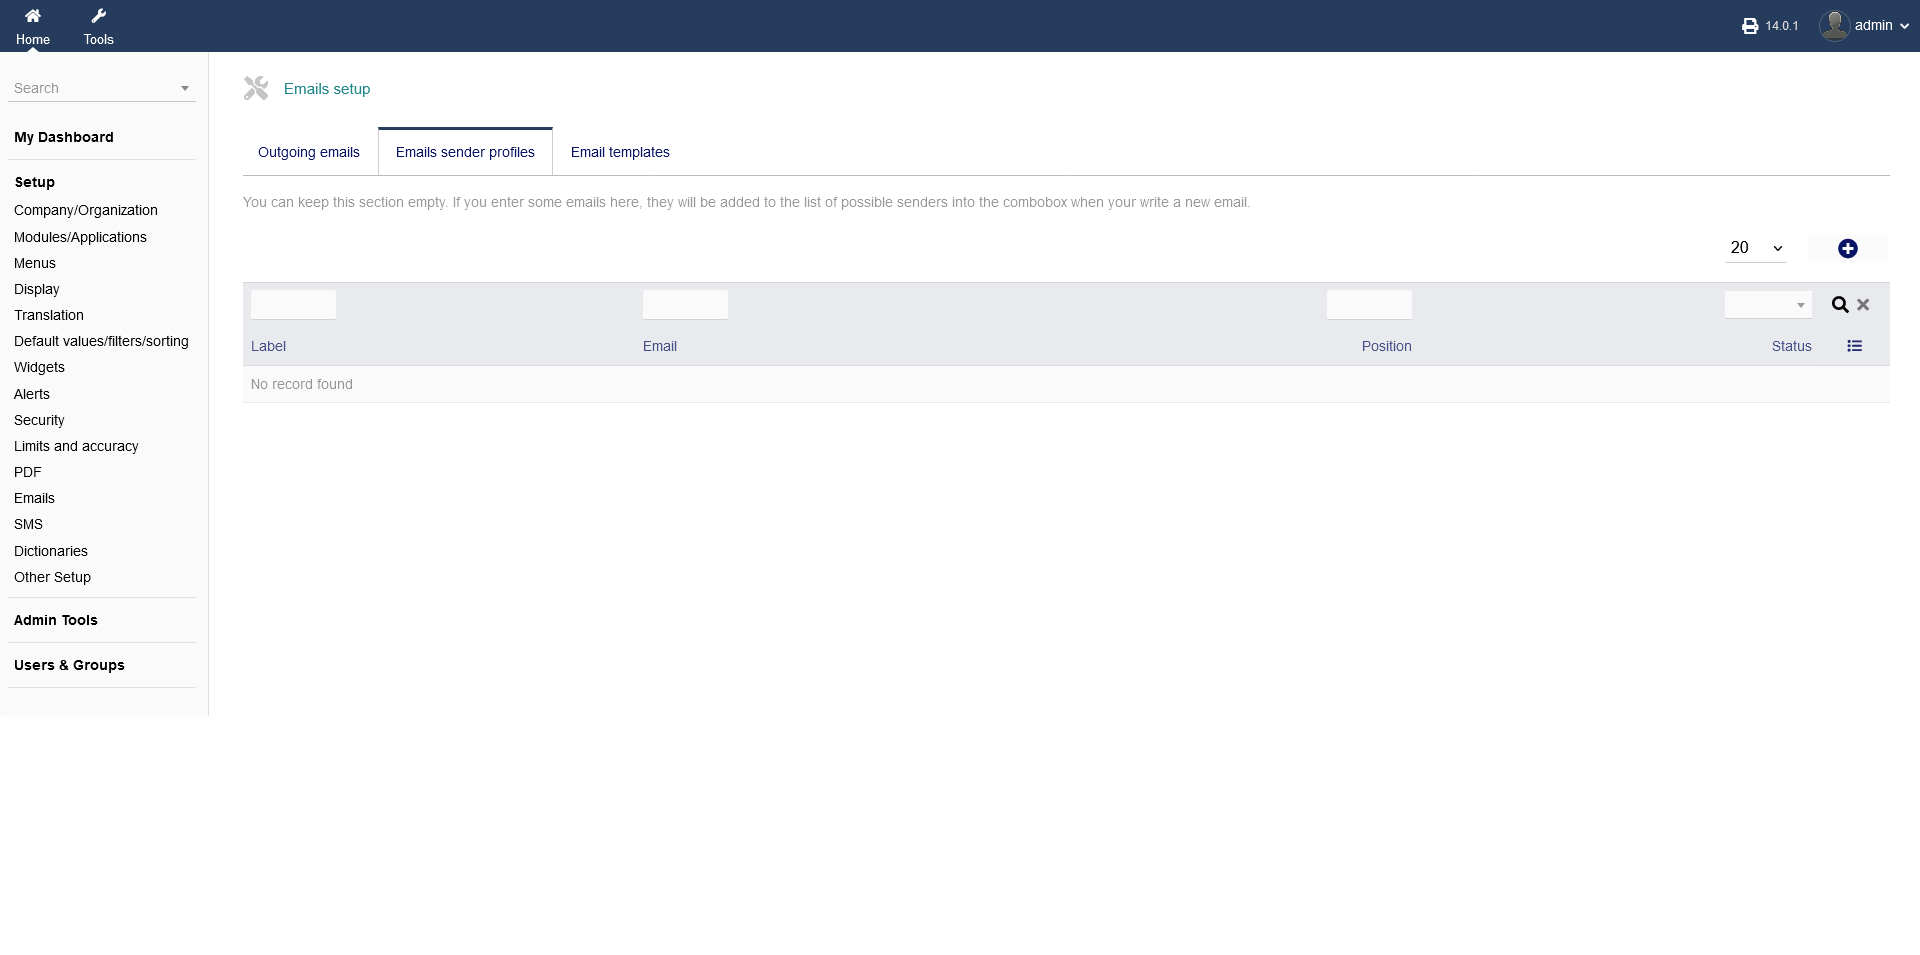
2.12.2 Emails sender profiles
You can set differend sending email profiles, if you e.g. need multiple sending emails for different products, services or maybe subcompanies. Go to "Setup -> Emails -> Emails sender profiles".
You can see all of them the list below. You can set the maximum listings (20-25000) on the right hand side.
To add a new profile, click the blue button with the plus sign on the right hand side.
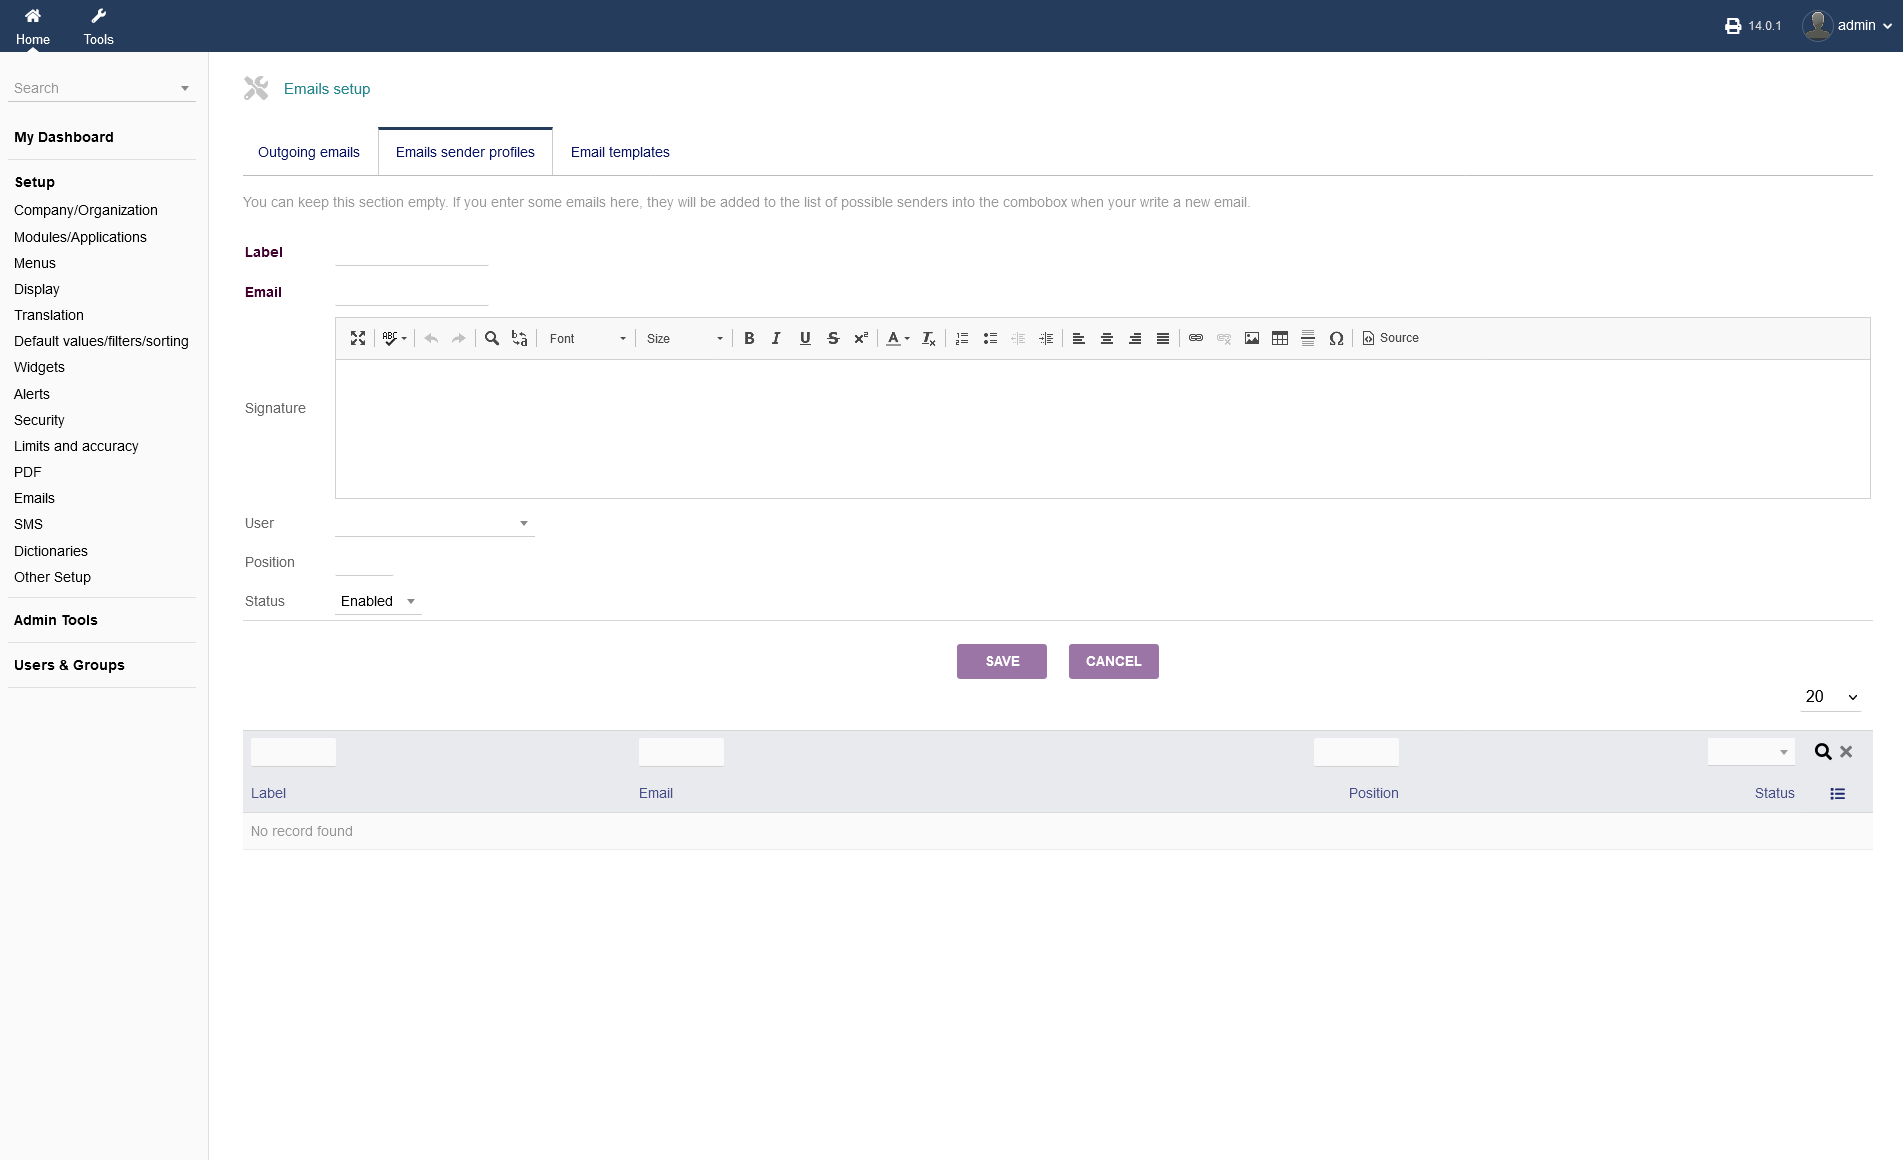
After clicking the adding button, you will see a form where you can fill in a label for that profile, the address, the signature, user, position and the status of that profile (enabled/disabled).
When you are done, click "SAVE".
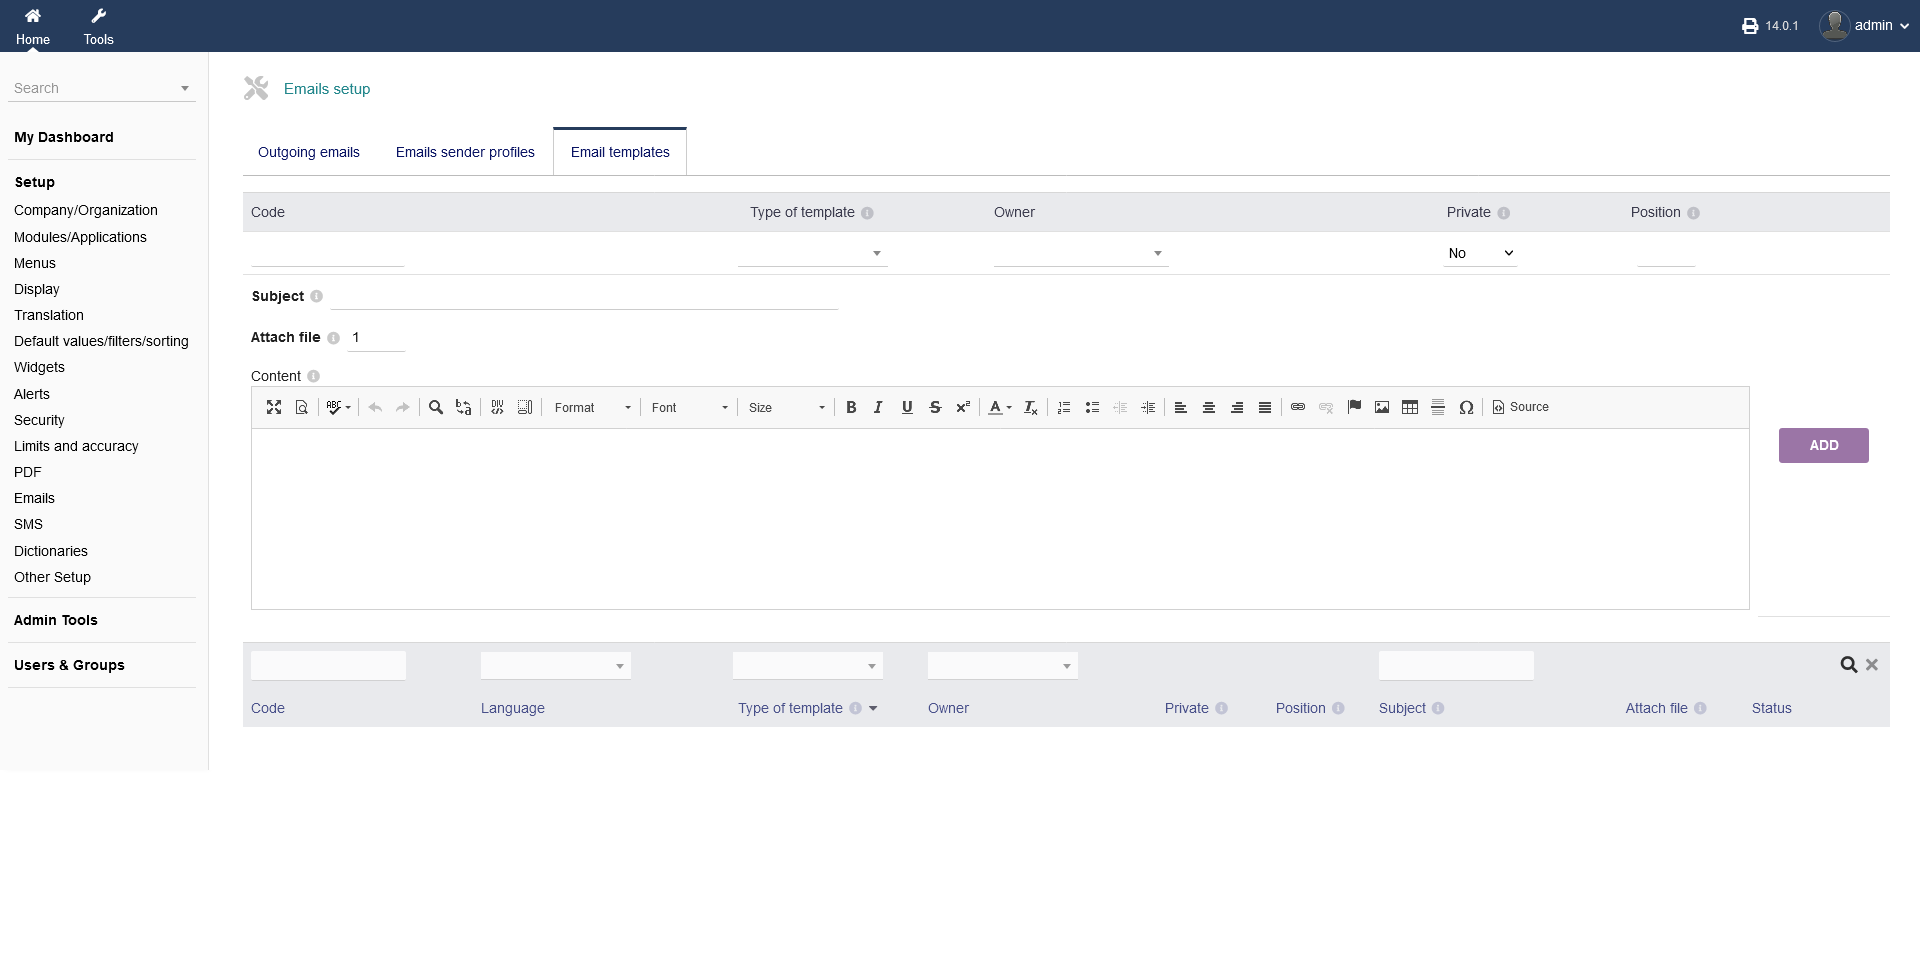
2.12.3 Email templates
intERP lets you create email templates under "Setup -> Emails -> Email templates".
There, you can give it a code, a type of template, ownership (default is admin/super admin), if it is private or not and its position.
Furthermore, you can give a subject and the content of the email.
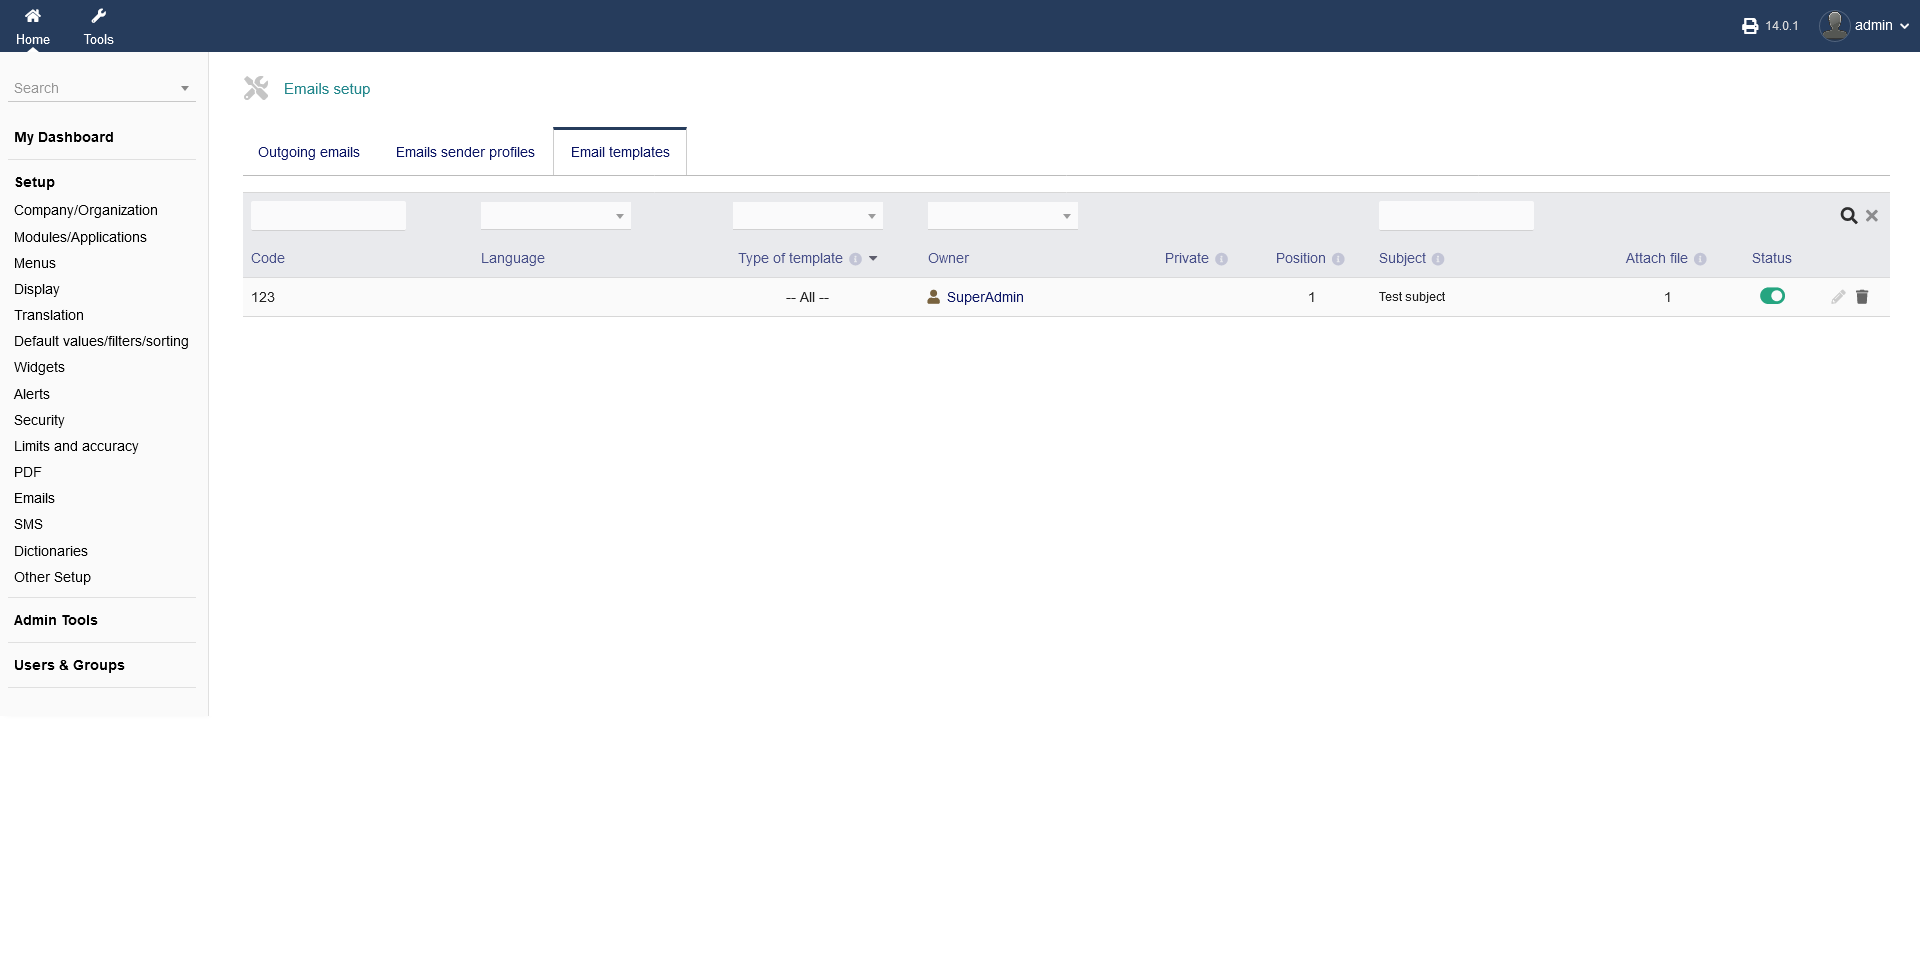
On the very bottom you find a listing of your templates.
When you are done, click "ADD".
Your listed templates can be activated/deactivated on the button under "Status", be edited by clicking the "pencil button" or be deleted by clicking on the "trash button".
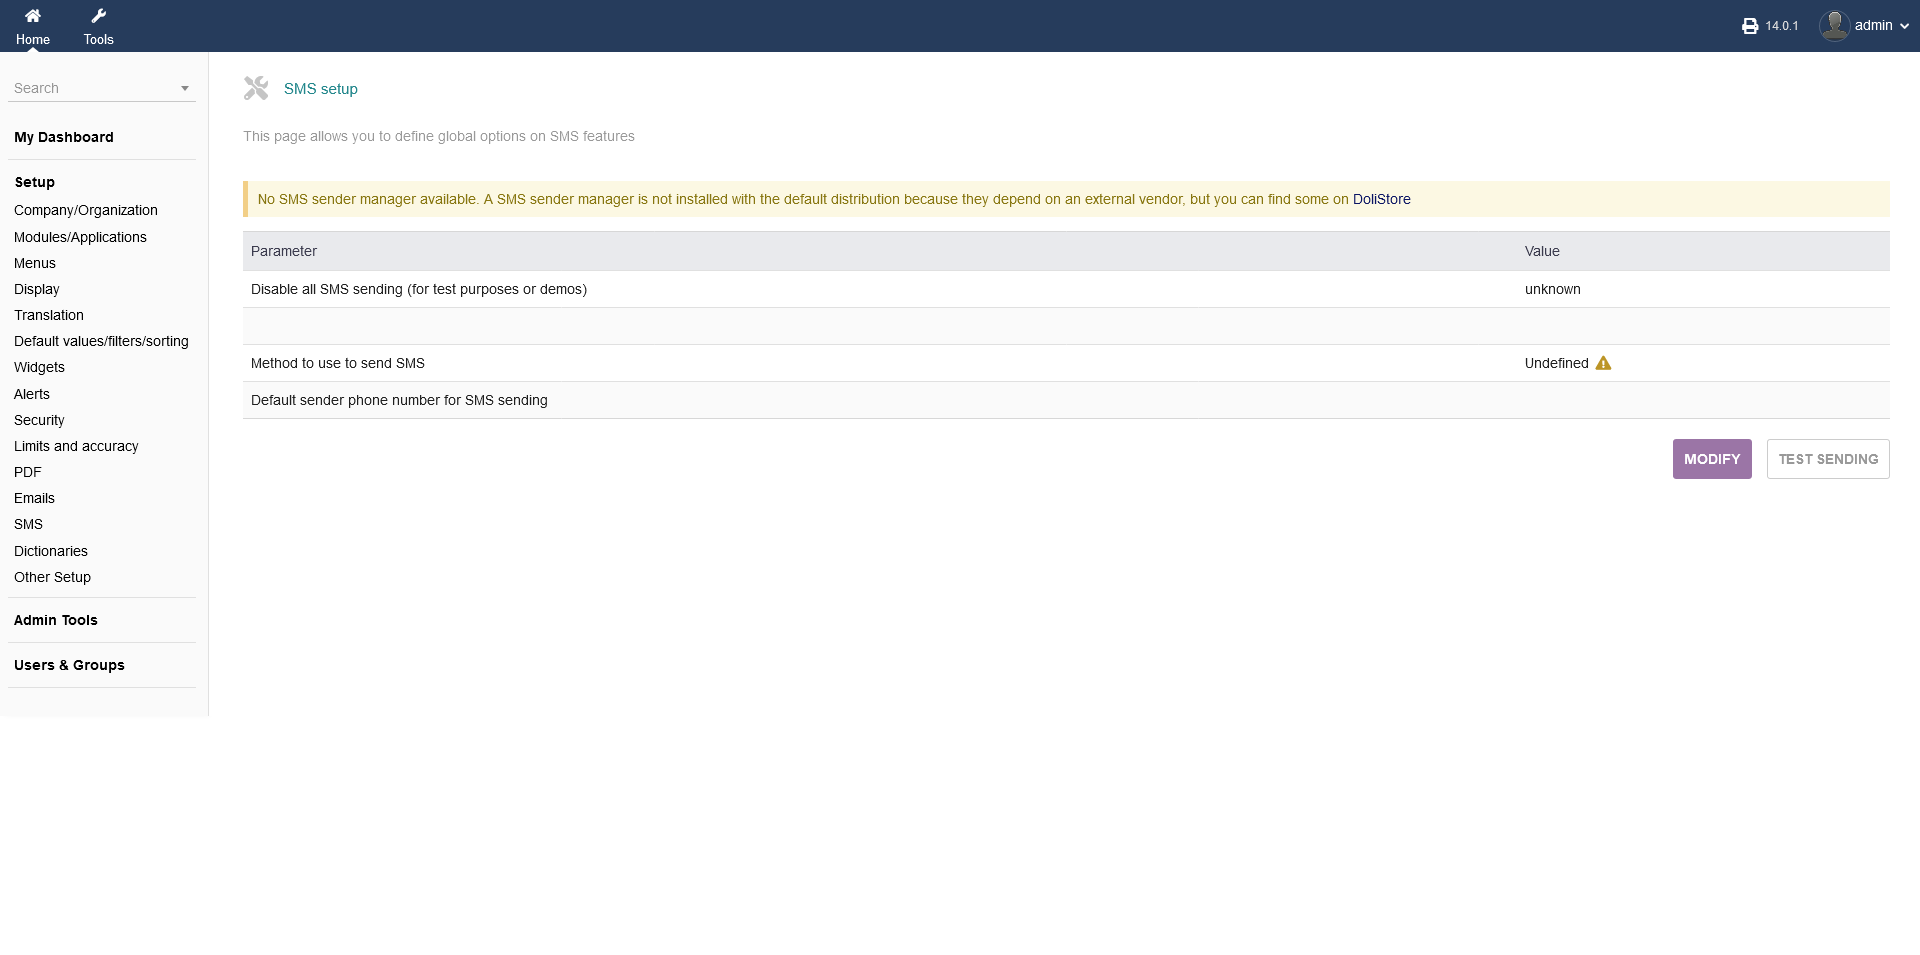
2.13 SMS
You can set SMS related settings with intERP under "Setup -> SMS". For it to function, you need to install a sms sending manager.
You can disable the sending of sms for testing new settings, as well as method and phone number.
To edit those options, click "MODIFY". When you are done, click "SAVE".
If you installed a sending manager and set up the settings correctly, you can send a sms for testing. Click "TEST SENDING"
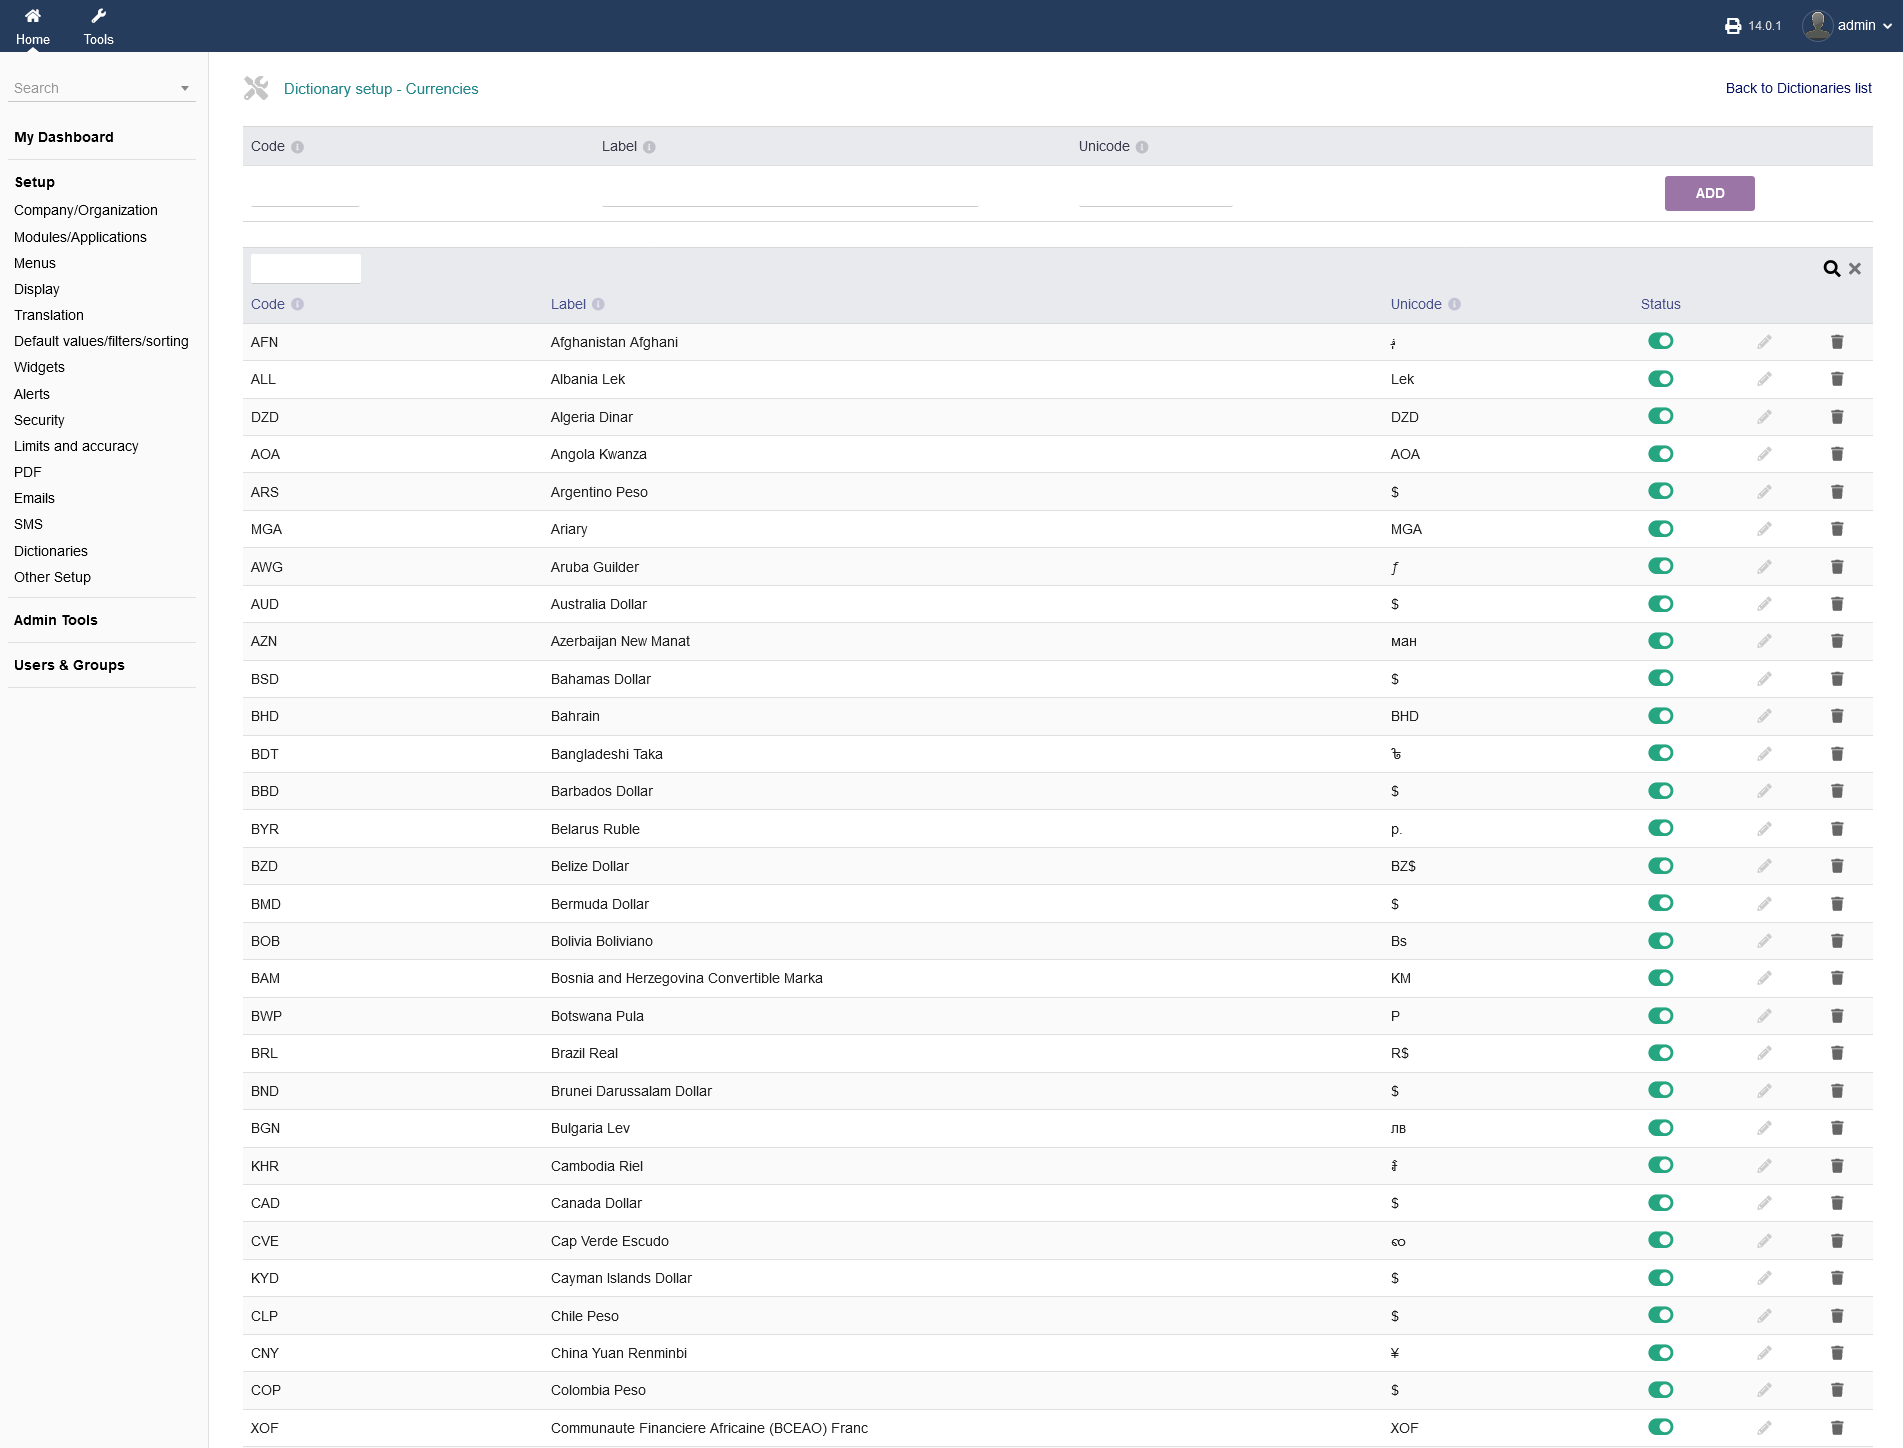
2.14 Dictionaries
To enable/disbale different regions, currencies, vat rates etc. go to "Setup -> Dictionaries".
To change any parameter, click on the "pencil" symbol.
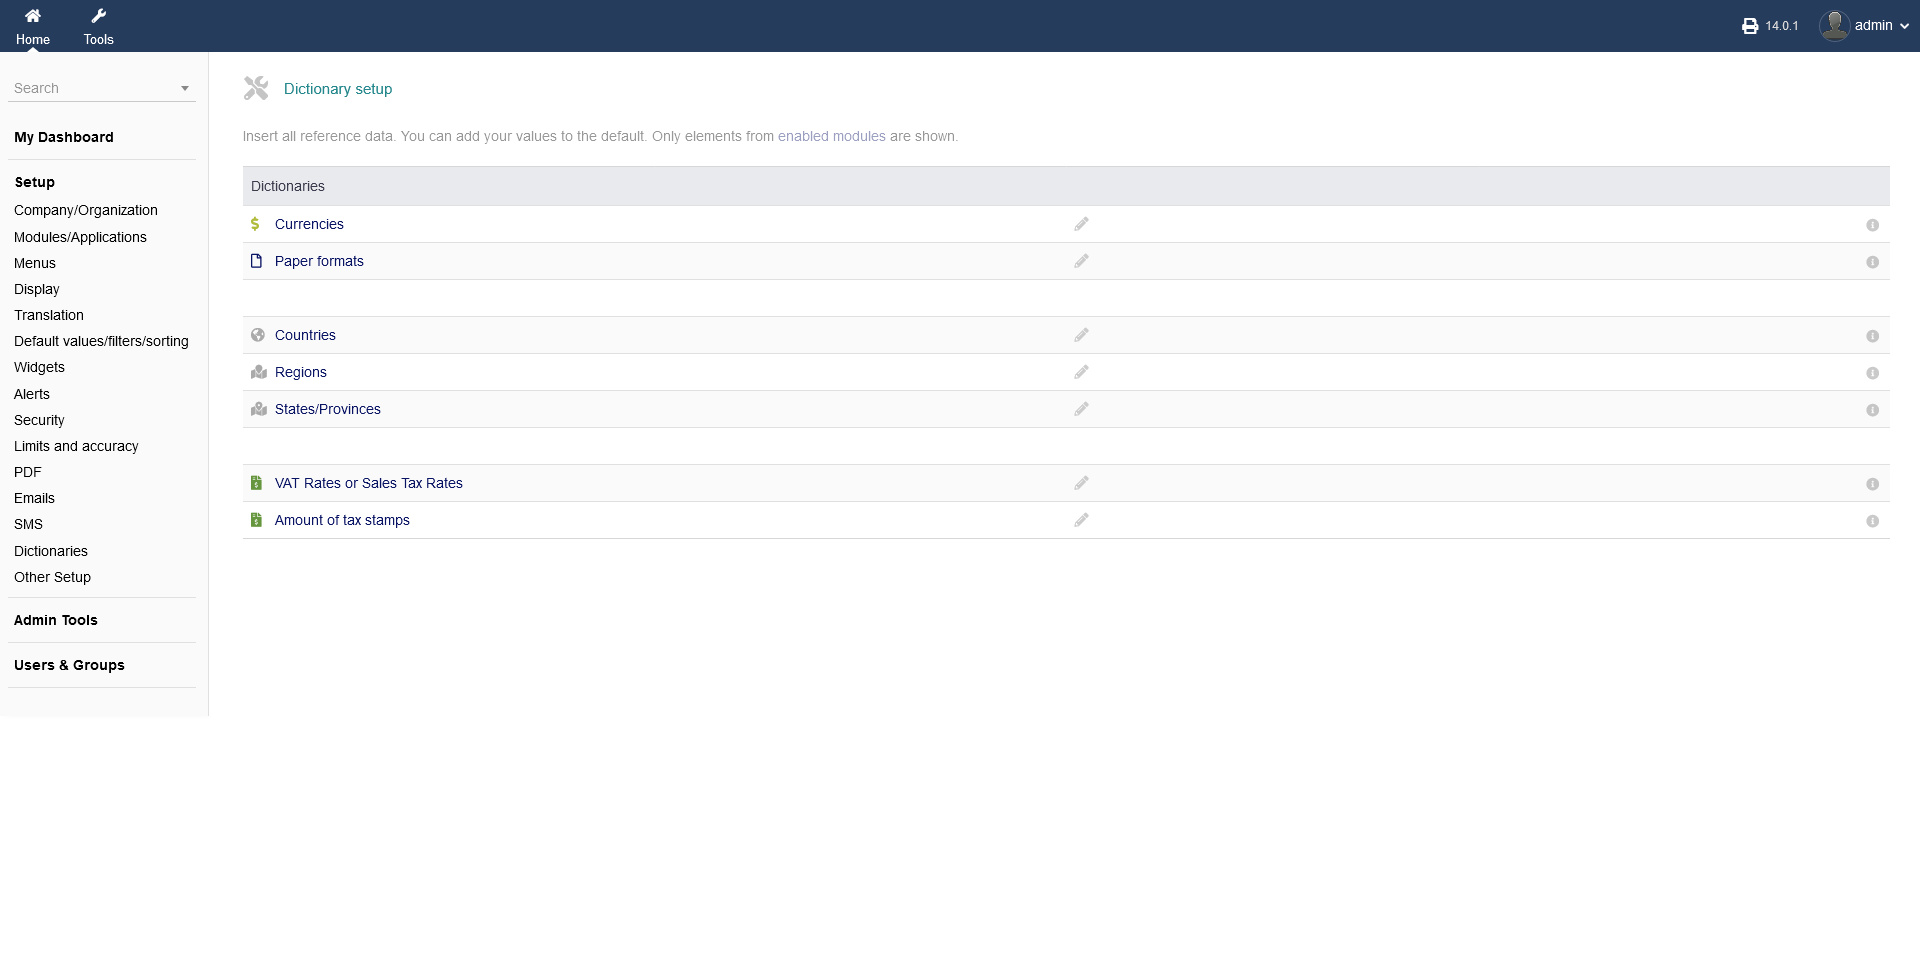
In order to enable different regions, currencies, vat rates etc. click the button under the header "Status" to enable or disable certain parameters.
You can delete on parameter by clicking the "pencil" button or deleting by clicking the "trash" button.
Using the very first line, you can add certain parameters by filling out "code", "label", "unicode" and clicking "ADD" in the end.
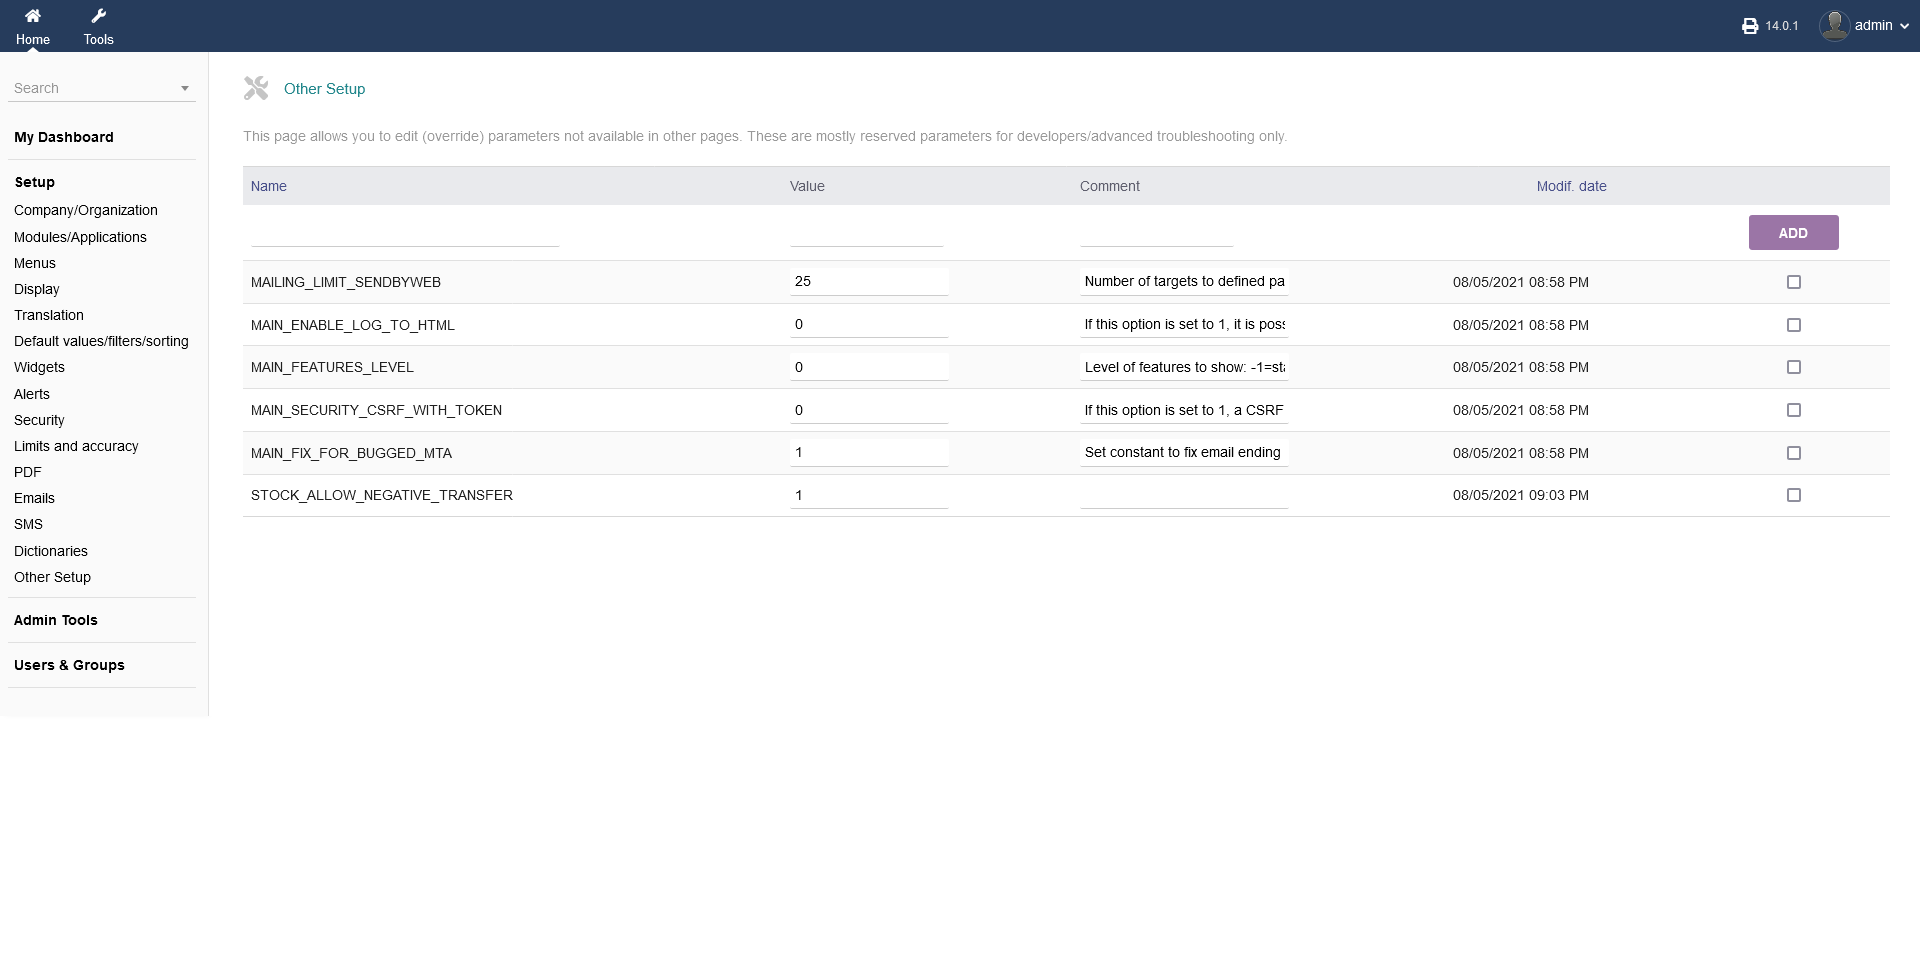
2.15 Other Setup
Under "Setup -> Other Setup", intERP allows you to edit/override parameters, not available in other pages. Be aware that this option is for advanced users only.