In order to get a general statistics birds eye view, click on "Third-party" on the very top of your left hand menu.
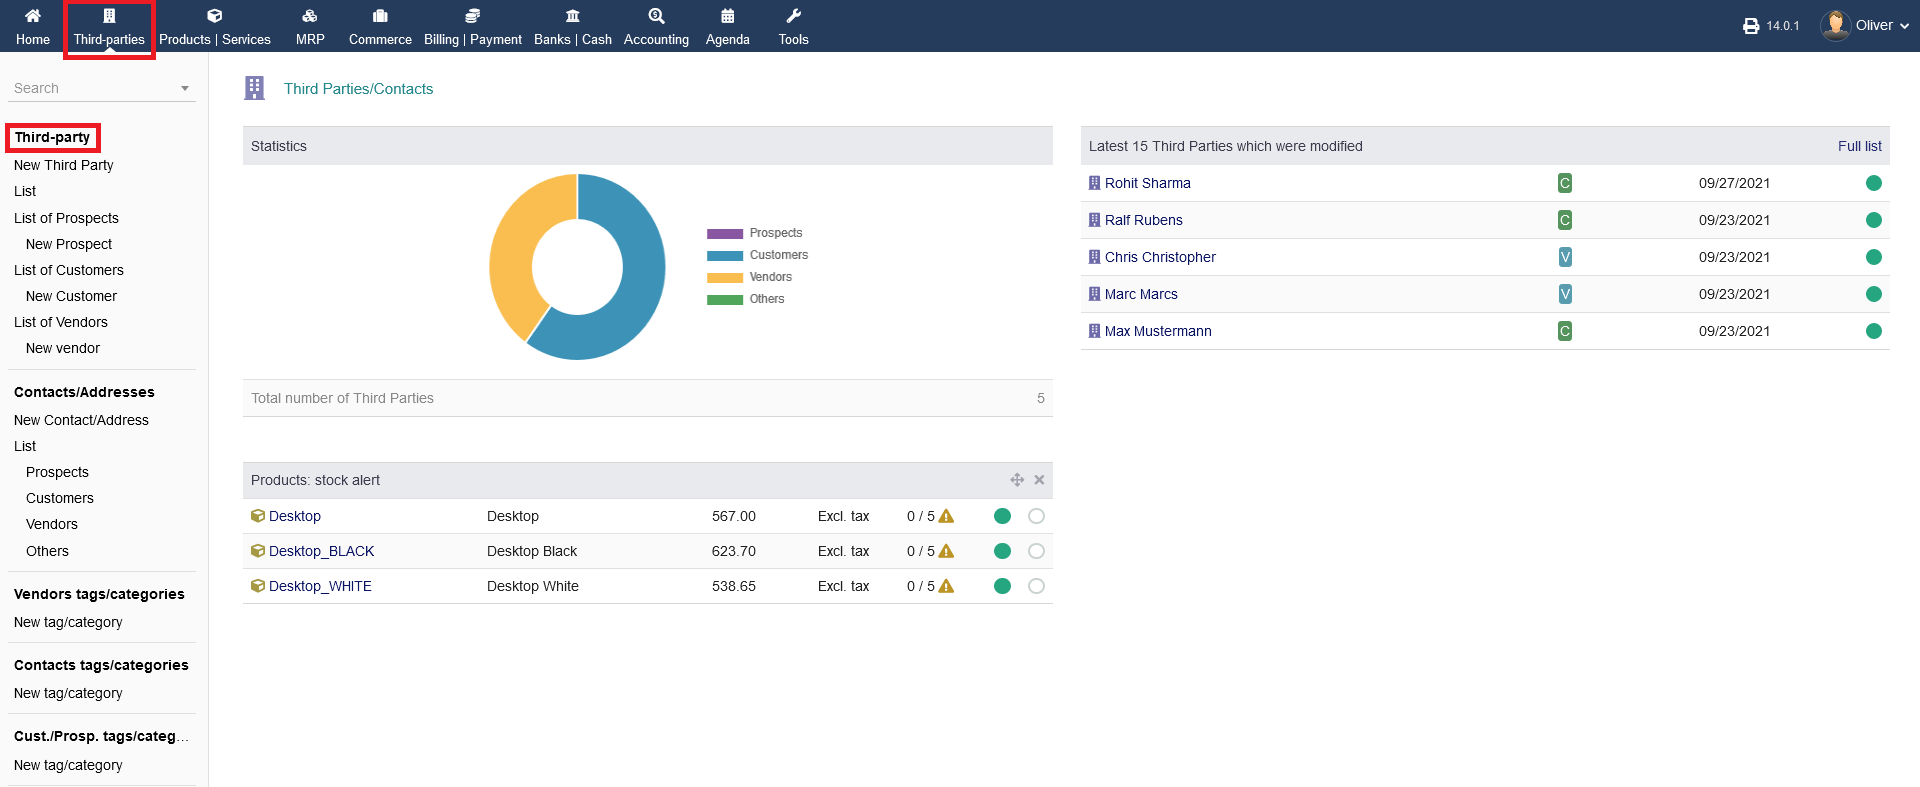
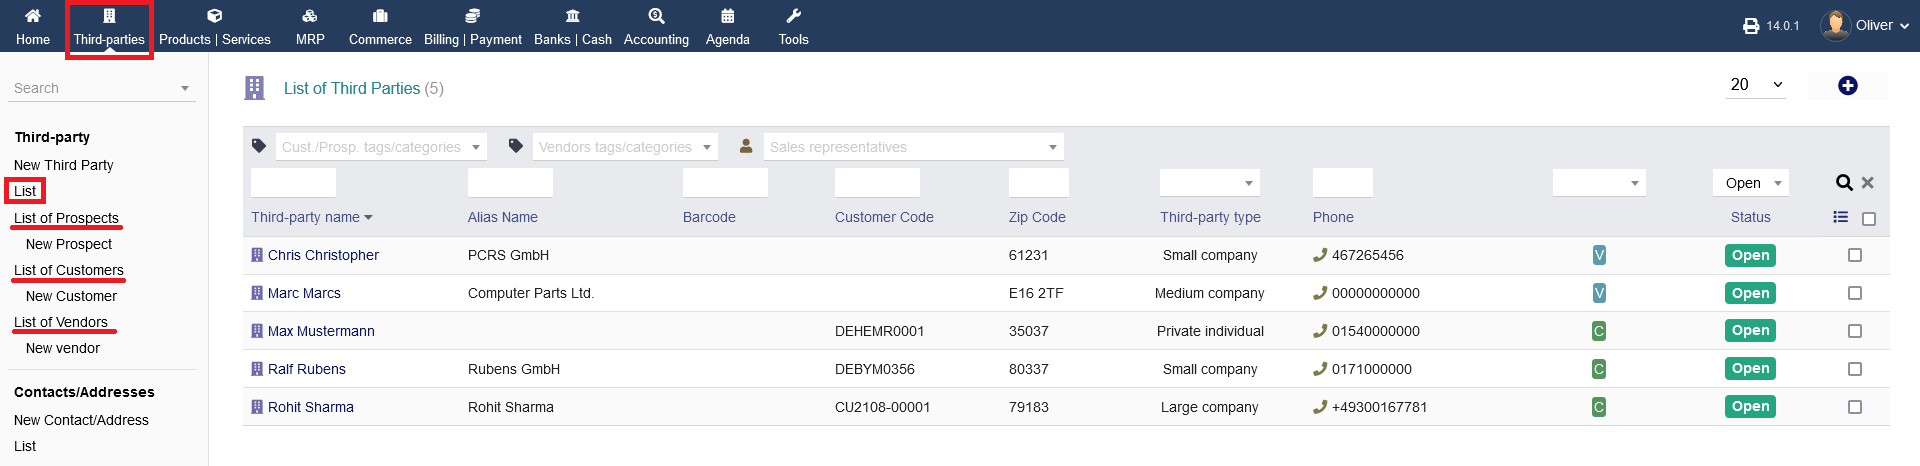
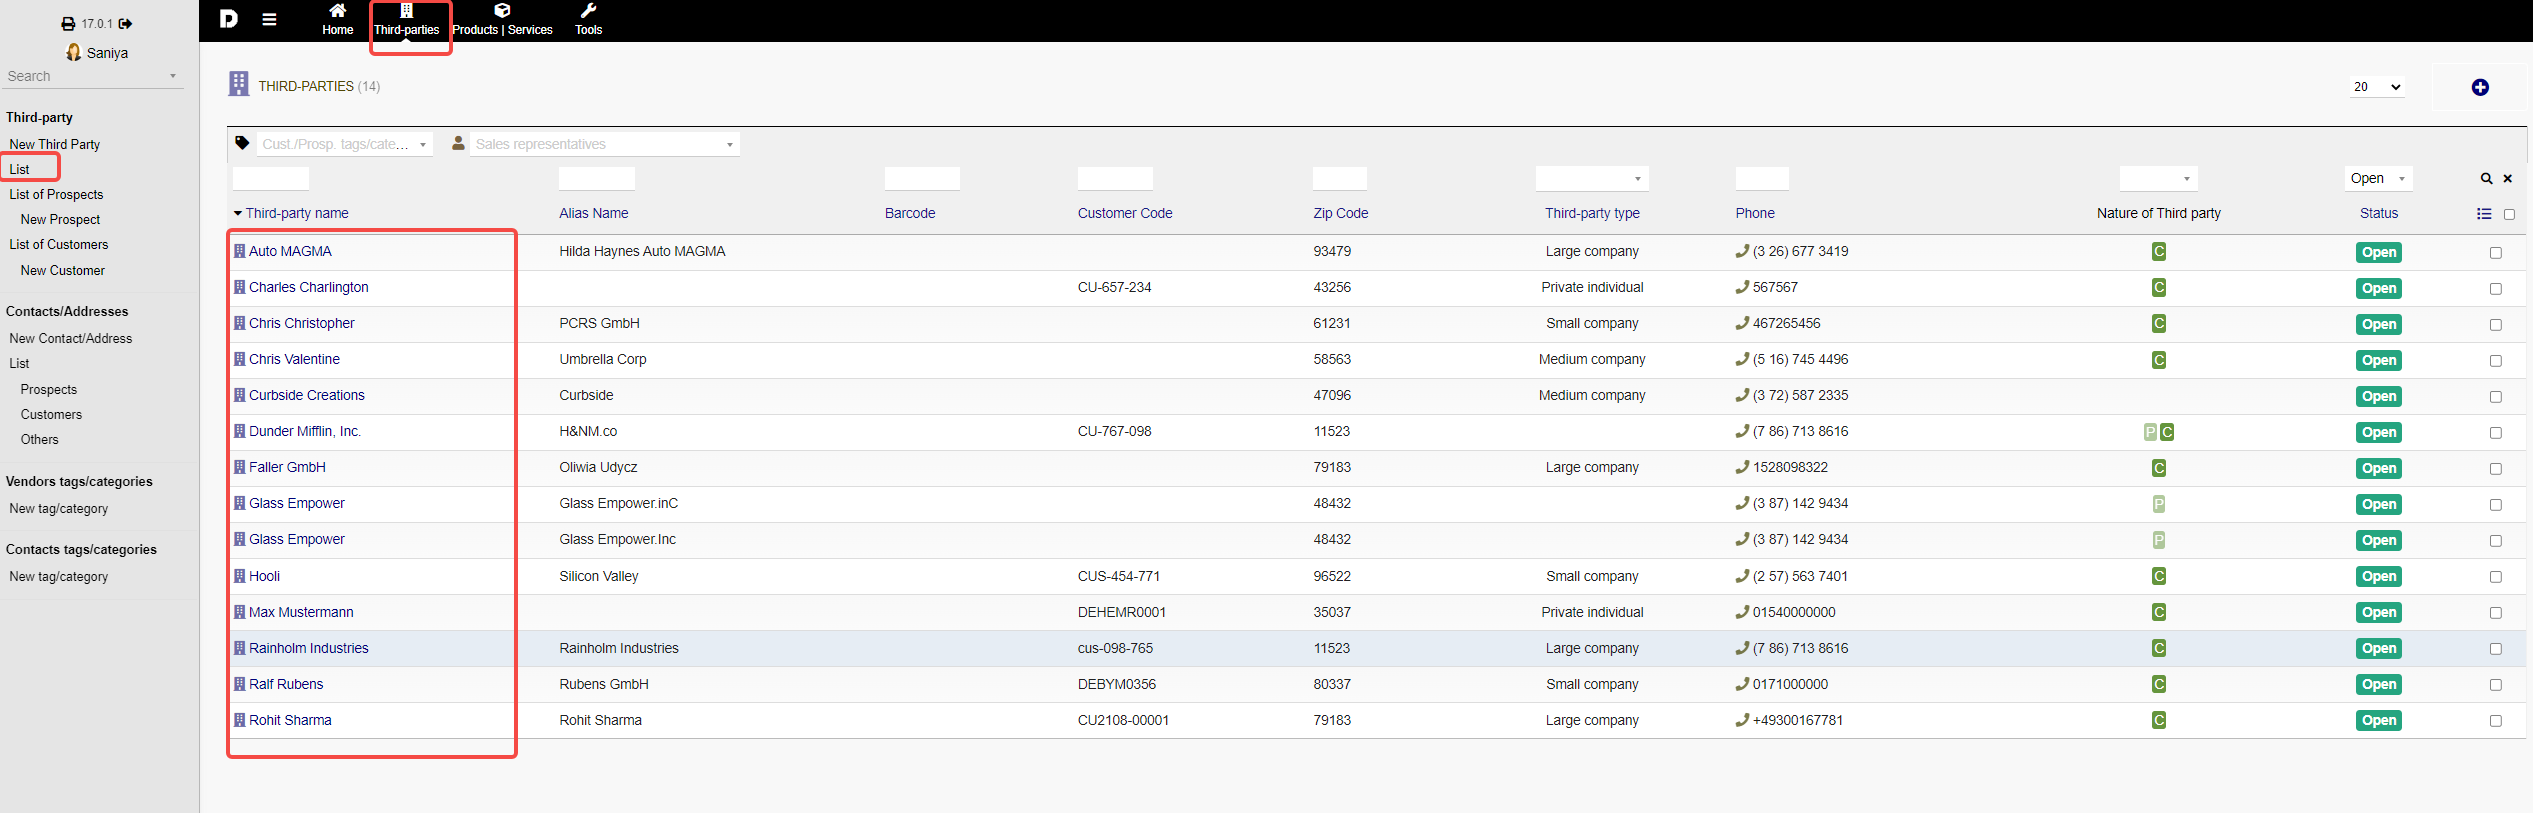
To have an overview of your third parties, click "List" to see all third party entries. You can have a categorized overview by clicking on "List of Prospects", "List of Customers" or "List of Vendors".
On the top of the listing, you can filter your third party contact by customer or vendor tags, sales representatives that are engaged with third parties, name, alias, barcode, customer code, zip code, third party type and their status. Select or fill out the respective fields/menus to your liking and click the "magnifier" icon.
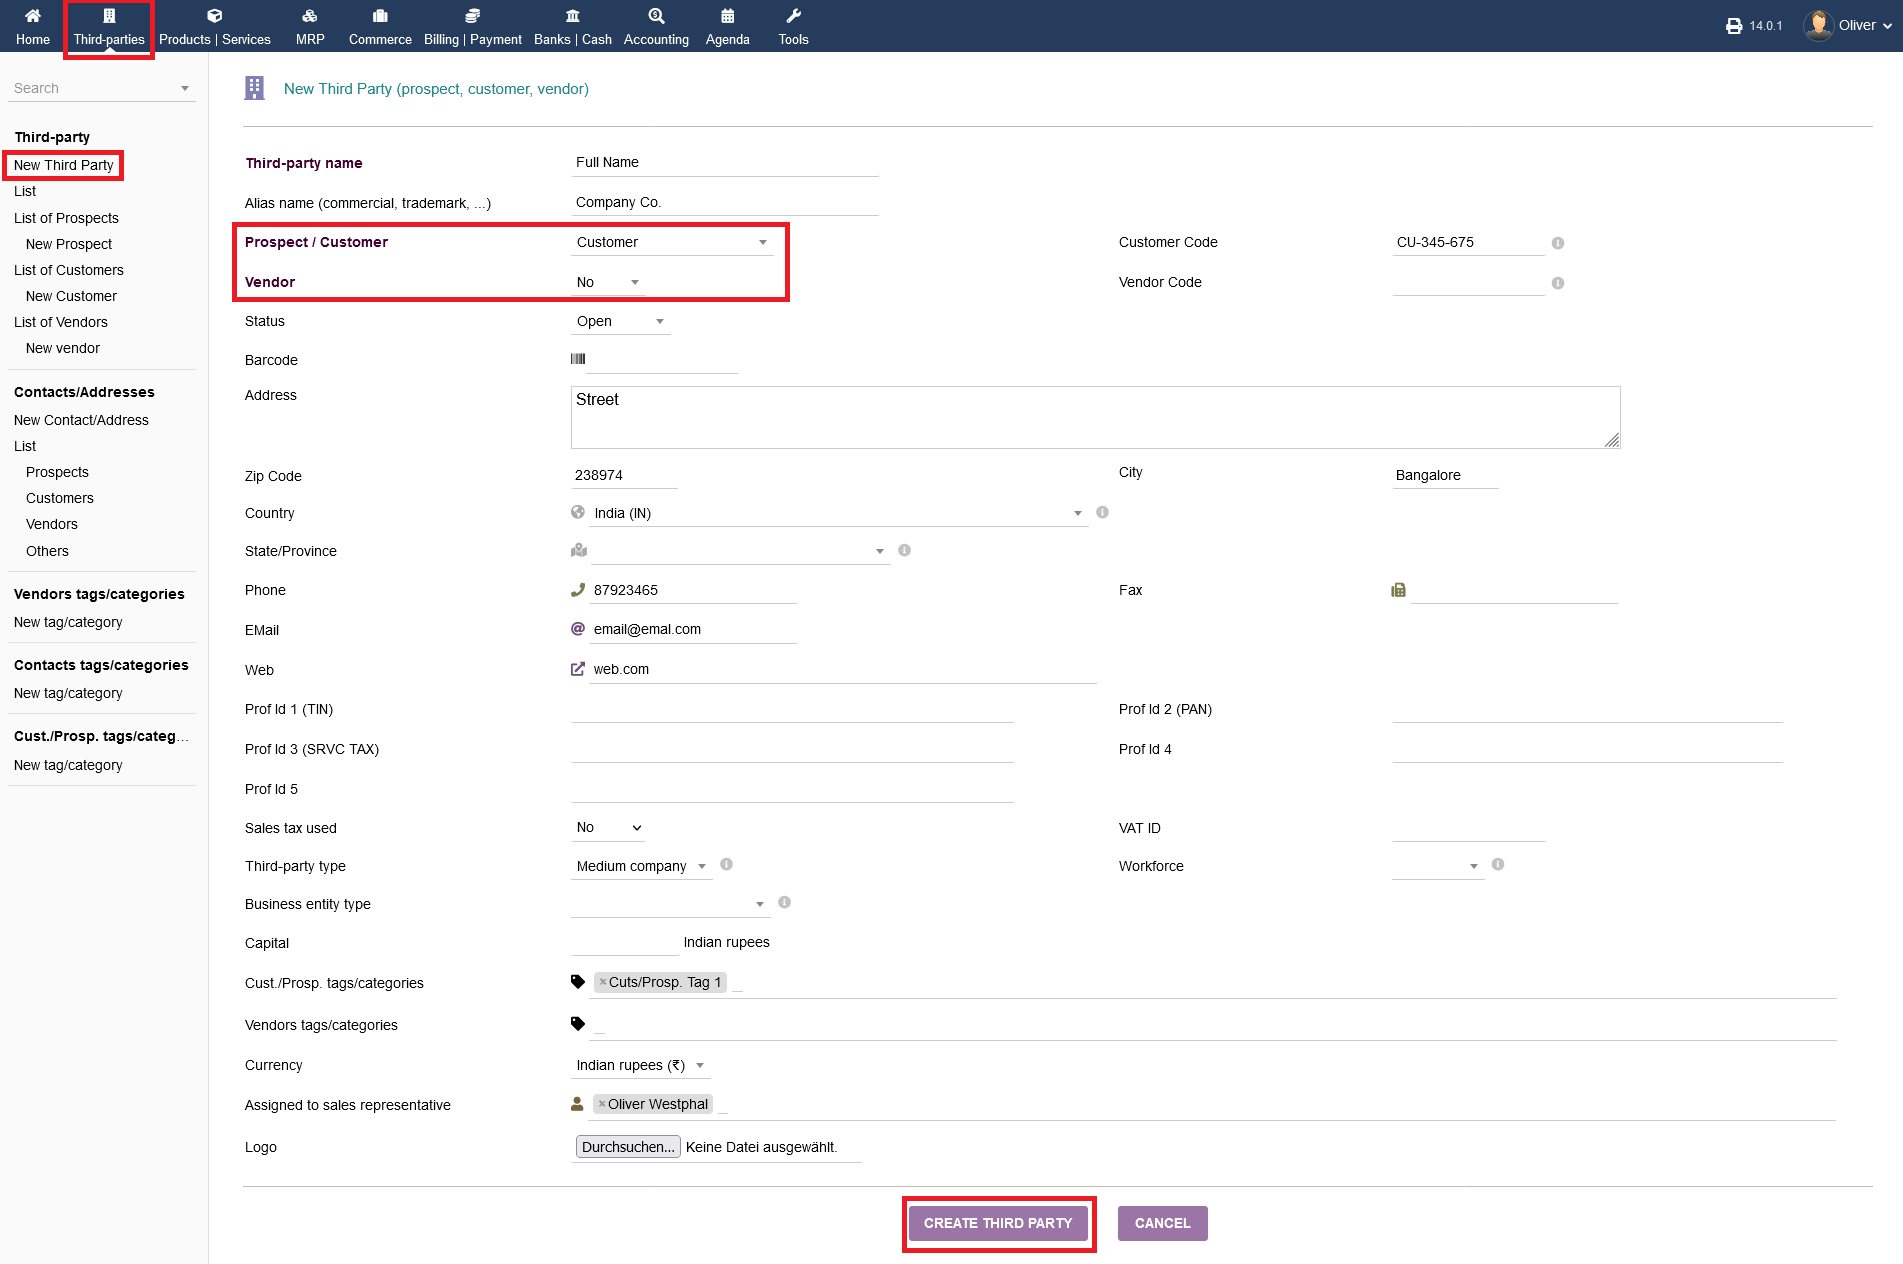
Creating a new third party (prospect, customer, vendor) :
Under Third party you can create Prospects , Customer and Vendor .
Under option Prospect/Customer : you can select the given options :
To setup a "Prospect " from the drop-down menu select "Prospect " and select "Vendor " option as . "No ".
To setup a "Customer " from the drop-down menu select "Customer" and select "Vendor " option as . "No ".
To setup a "Prospect/Customer " from the drop-down menu select "Prospect/Customer " and select "Vendor " option as . "No "
To setup a "Vendor" from the drop-down menu select "Nor prospect, nor customer " and select "Vendor " option as . "Yes ".
For each combination you select, you can fill in more details to it like "Address" ," URL", "email ", "Phone number" and "Logo", you can upload a picture or logo of your third party .
To finish the process, click on "CREATE THIRD PARTY".
Alternatively, you can choose the menu option "New Prospect", "New Customer" or "New Vendor" to create the respected new third party.
Once you have created an Prospect/Customer , you can view those by click on "List" open form the left menu bar.
Editing third party entries & further options :
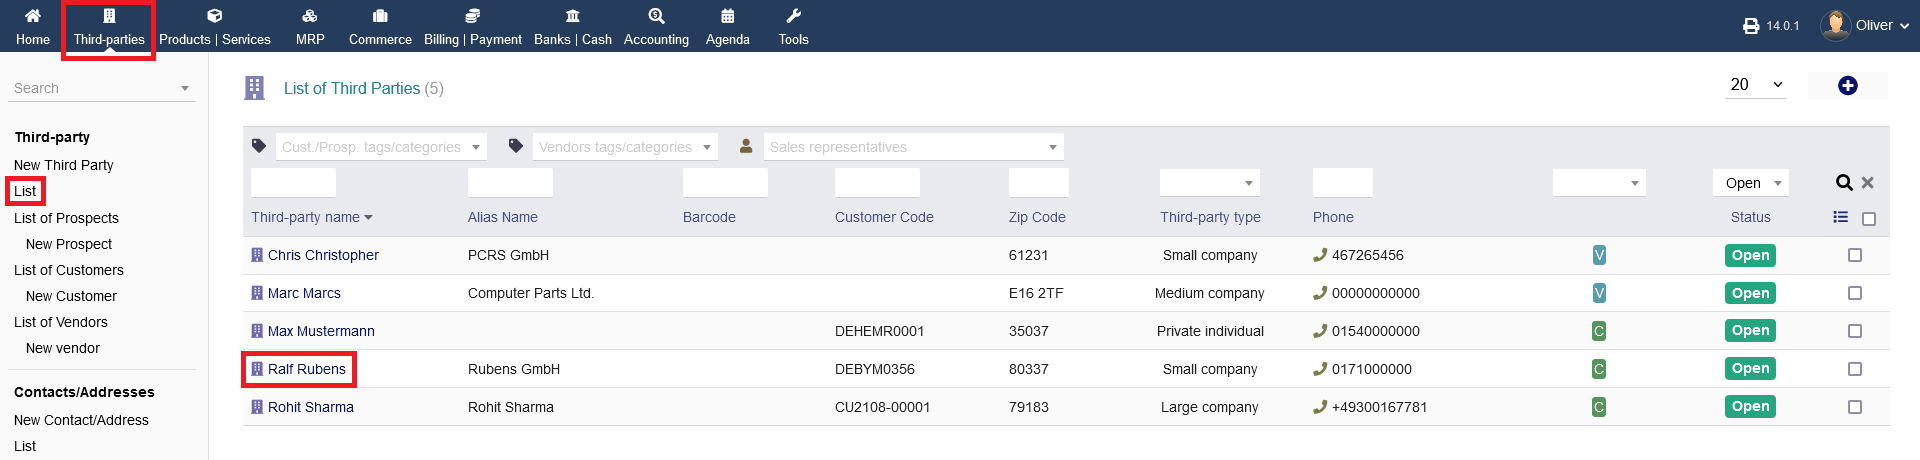
To add or to edit a third party (prospect, customer, vendor), click on "List" or the respective categorized listings "List of Prospects", "List of Customers" or "List of Vendors". in more details to your created "Prospect/Customer" you would need to click on particular Third part name as shown below :
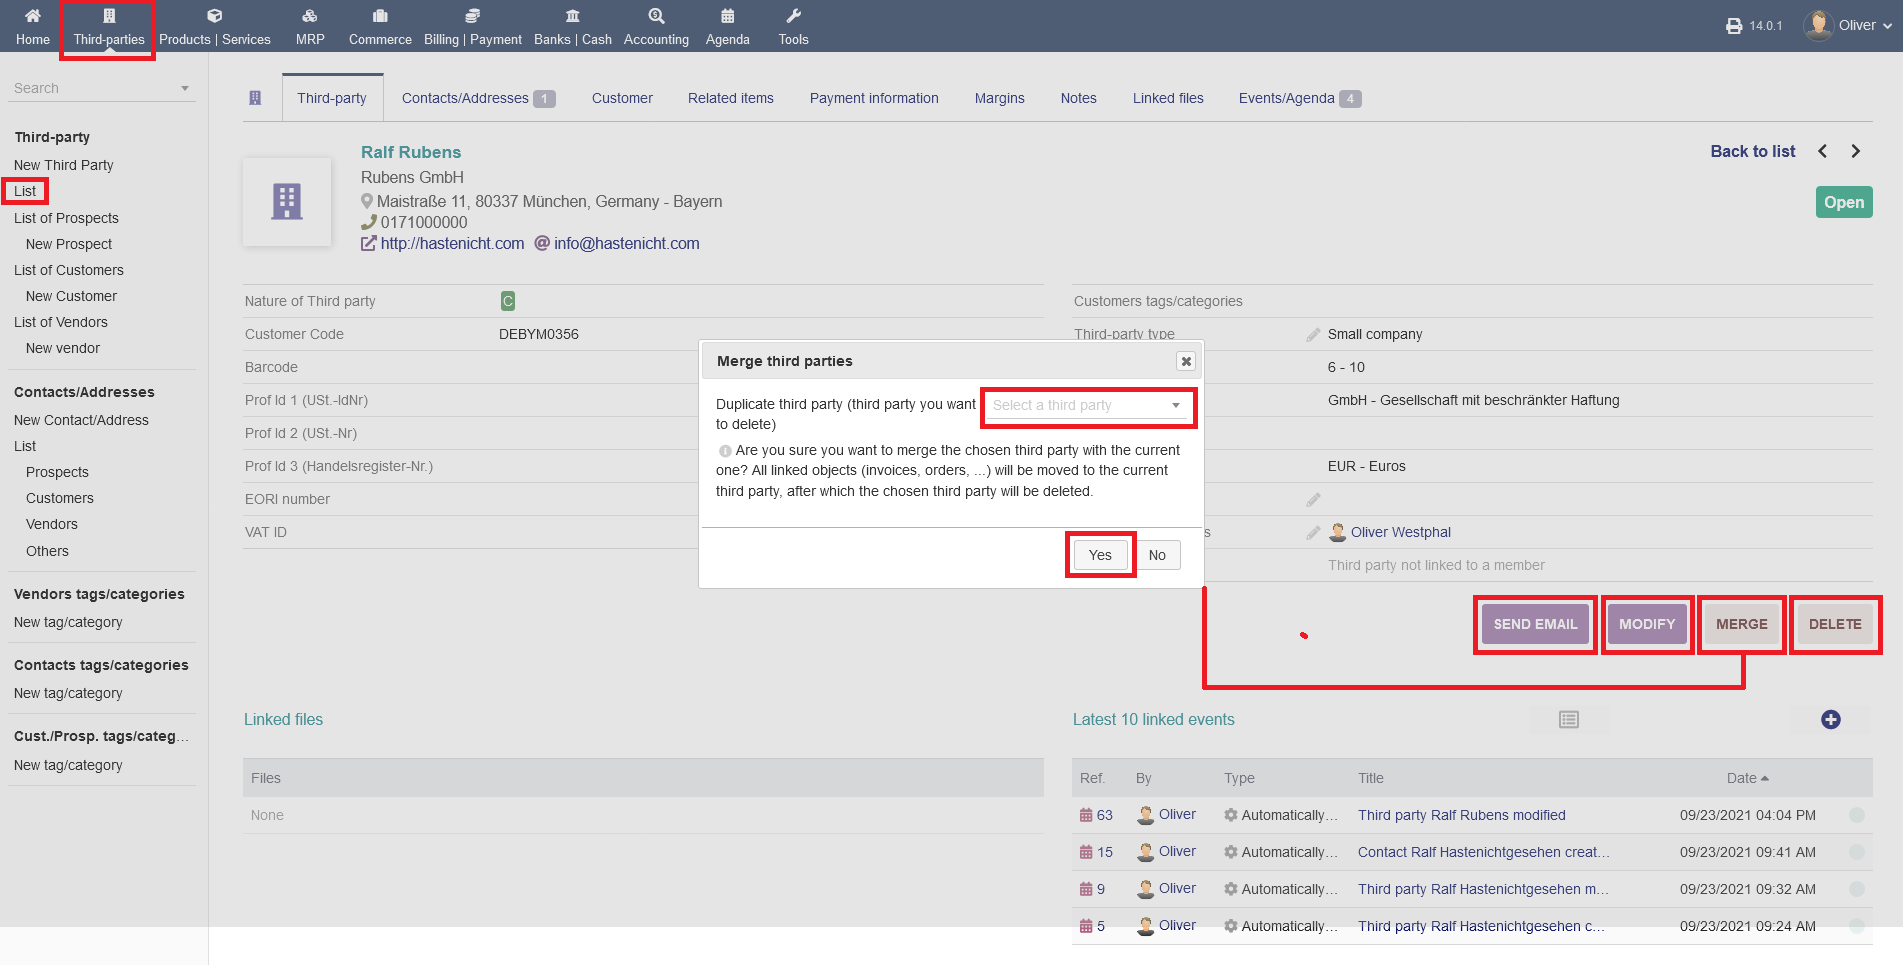
You will have the option to send an E-Mail to the third party contact by clicking on "SEND EMAIL". To edit the basic details of that entry, click on "MODIFY". It will present the same form as you already know from setting up a new third party. In case you have double entries/double third parties, you can merge them into one by clicking on "MERGE". Select a contact from the drop down menu "Select a third party" you whish to merge your contact with, in the overlaying mask. Finally, you can delete the third party all together by clicking on "DELETE".
Third-party Tab:
Further option to your third party contact can be found on the sub-menu bar starting with "Third-party". There you have an overview of your details to the specific third party, which you can edit also by clicking on the "pen" icons (see picture above).
Contacts/Addresses Tab :
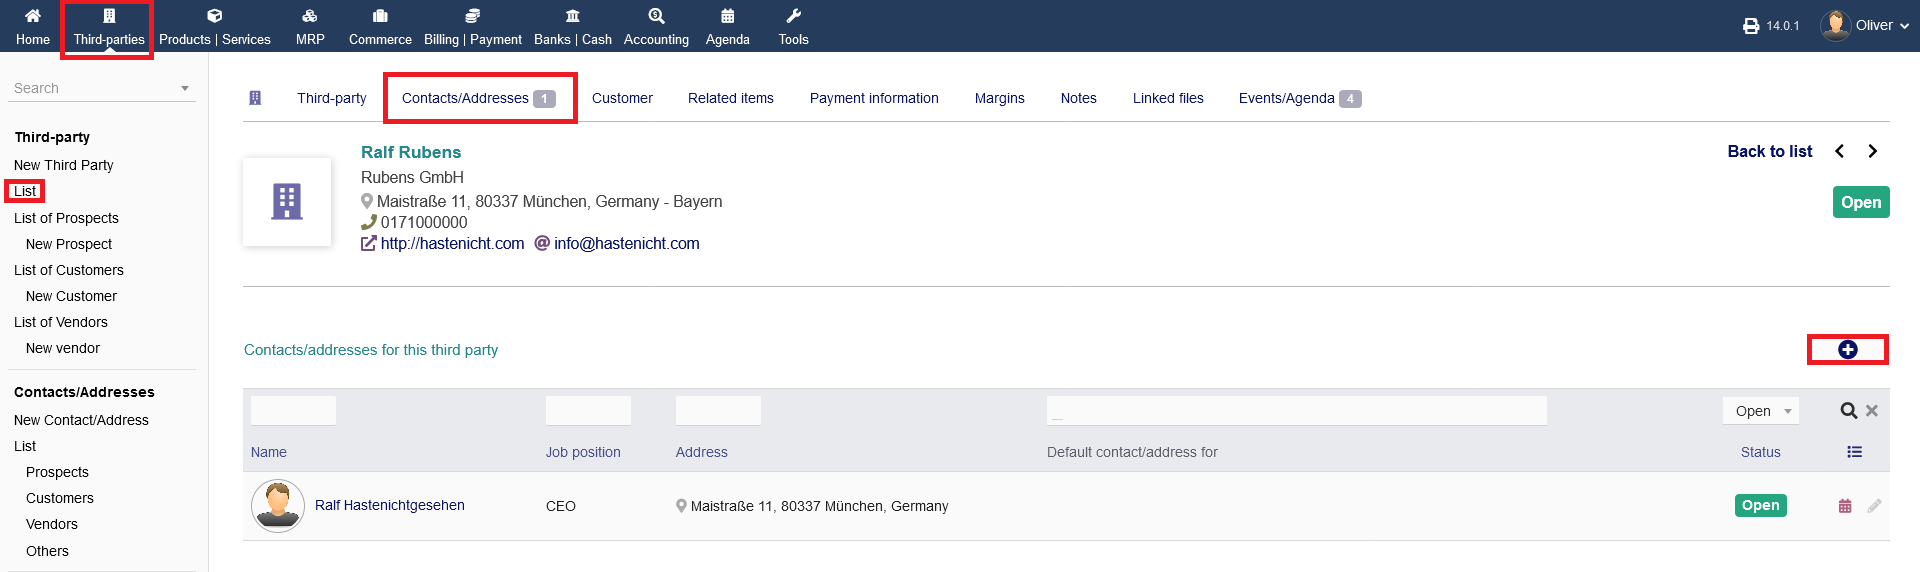
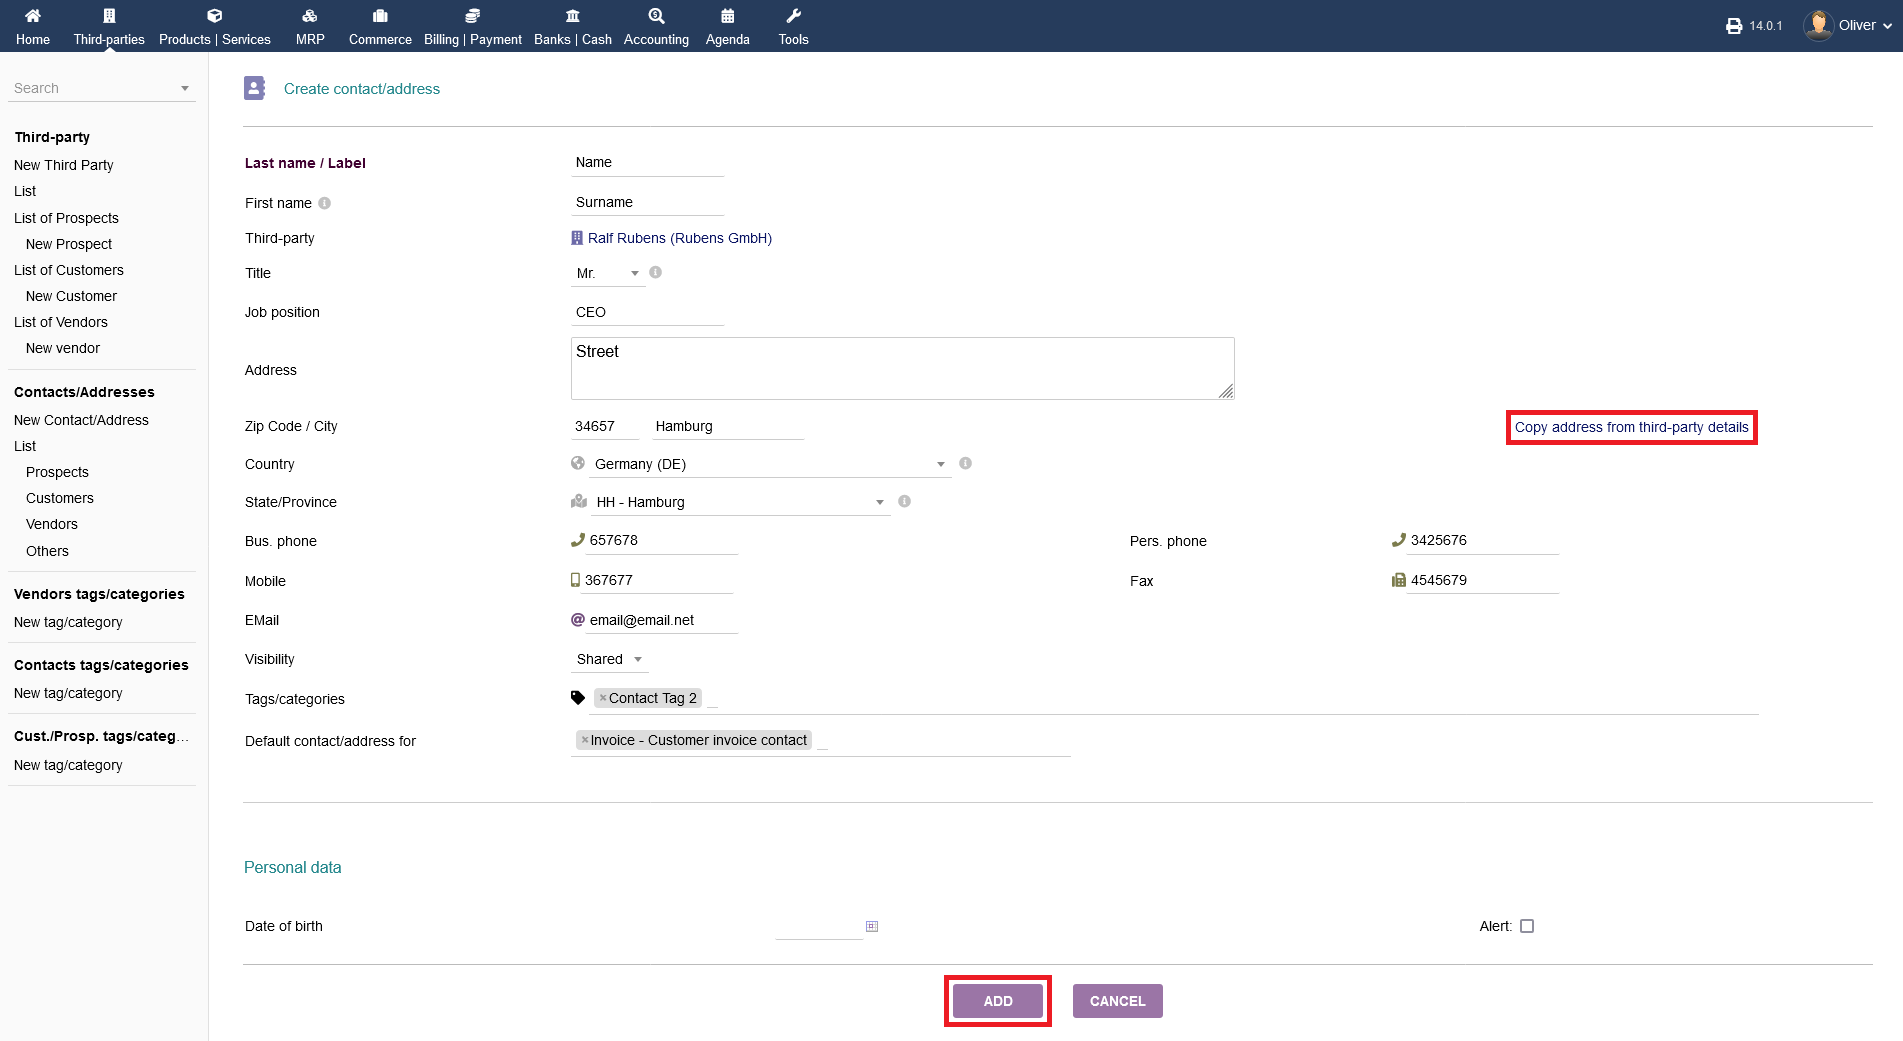
Under "Contacts/Addresses", you can save multiple contacts and addresses to your third party entry. This is helpful, if your third party (e.g. a vendor) has separate addresses for headquarters and warehouses. Click on the "plus" icon to get to the form to fill out for a new contact/address. You can copy over any existing addresses by clicking "Copy address from third-party details". To finish the process of adding a new contact/address, click "ADD".
Prospect/Customer/Vendor :
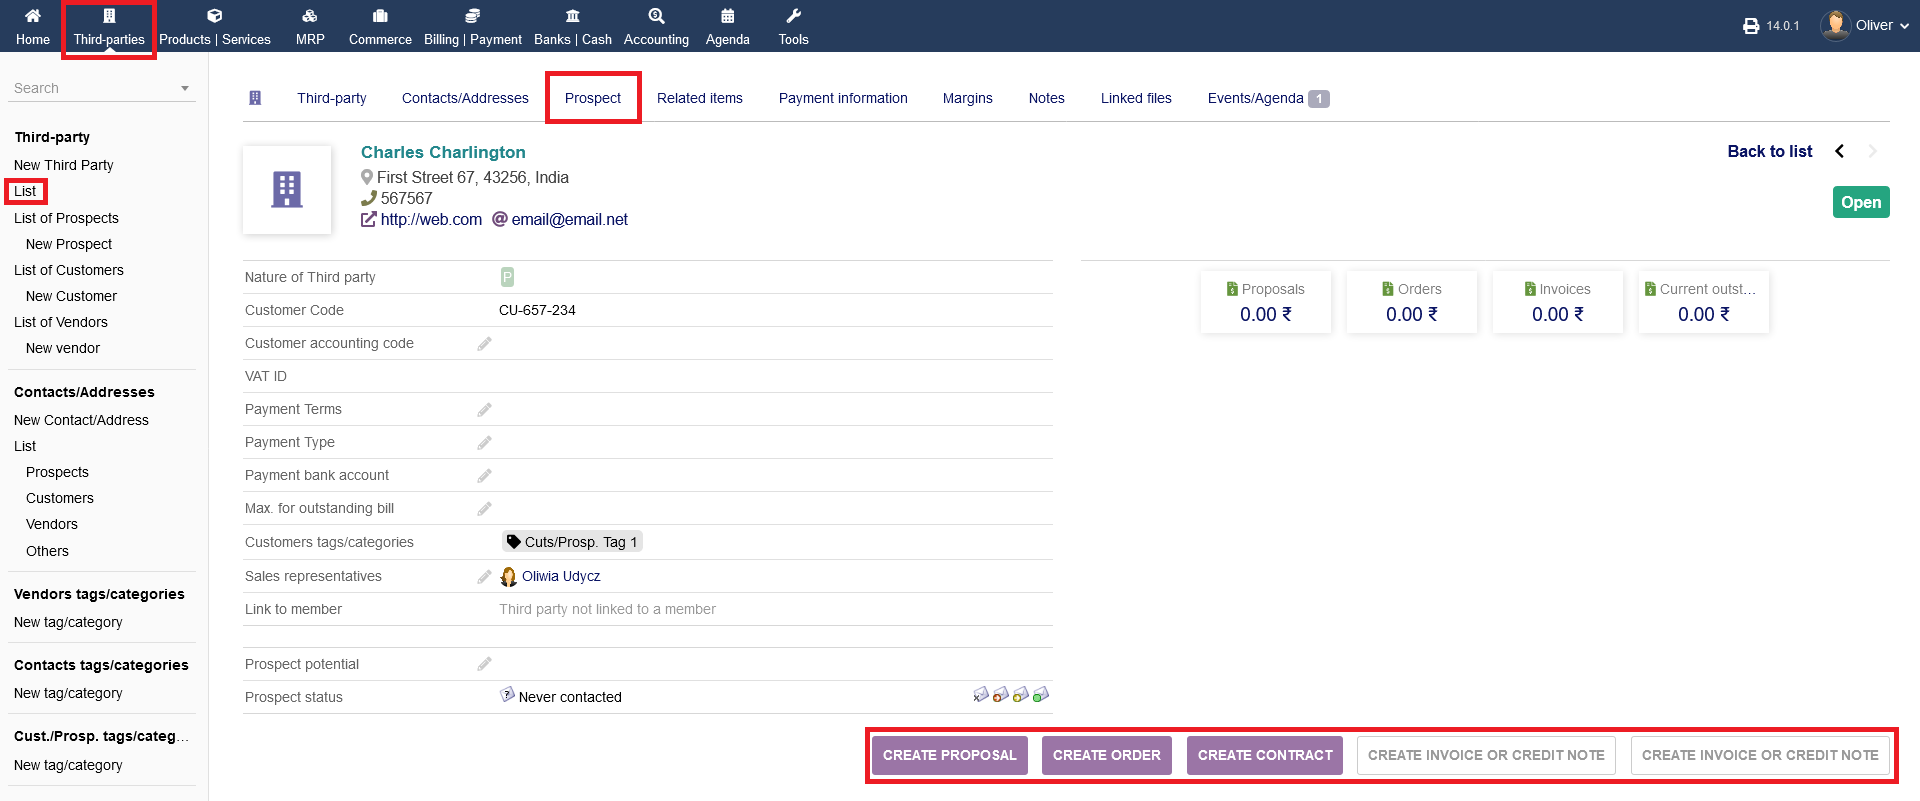
The third tab can say "Customer", "Vendor" or "Prospect" regarding that category your third party is, which you want to edit. Here you can add additional information like payment type, payment terms etc.
For prospects, you can "CREATE PROPOSAL", "CREATE ORDER", "CREATE CONTACT" and "CREATE INVOICE OR CREDIT NOTE". For your desired option, click the respective button.
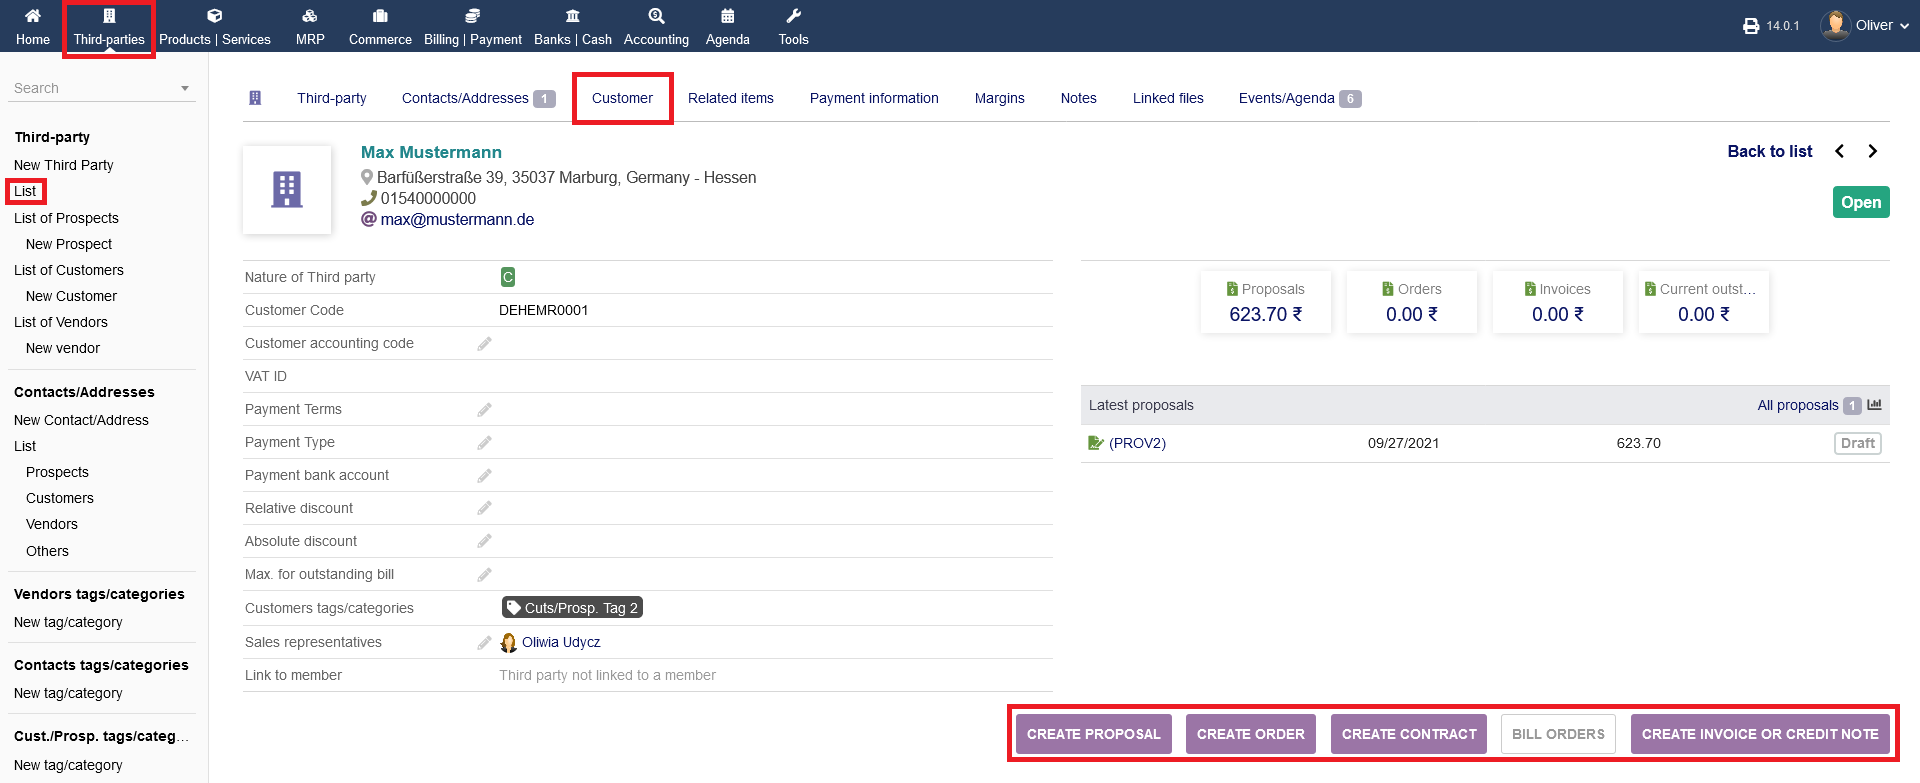
If you have a customer you have the following options: "CREATE PROPOSAL", "CREATE ORDER", "CREATE CONTRACT, "BILL ORDERS" and "CREATE INVOICE OR CREDIT NOTE". Click the respective button of the option you want to proceed with.
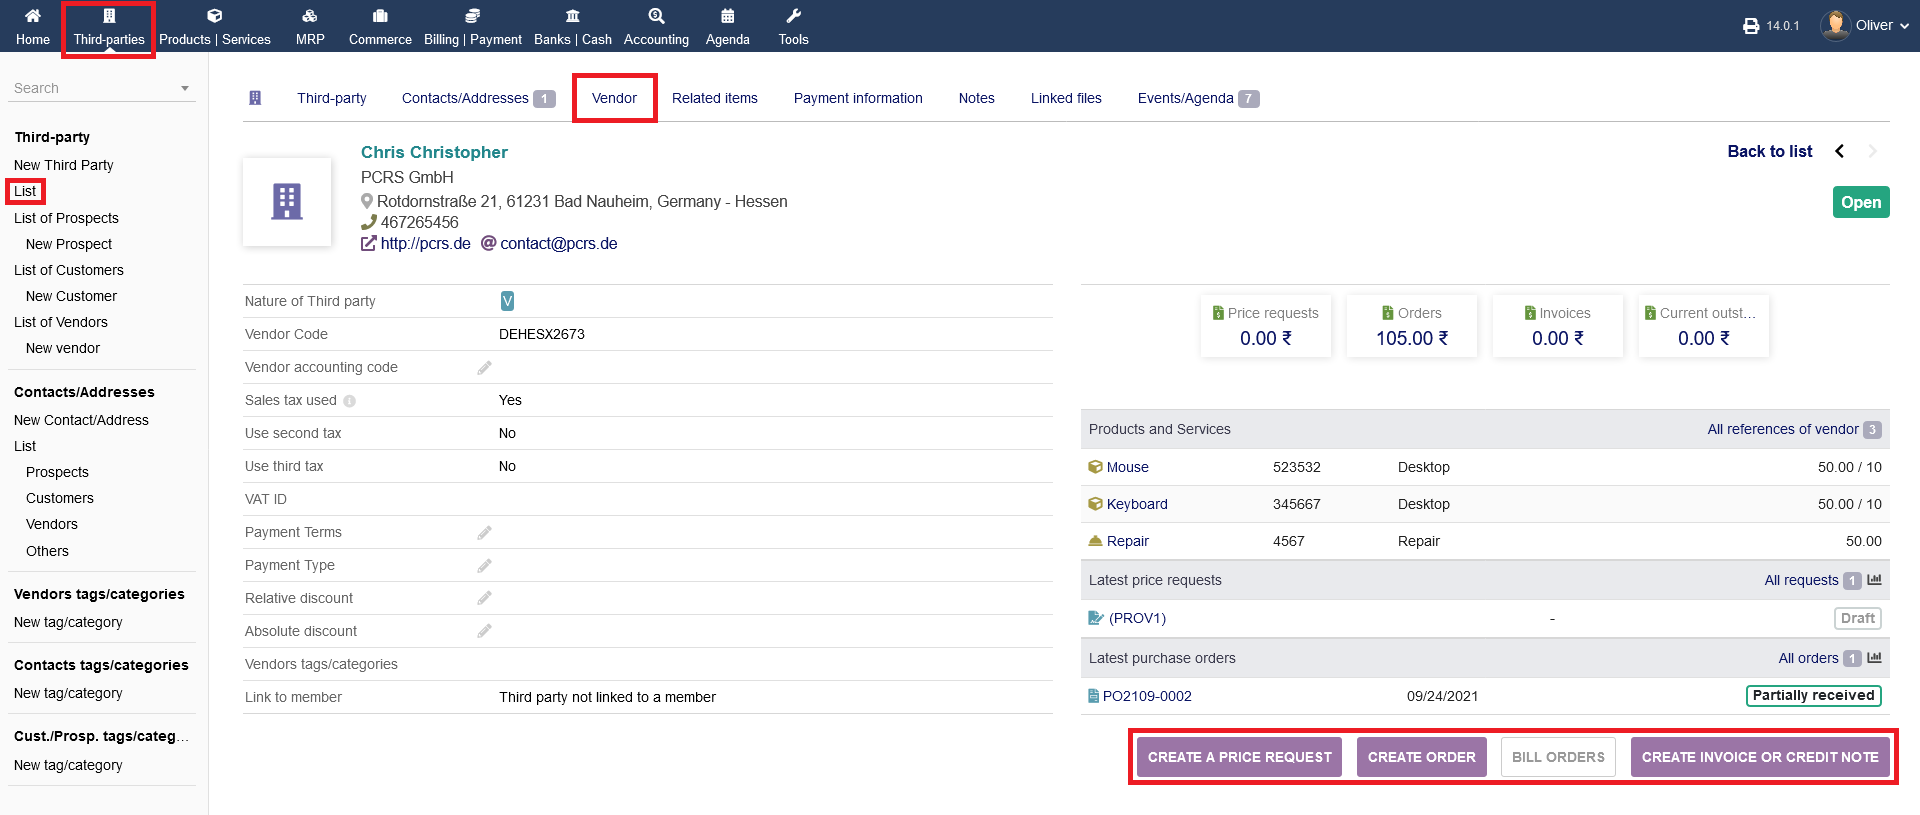
In case you have a vendor, you can "CREATE A PRICE REQUEST", "CREATE AN ORDER", "BILL ORDERS" or "CREATE AN INVOICE OR CREDIT NOTE " by clicking the respective buttons.
NOTE: For how to create proposals, orders, contact price requests and invoices, please refer to the respective documentation.
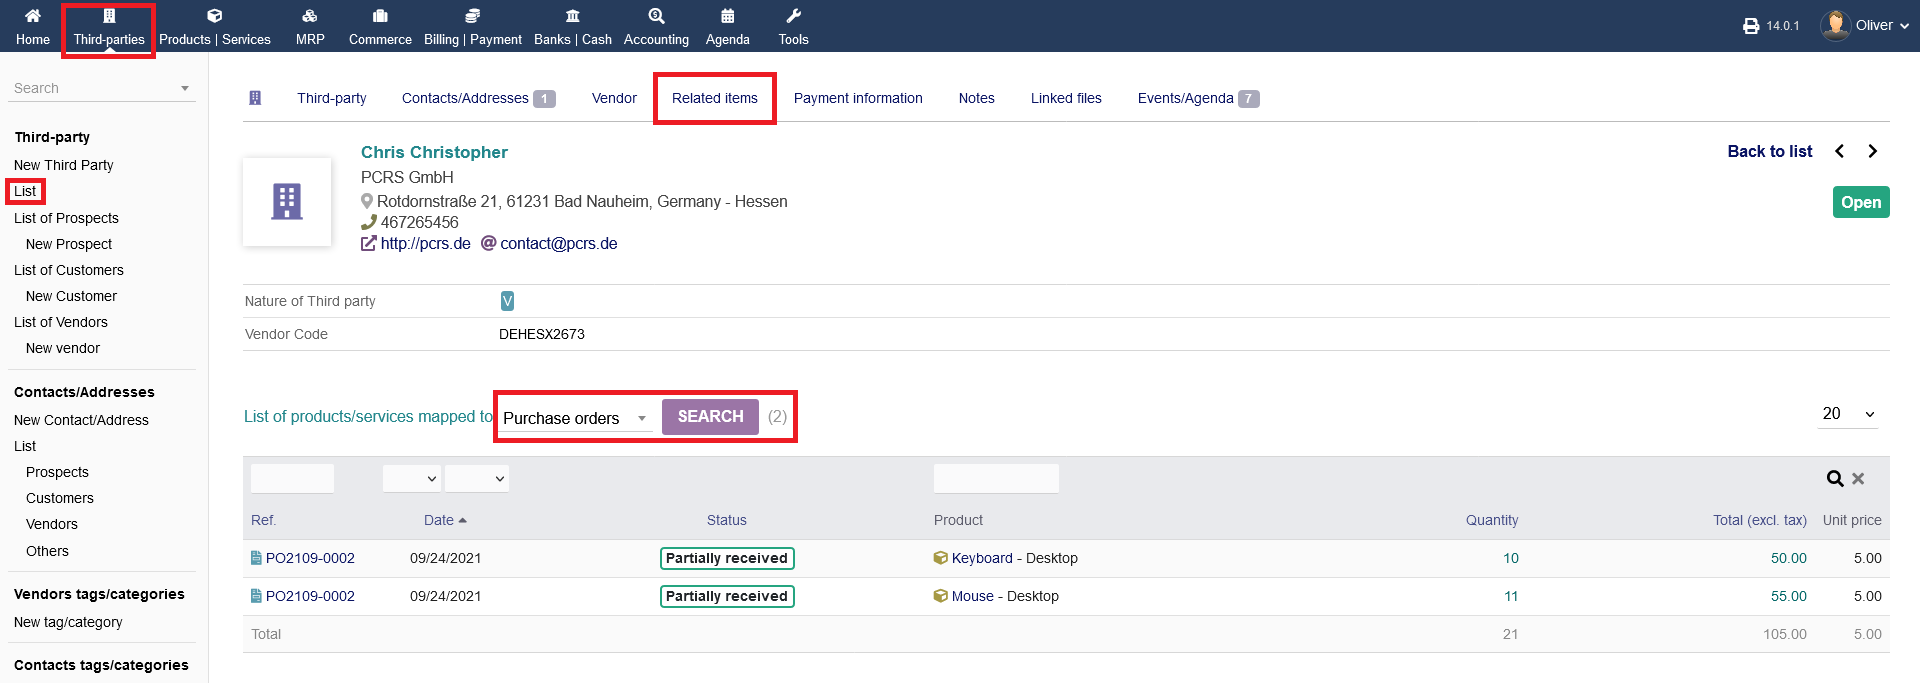
Related items
The menu tab "Related items" shows any events that are connected with that specific third party. You can list different parameters by clicking the drop down menu, selecting the parameter you want to have more information about and click "SEARCH" to finish the process.
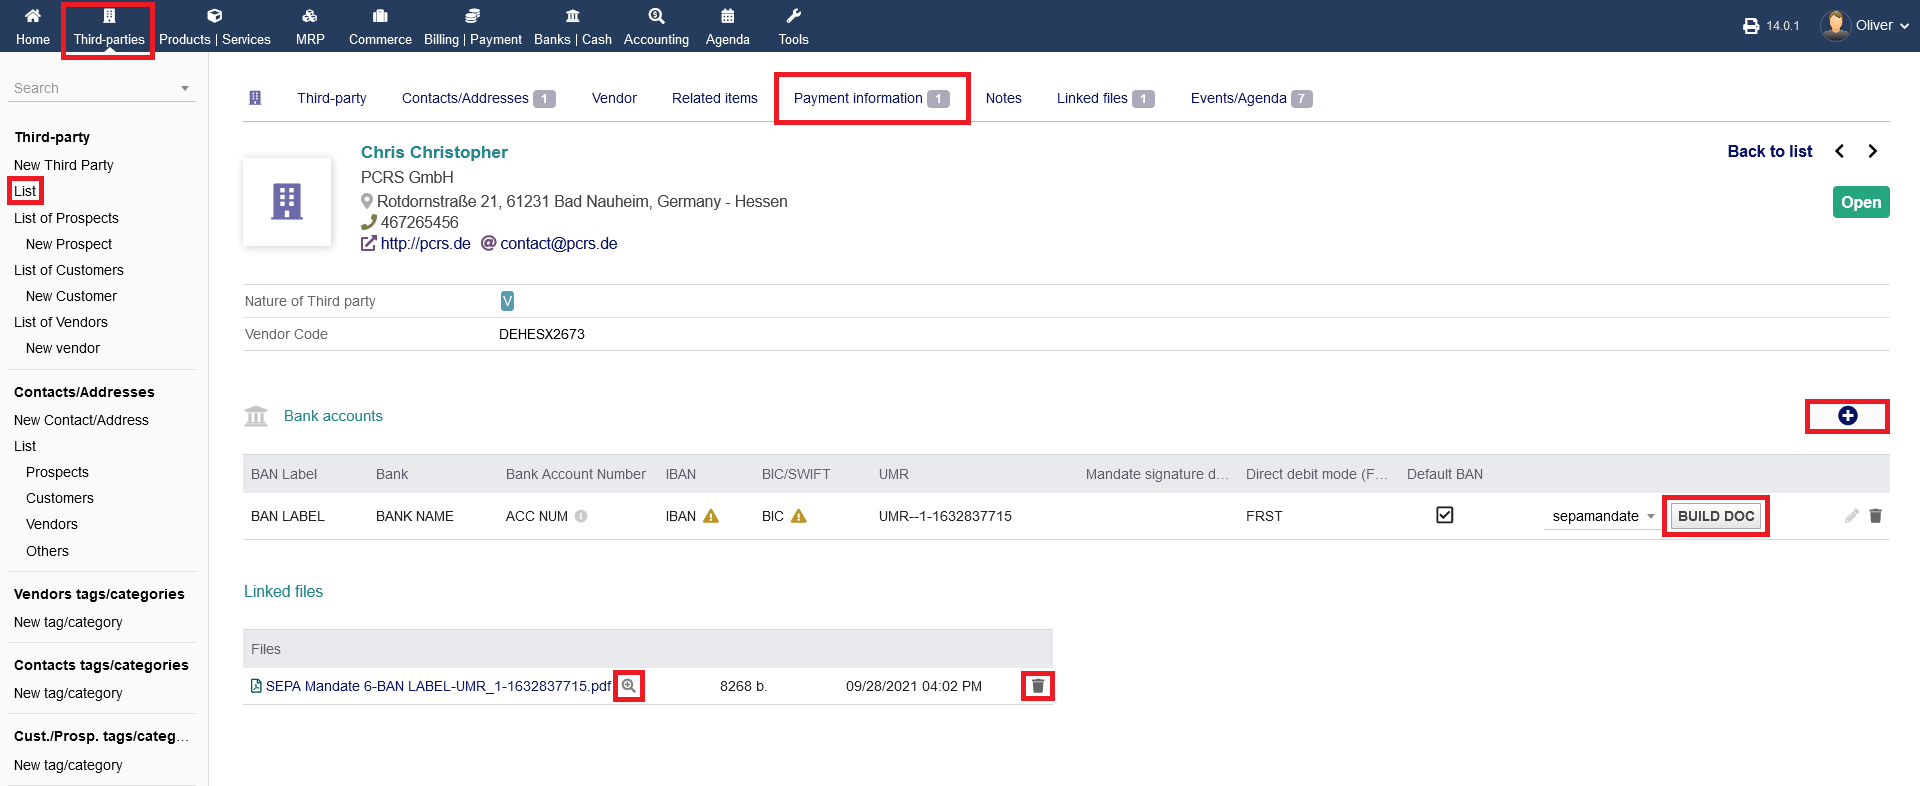
Payment information
Additional payment information can be seen or edited under "Payment information". Any bank accounts will be listed there. To add a new bank account, click the "plus" icon, fill out the form and click "ADD". You can build a document for a SEPA-mandate, that the (in the shown case) vendor has to sign. Click "BUILD DOC", to create the PDF document. Any built SEPA documents are shown below. You can preview the PDF document, edit or delete it.
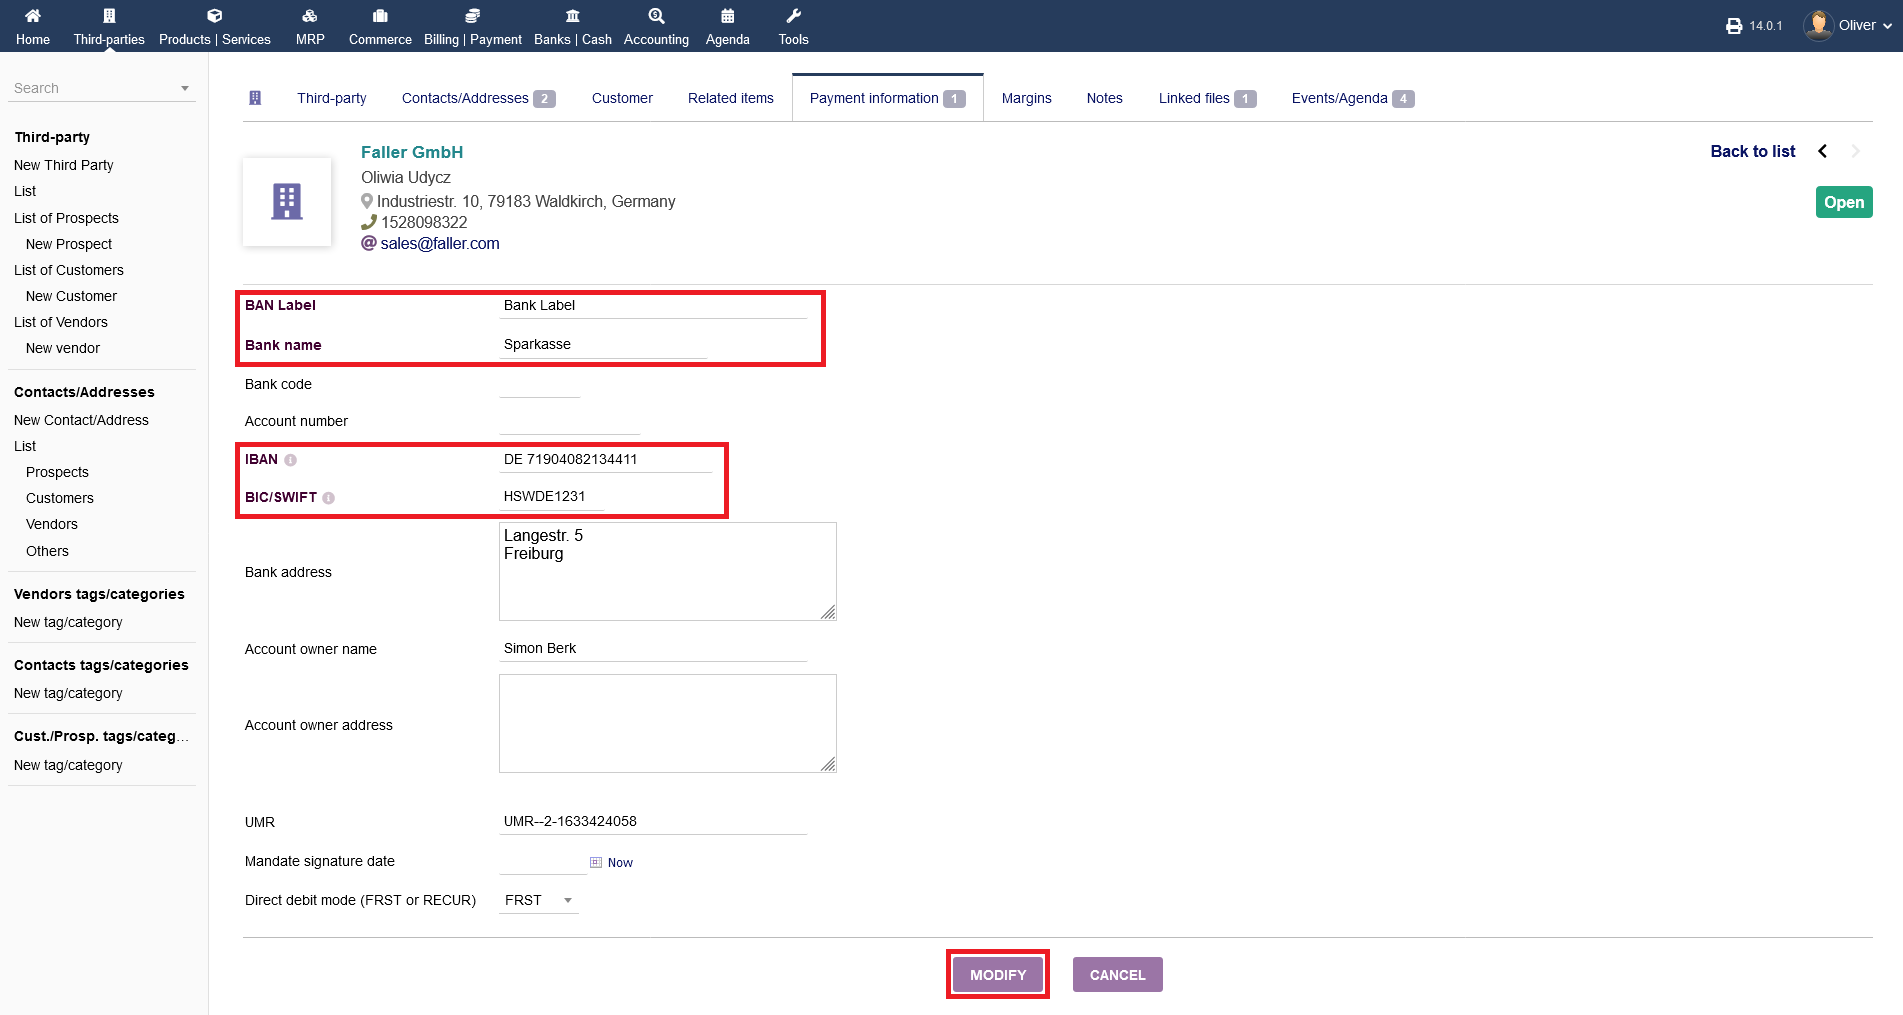
Please fill in the necessary details, so all information can be pulled by other modules reliably. Pay special attention to Bank name/label and IBAN/BIC/SWIFT.
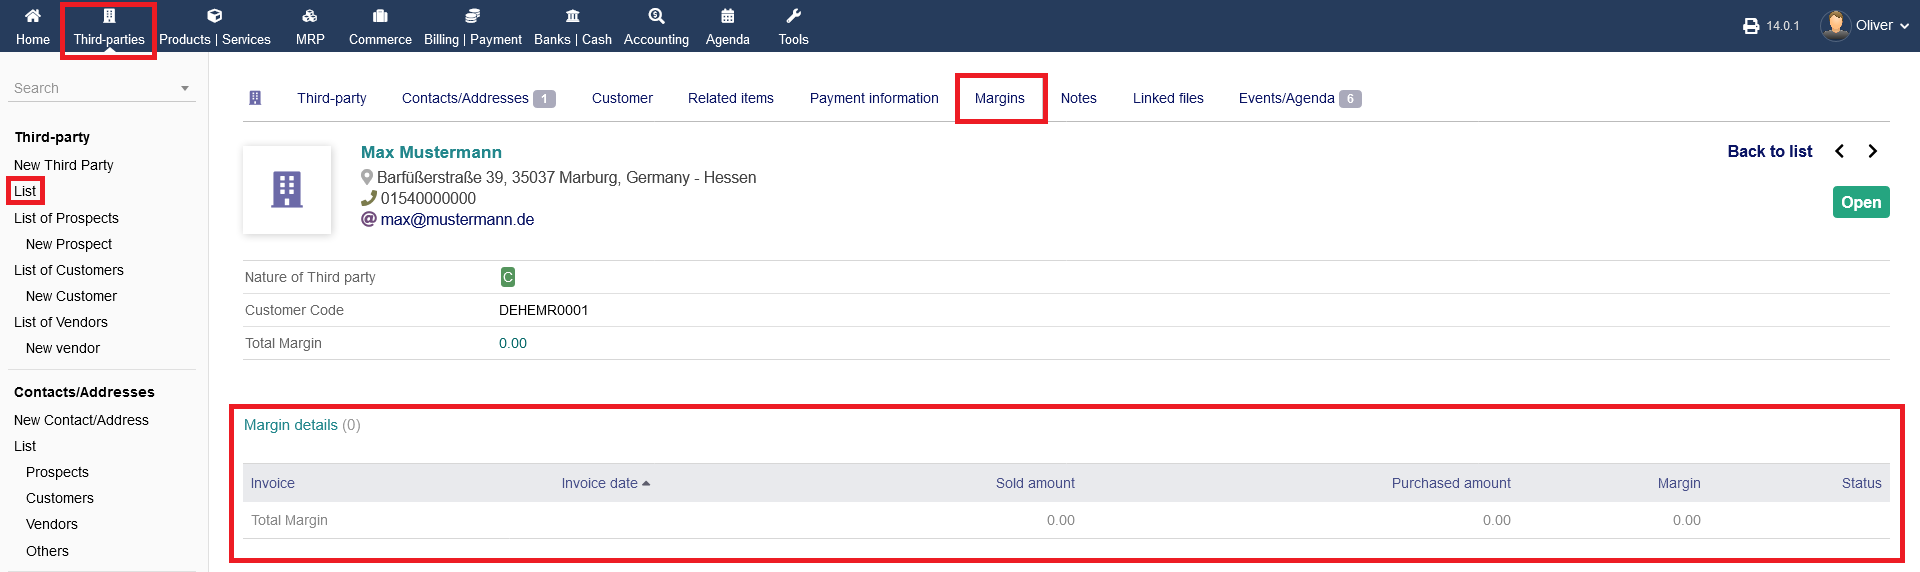
Margins
Under "Margins" you see all margin details you had resulting out of your business relations with that specific third party. Note, that the margins option is present only with customers.
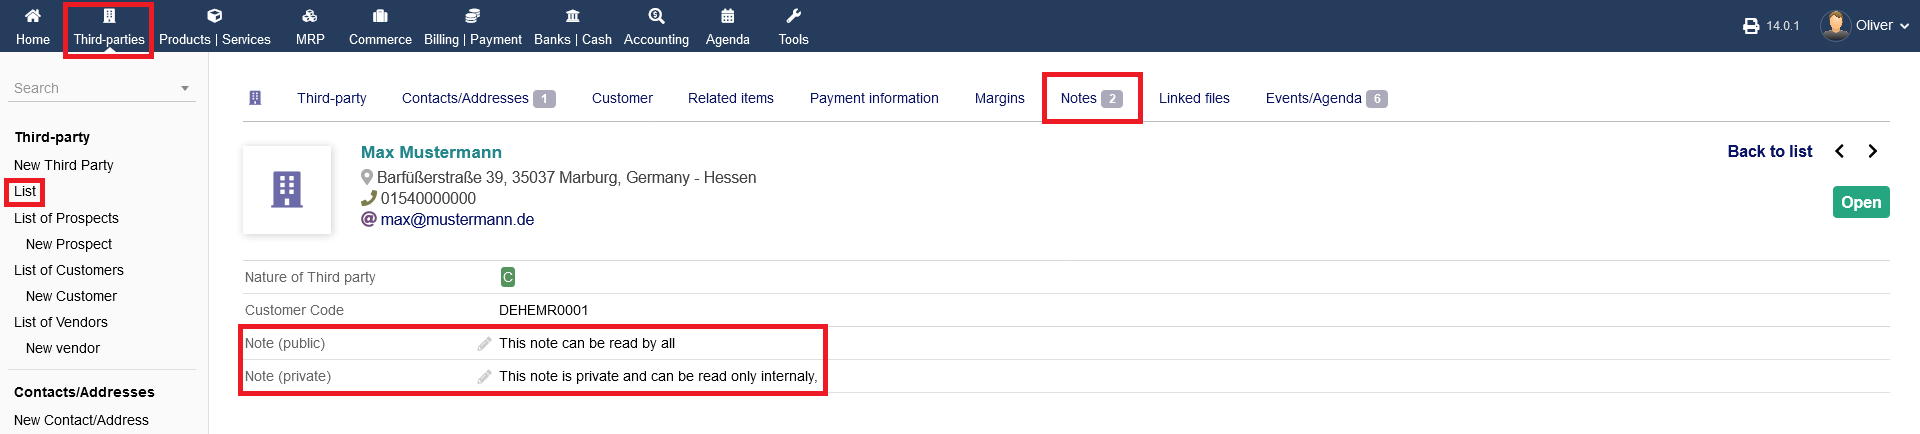
Notes
The tab "Notes" is showing any public and private notes you can give that third party. Click on the "pen" icon to edit.
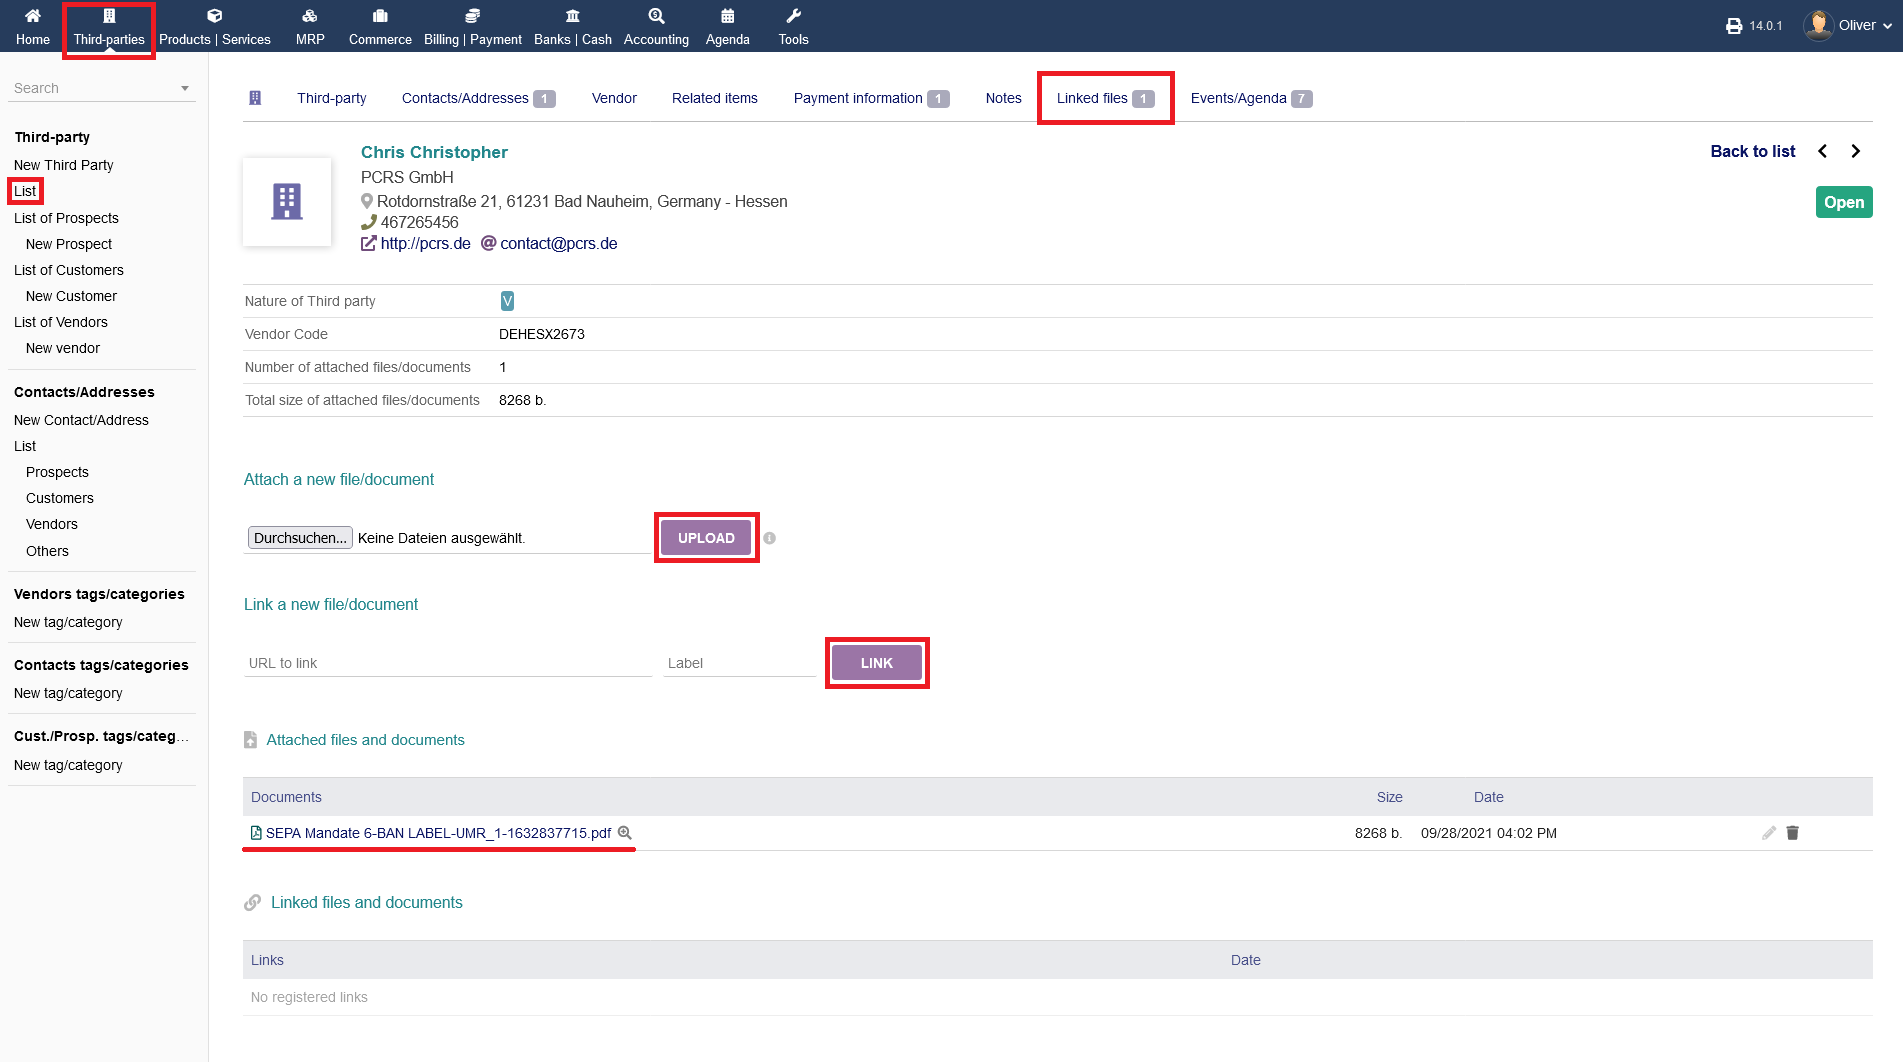
Linked Files
Any linked files or files you want to upload to link with that third party you can see or manage under "Linked files". You can upload files from your PC and click "UPLOAD". Alternatively, you can link a file via URL too. Click "LINK" to finish the process. All documents and links will be shown in listings below.
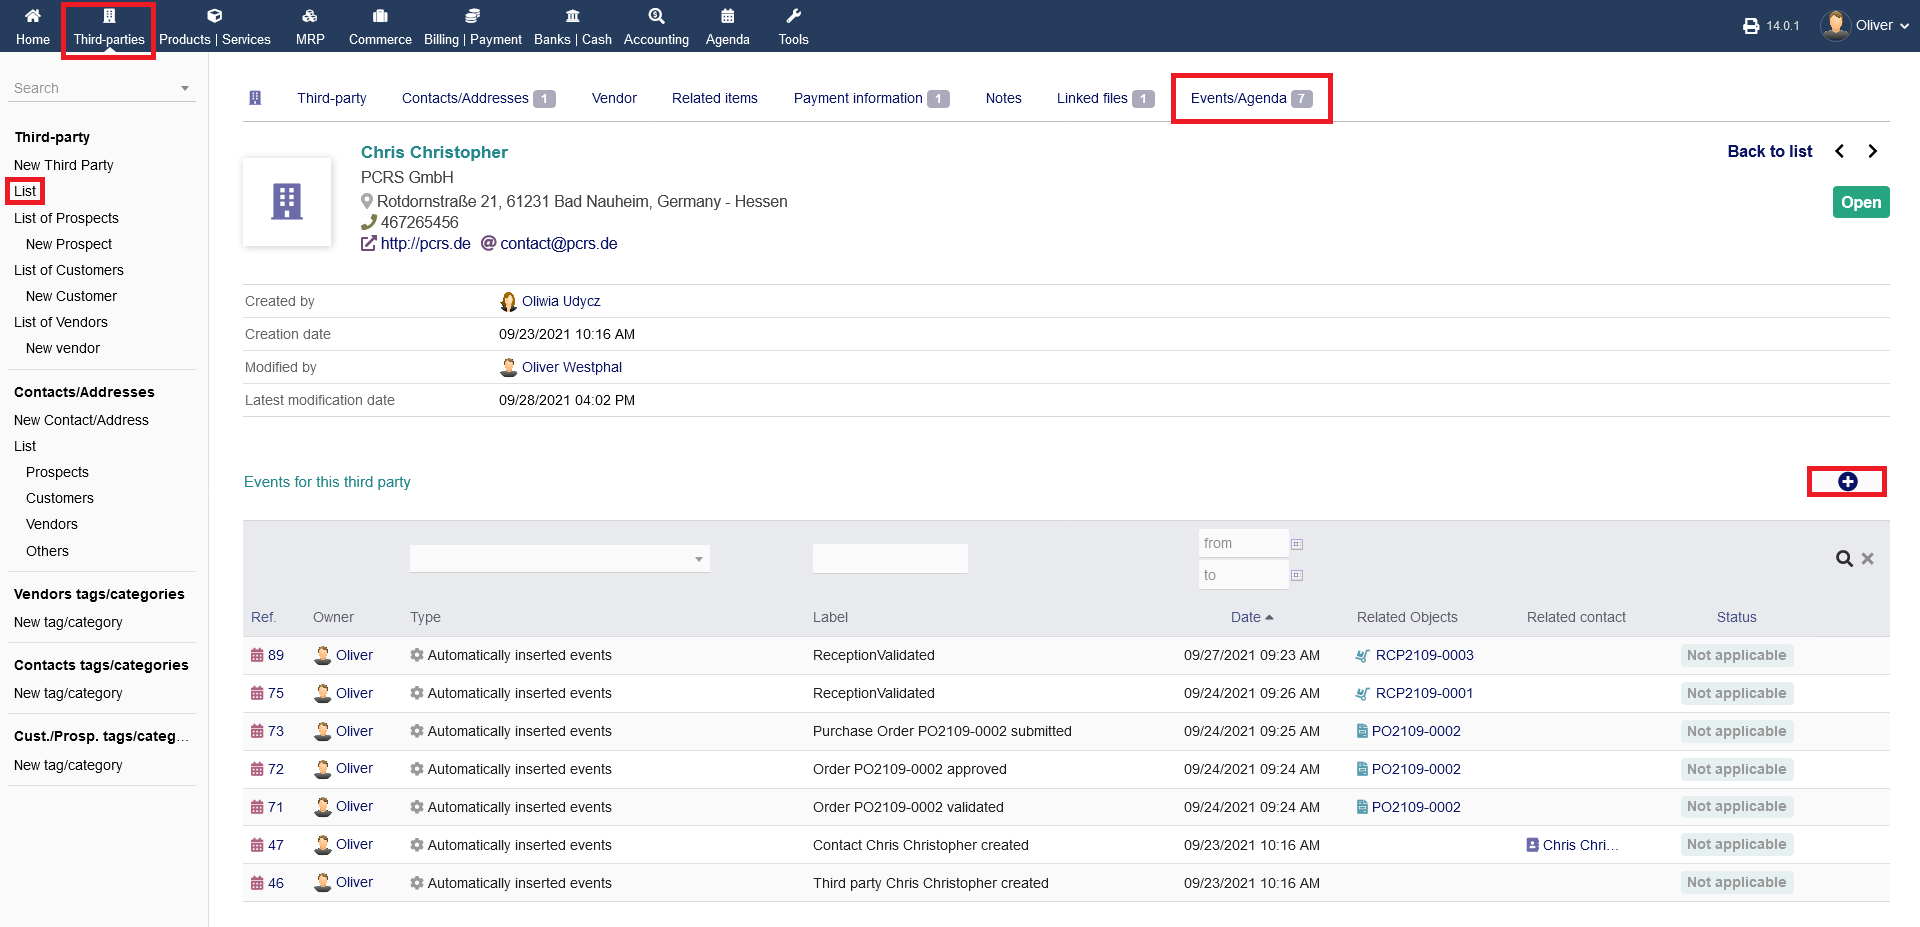
Events/Agenda
Any events/agendas that happened in relation to that third party will be documented under "Events/Agenda". You can add a new event by clicking the "plus" icon, filling out the form with all necessary details and click "ADD" to finish.